Sandbox Seeding
- Do you struggle with old, stale data and wish your developers could develop and test against the latest production data?
- Is your company behind on your Salesforce sandbox refresh cycle?
- Does your team struggle to follow a Salesforce DevOps process?
- Do your developers all work out of the same sandbox and step on each other's toes while trying to build, test, and ship their code?
- Do you need to anonymize data in lower sandboxes for training in compliance with privacy laws?
Who is seeding for?
GRAX Sandbox Seeding is built for Salesforce developers and the Salesforce administrators who support them. Seeding helps make your job easier to develop, iterate, test, retest, and ship your new feature or product improvement so you can get to market faster with higher quality results.
Where to use GRAX Sandbox Seeding
GRAX Sandbox Seeding works with all Salesforce org types but immensely improves the experience with Developer and Developer Pro sandboxes, where Salesforce doesn't provide the tooling to propagate data as part of a template-driven refresh.
How to access GRAX Sandbox Seeding
Sandbox Seeding is integrated in three places within the GRAX Application.
-
Seeding Menu Page
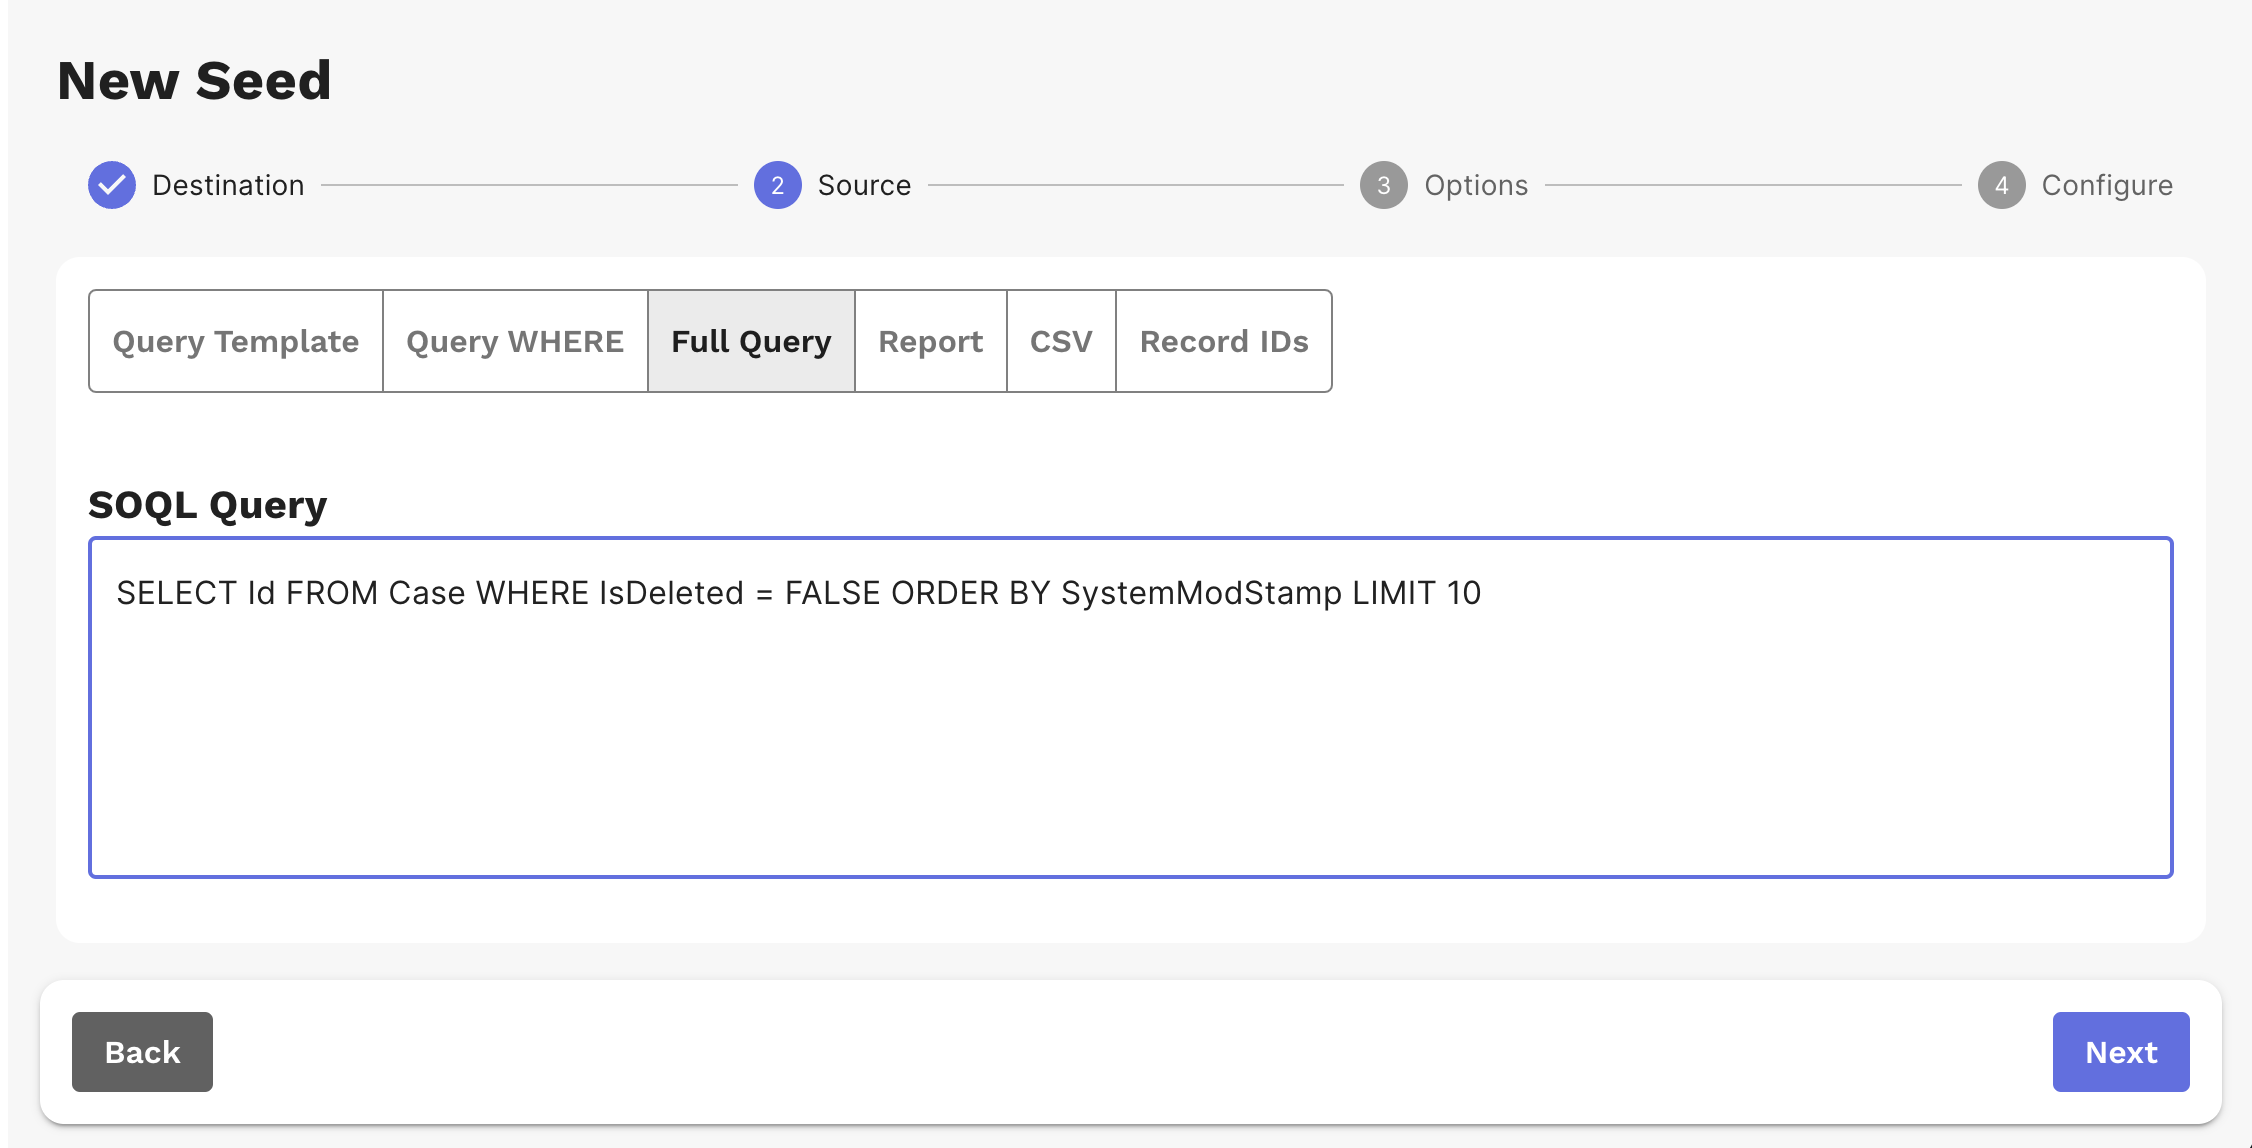
Click on Sandbox Seeding in the menu and you will see the button New Sandbox Seeding. This takes you into the Seeding workflow where we mirror our source selection user interface from Archive and provide users with the ability to select records with the familiar choices of Salesforce Report, SOQL Query, CSV, or list of record IDs.
-
Seeding from Global Search
A second entry point for Sandbox Seeding is Global Search. When you click on Global Search in the menu, you will see a table of previously run search jobs. You can create a New Global Search or use a previously run search to select data as the source. Use the checkboxes to select a subset of records or all records and then click the ‘Seed Records’ button to begin the Seeding workflow.
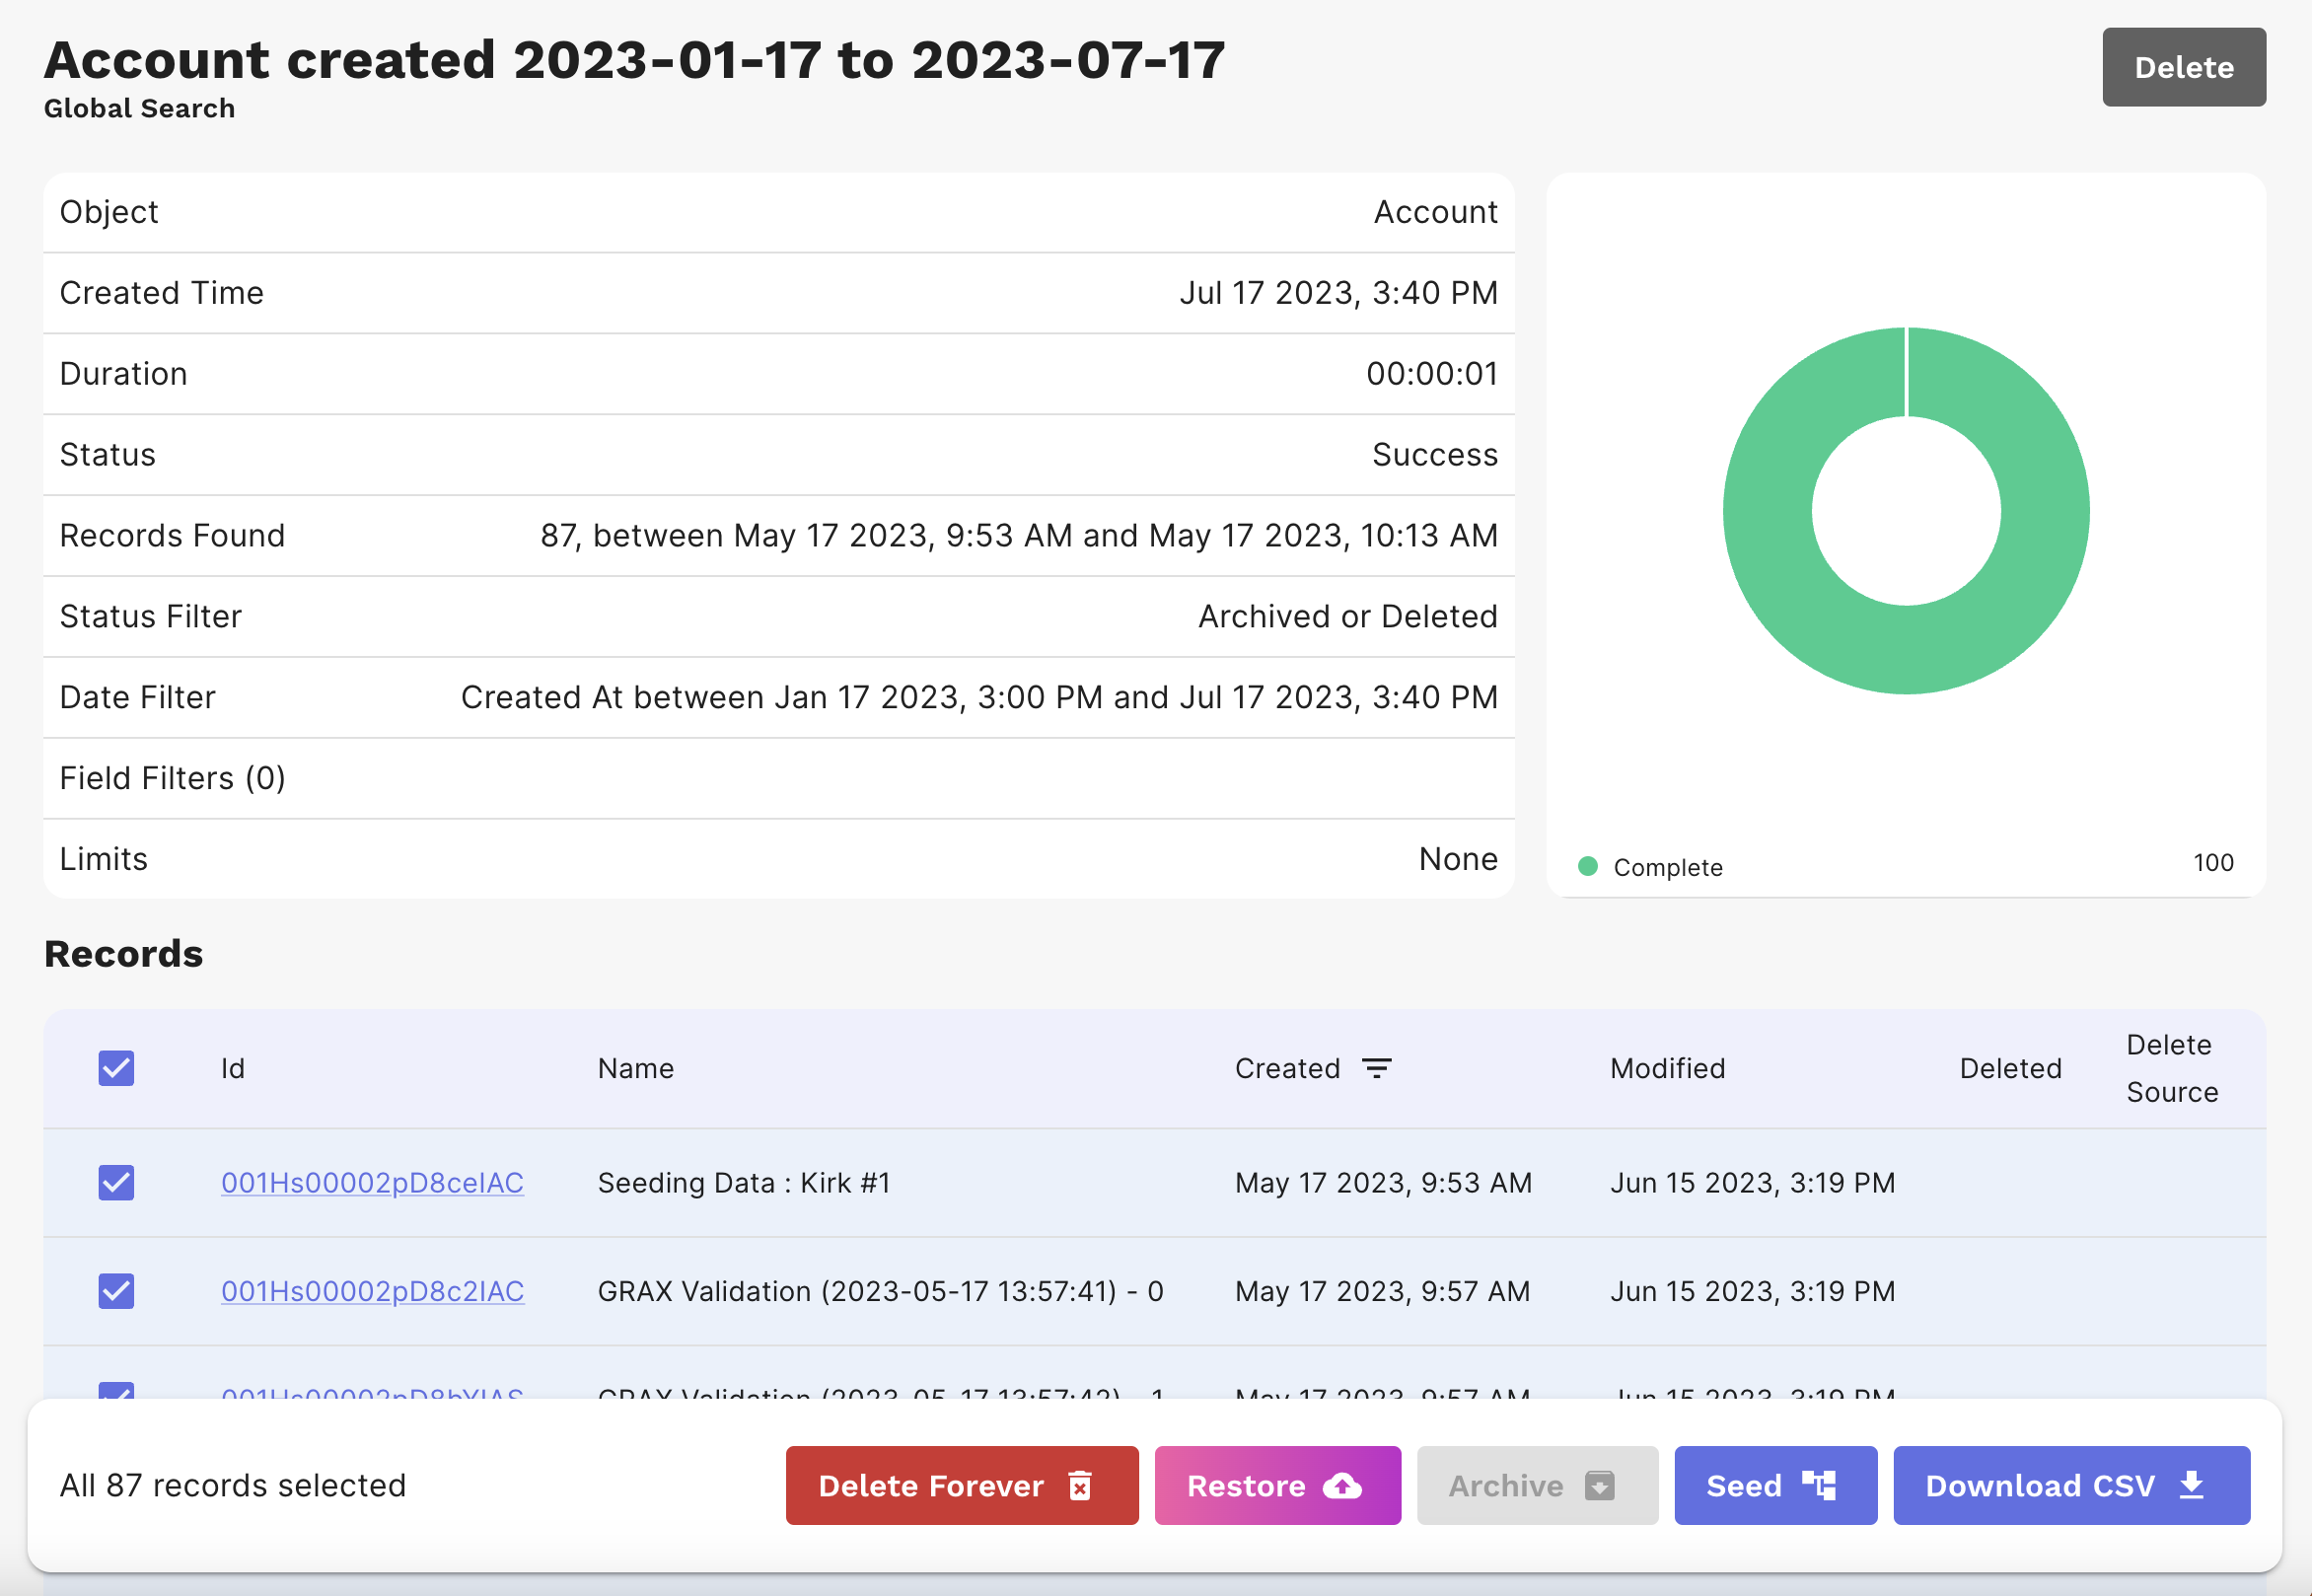
You have the option to tune the size of the graph by using the Maximum Child Level drop down. You also have the options to include archive and deleted records and to be notified by email on this seeding job. Click the save (disk) icon to make your chosen settings the default.

-
Record Details
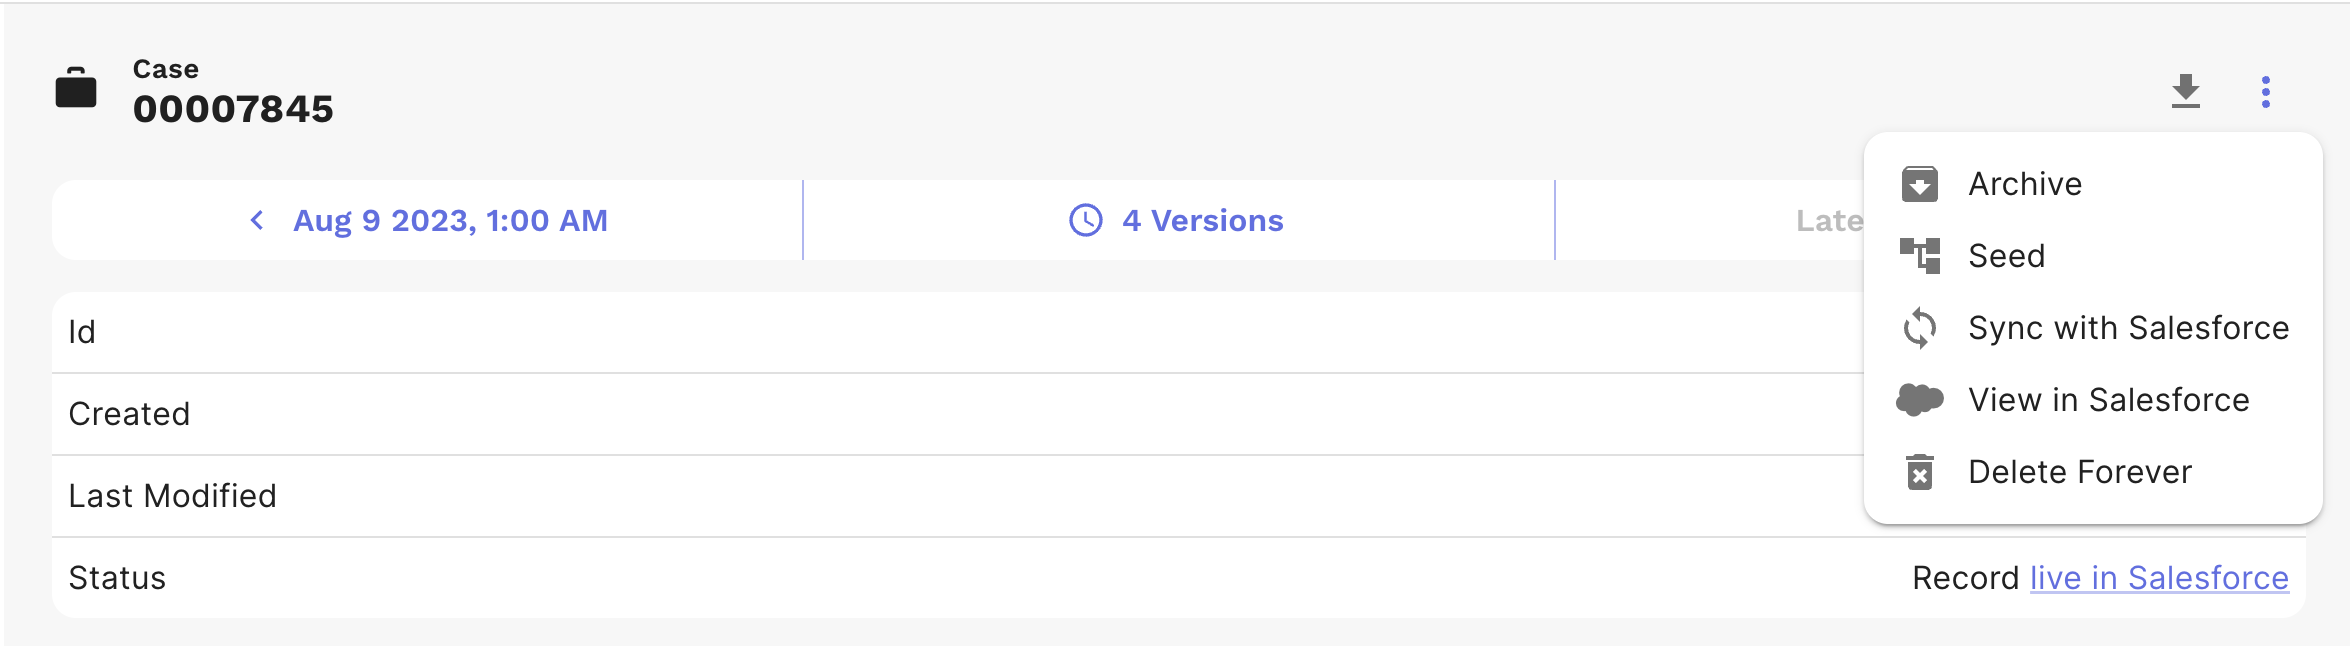
A third method of selecting records for Seeding can be accessed through record details. Either click on any record link or enter the ID in the Lookup By ID box in the header to arrive at the record details view. Clicking on the vertical ellipsis in the header gives you the option to seed. A modal pops up asking you to enter your credentials and presents a similar workflow as the other Seeding source selection methods.
How to get started
- Create / refresh an empty Developer sandbox off your production Salesforce org
- Choose one record to seed (it's best to start small and see how things work in your org)
- Follow the workflow to seed
- Undo the seed
Once you are successful with the above steps, you are ready to move on to bigger and more realistic data sets. Remember, Salesforce data is complex, so it's best to start small.
Sandbox Seeding Workflow
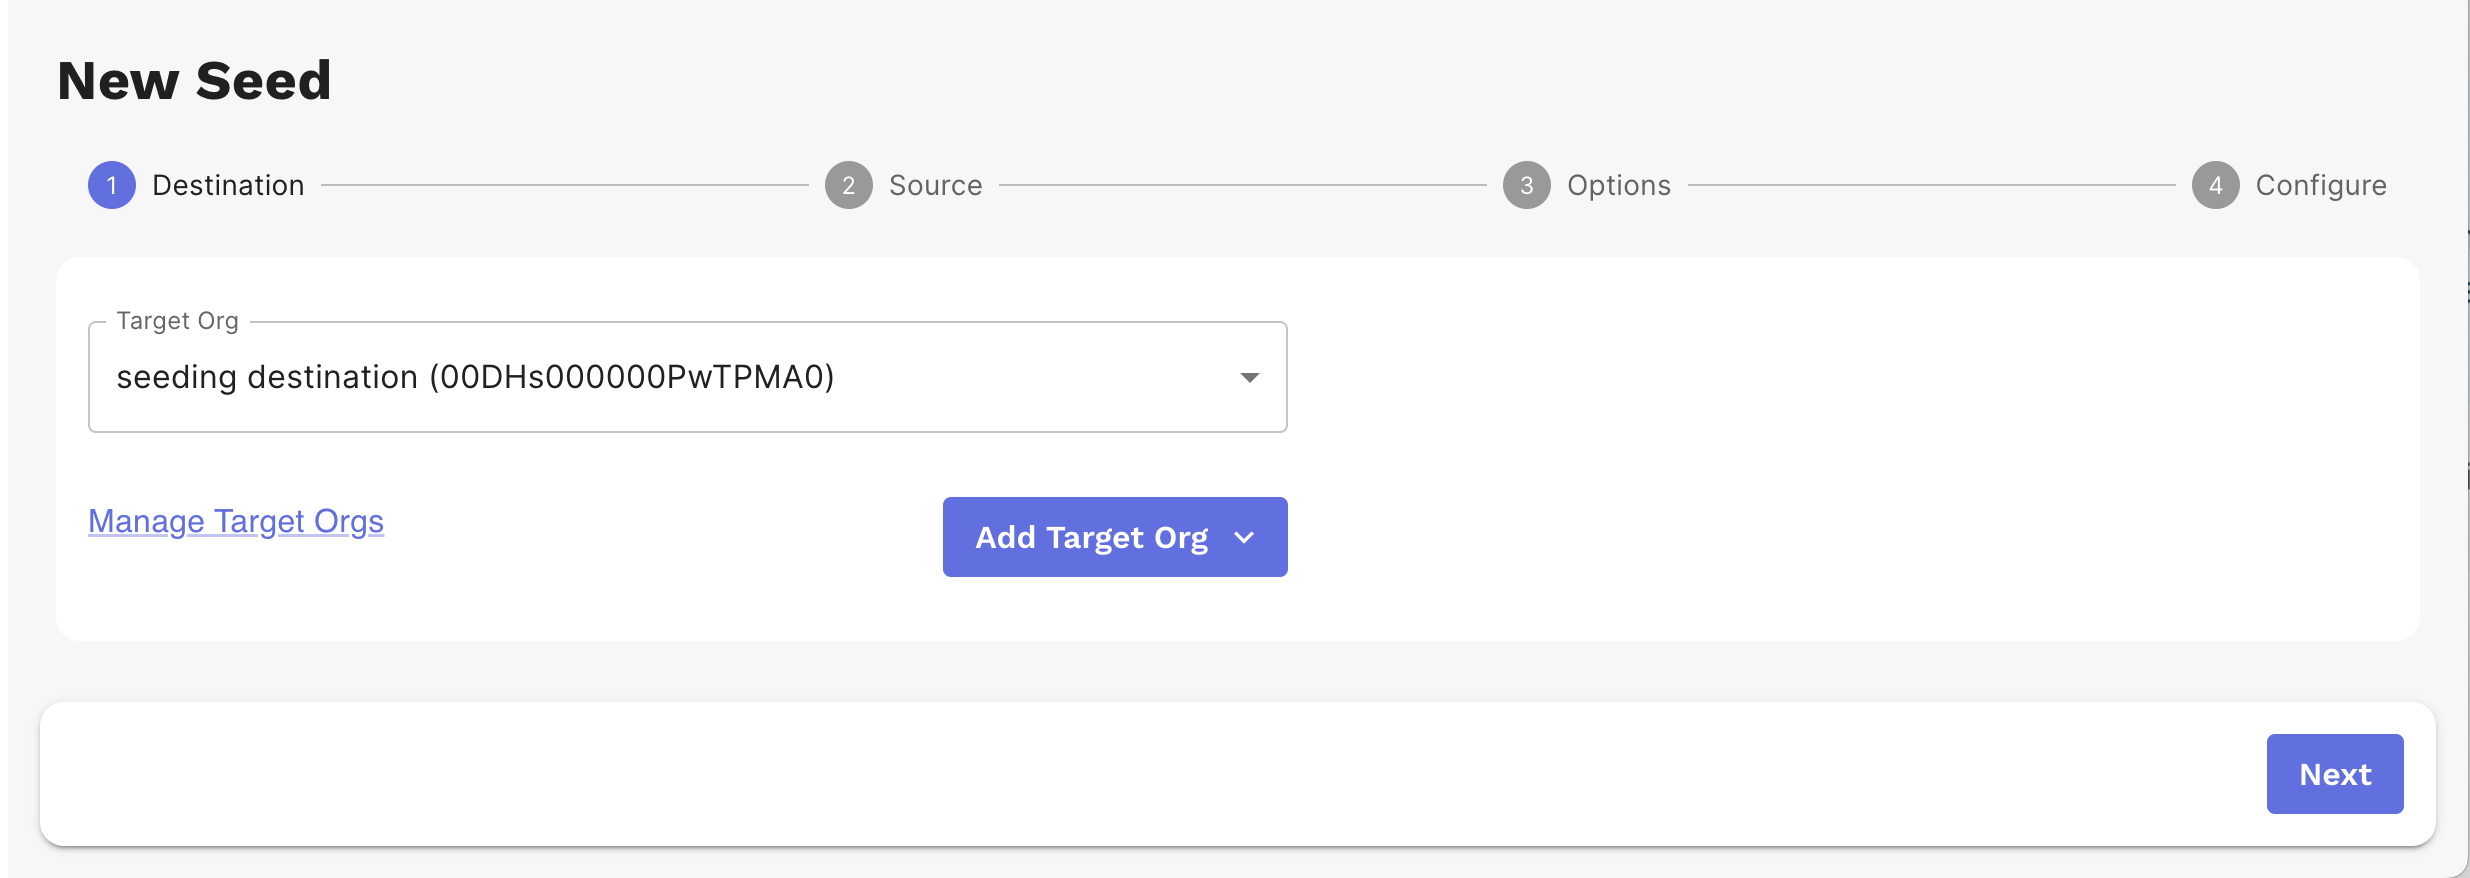
GRAX Sandbox Seeding provides a workflow to guide you through the steps to seed data from a source to a destination org.
-
First, select the seeding destination. If you have seeded to this org previously, the seeding destination will be listed in the drop down. If this is your first time seeding to this org, click Add Target Org. Clicking this button pops up a modal asking for your target Org Type and the Salesforce login information for that org (either OAuth or username, password, and security token).
-
Select the Seeding source.
-
Choose seeding options. We provide several settings:
- You can tune the size of the seeding dataset through the Maximum Child Level feature.
- The option to include deleted and archived records
- You can disable automated processes including triggers and field validation
- You can anonymize the seeding data.
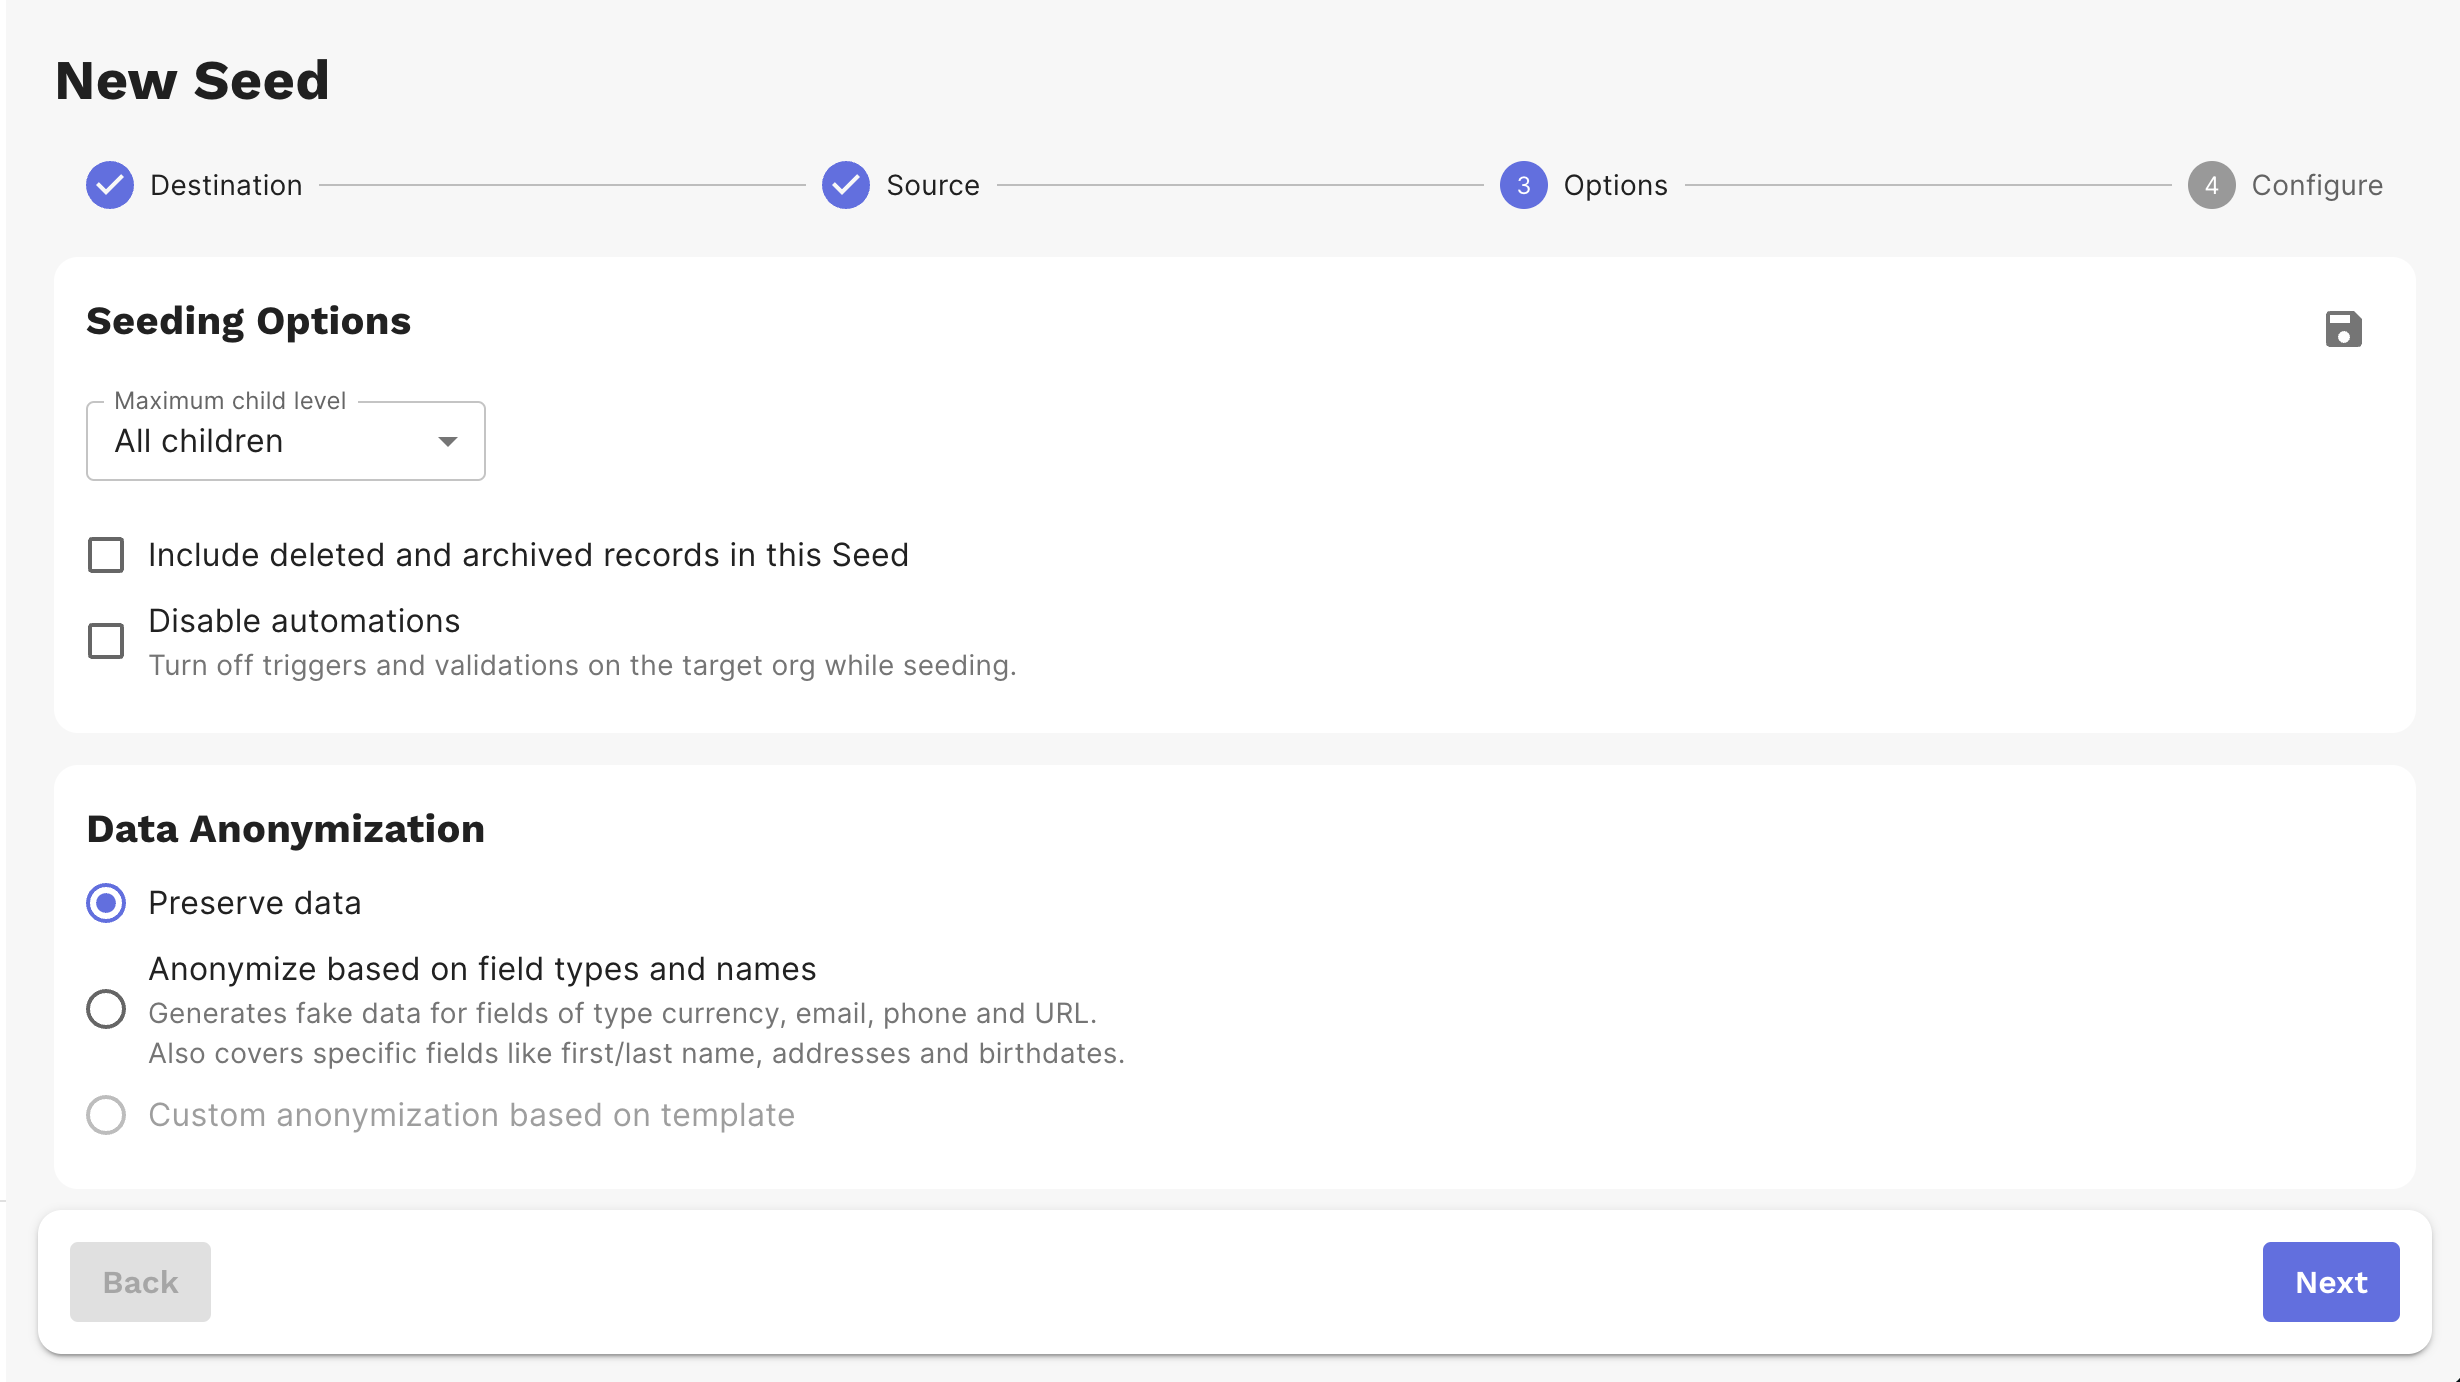
Click the save (disk) icon to make your chosen settings the default.
-
GRAX builds and graphs the hierarchy of your records to prepare for seeding to the target org. If you used Global Search or the record details view as the Seeding source, you will start on this page of the workflow.
You will notice a Seeding data size estimate versus available space in the target org in the graph header. Use this to make sure your org has enough space for the Seeding data and any development or testing work you need to do.
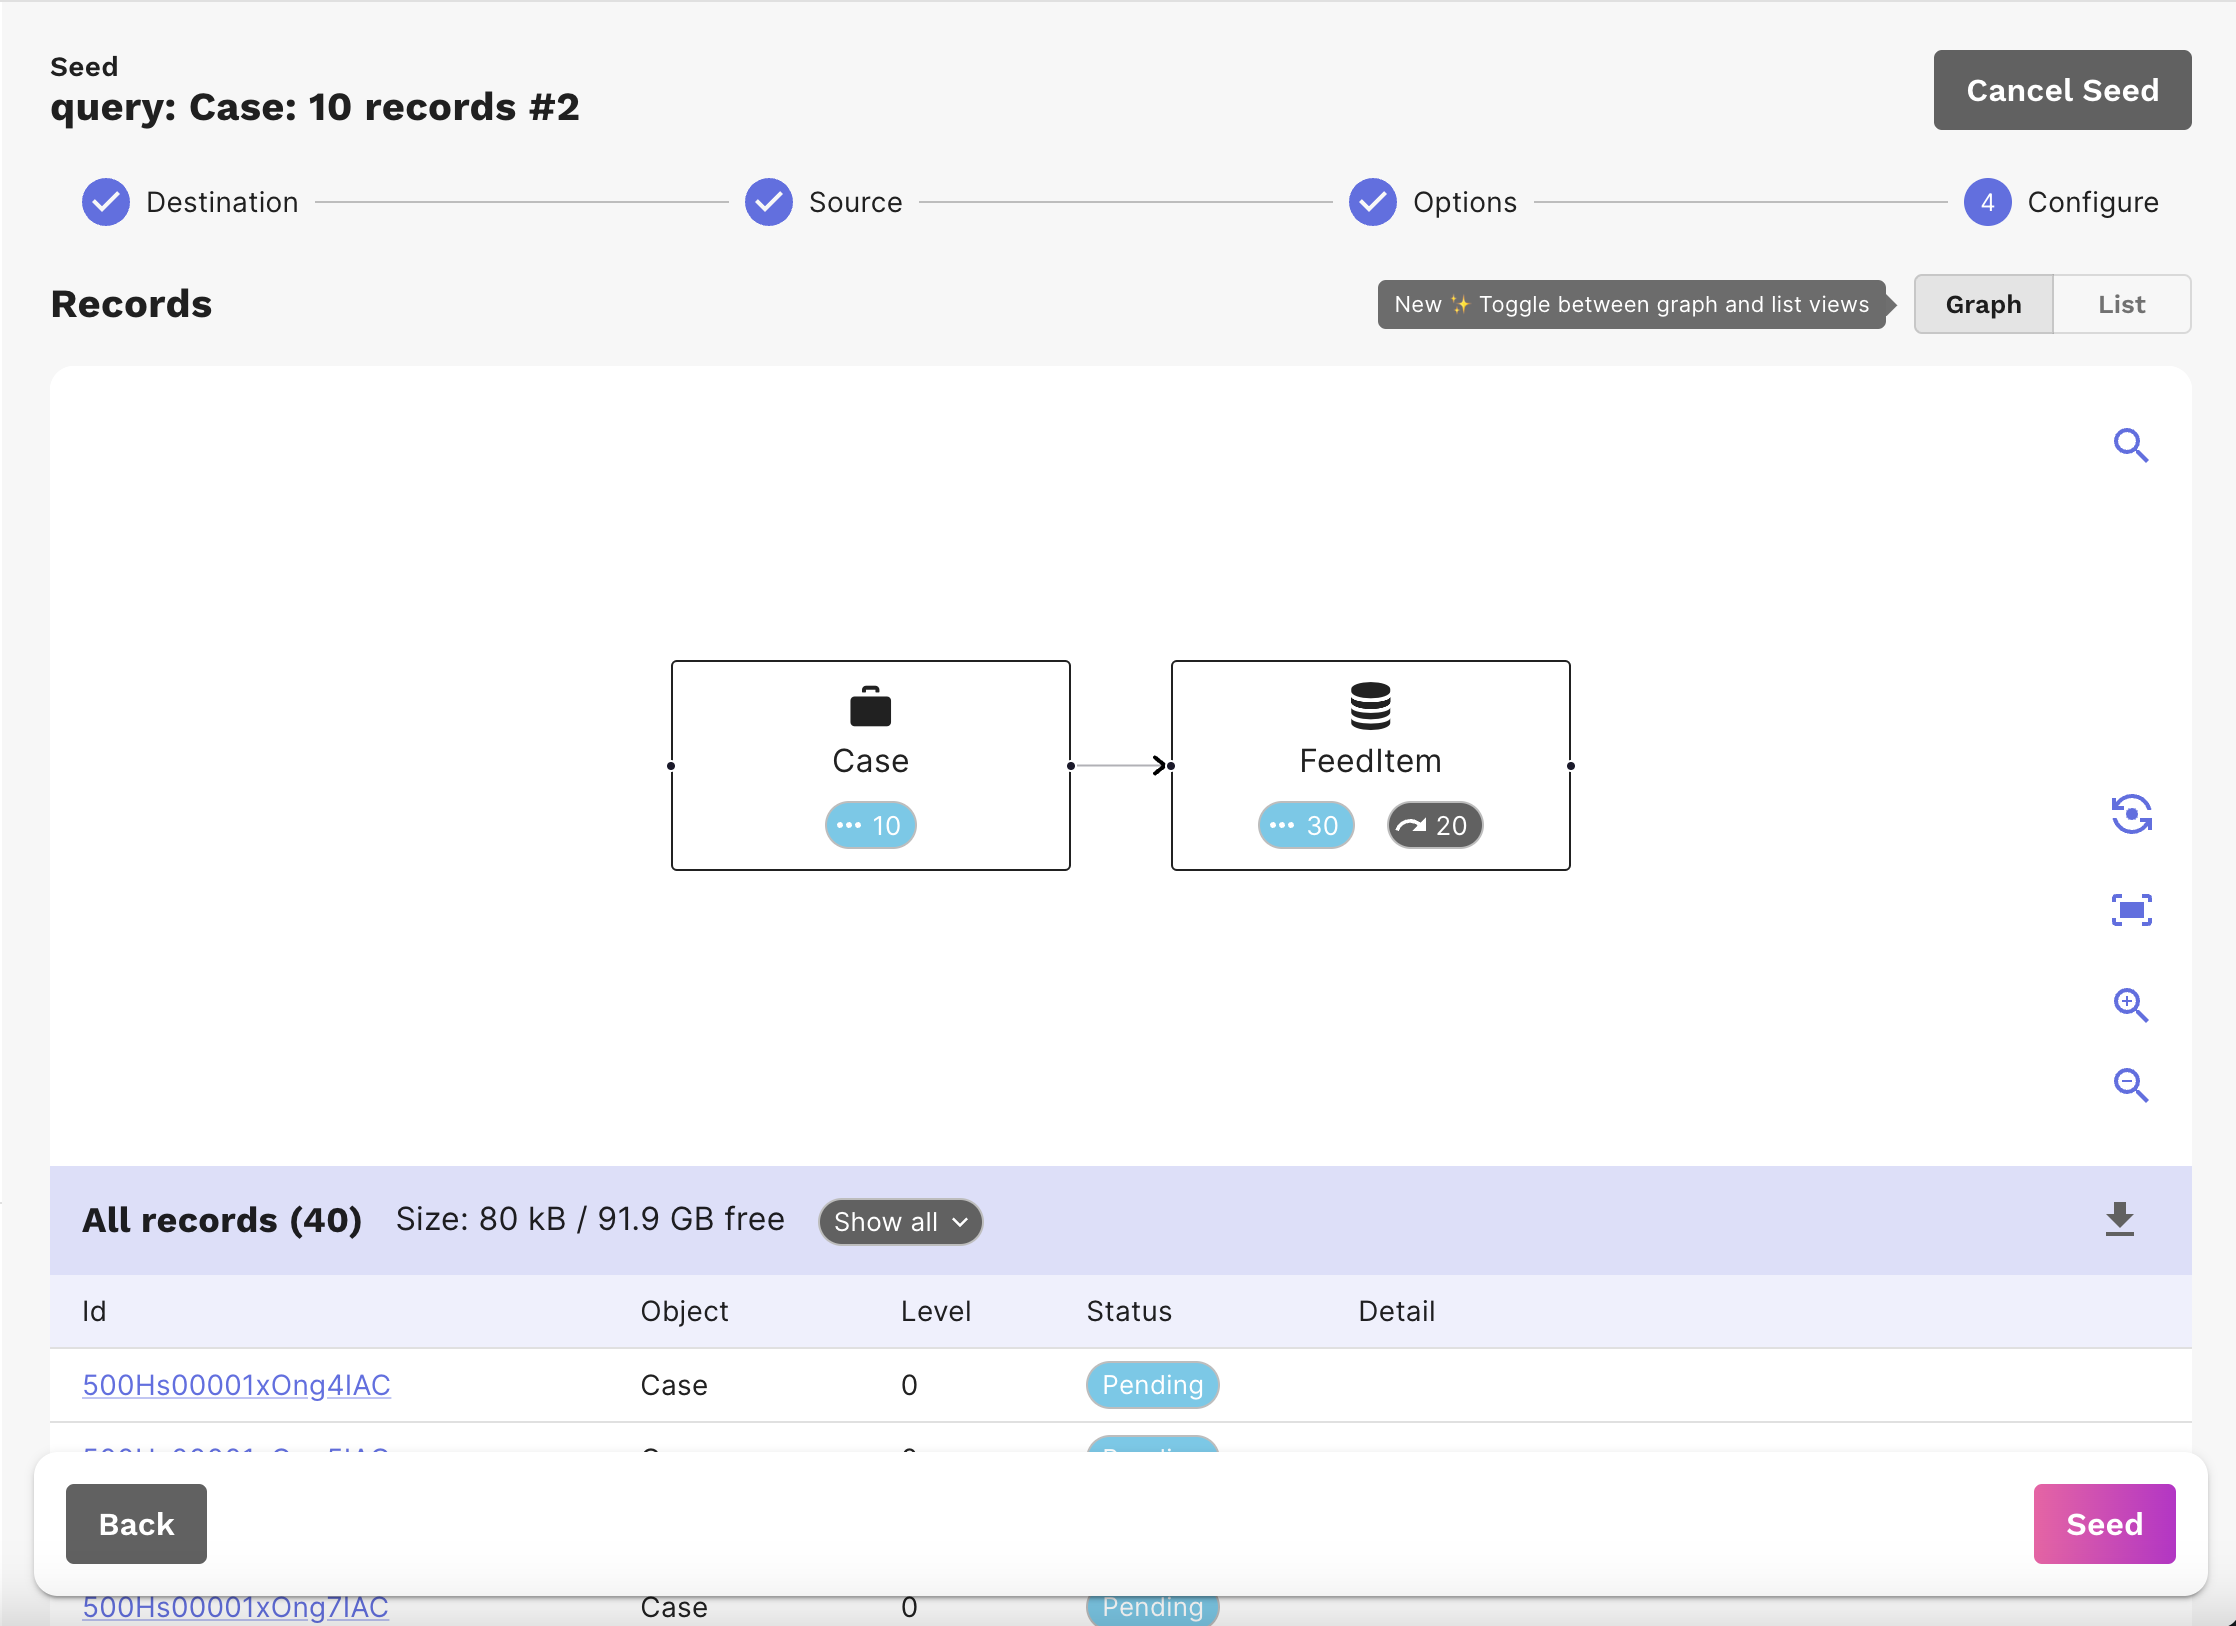
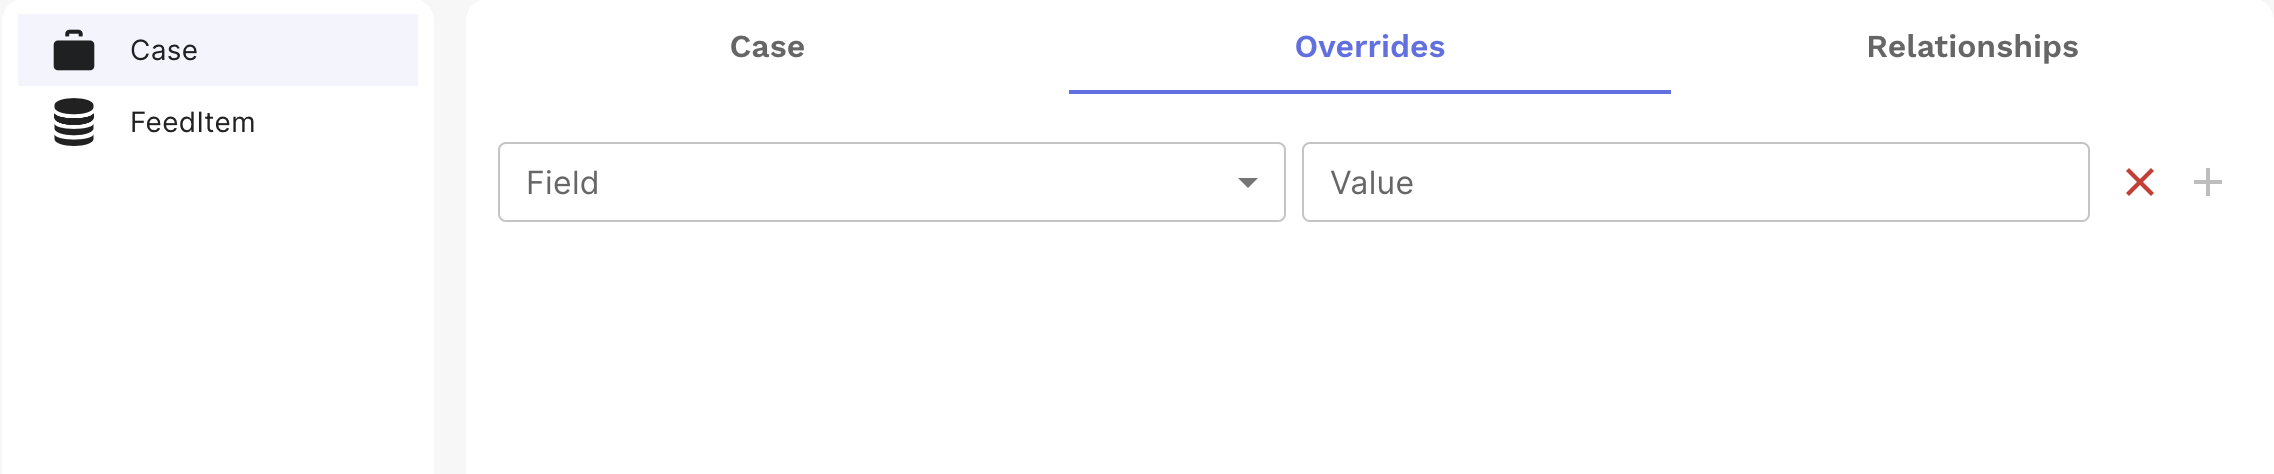
There is also a list view where you are presented with tools to configure the seed allowing you to skip records, set overrides, and include additional objects referenced by your seed data.
You may not want all objects that are referenced in the graph hierarchy. You have the option to skip objects that you don't wish to include.
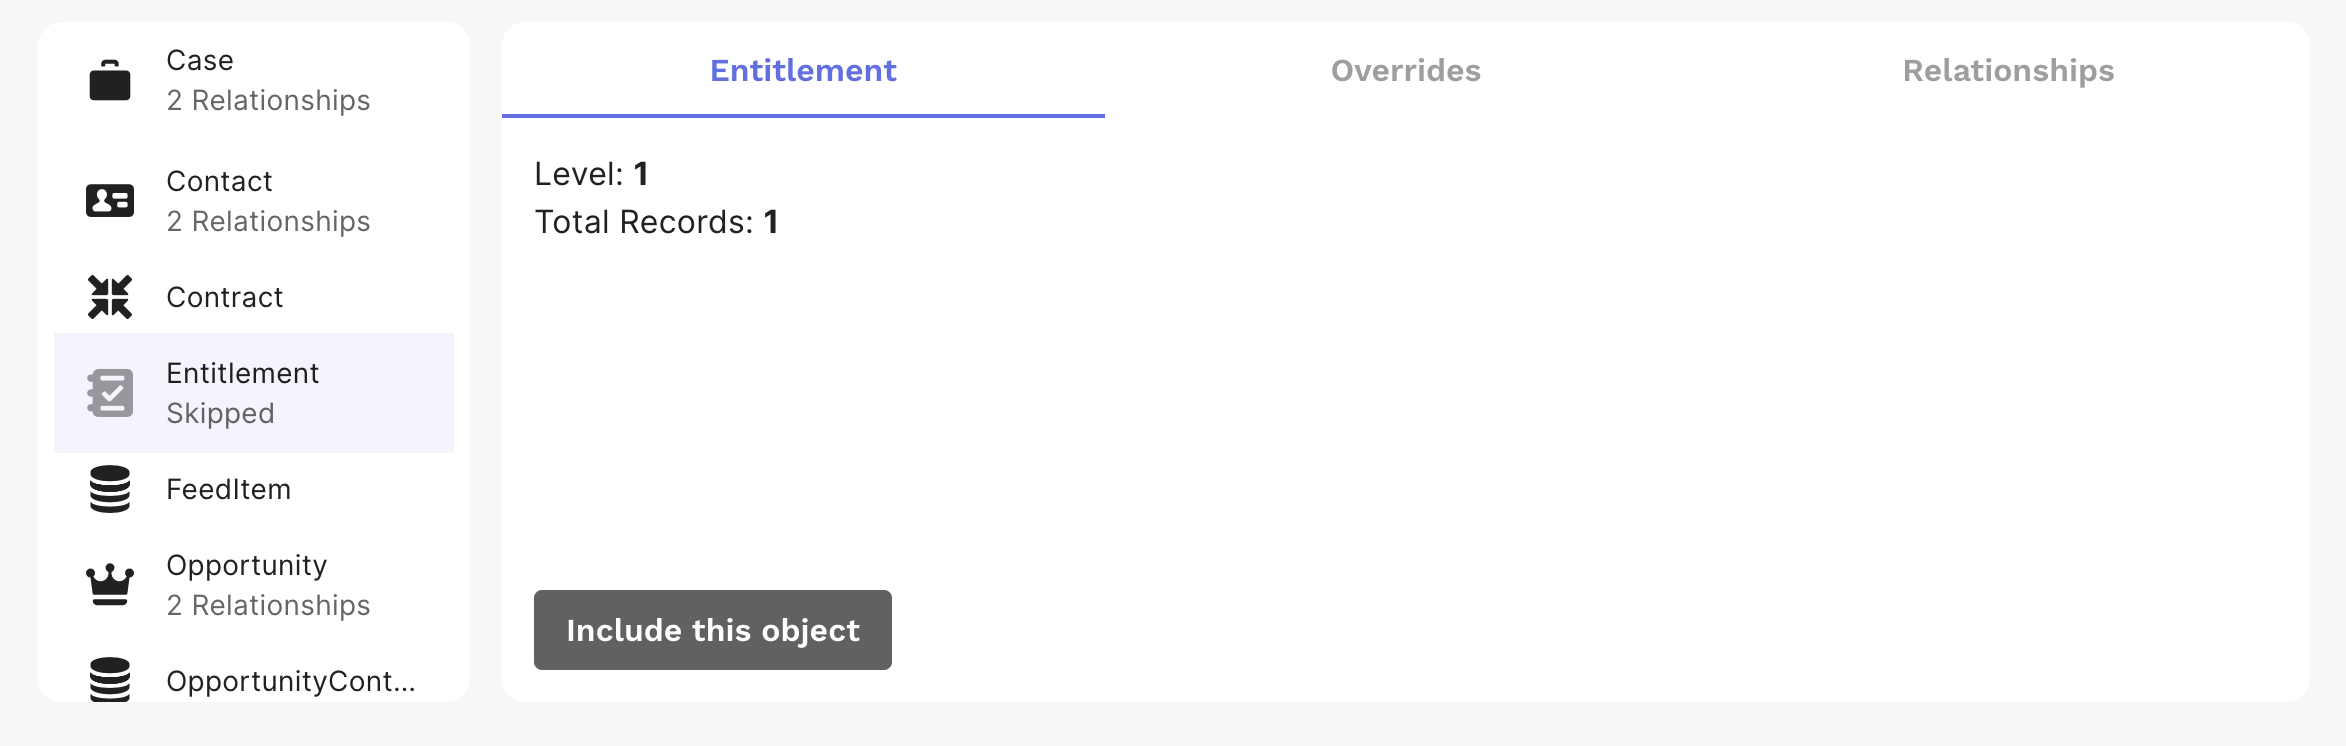
Salesforce requires that we maintain referential integrity so certain objects that are referenced by other objects in your seeding data must be included with a seed or you will get an error. To resolve this, you can either include the referenced objects or set an override. Overrides allow you to reference an object that is already in the target org or the seeding data set. We automatically include referenced parent records that are required by Salesforce to reduce the need to set overrides.
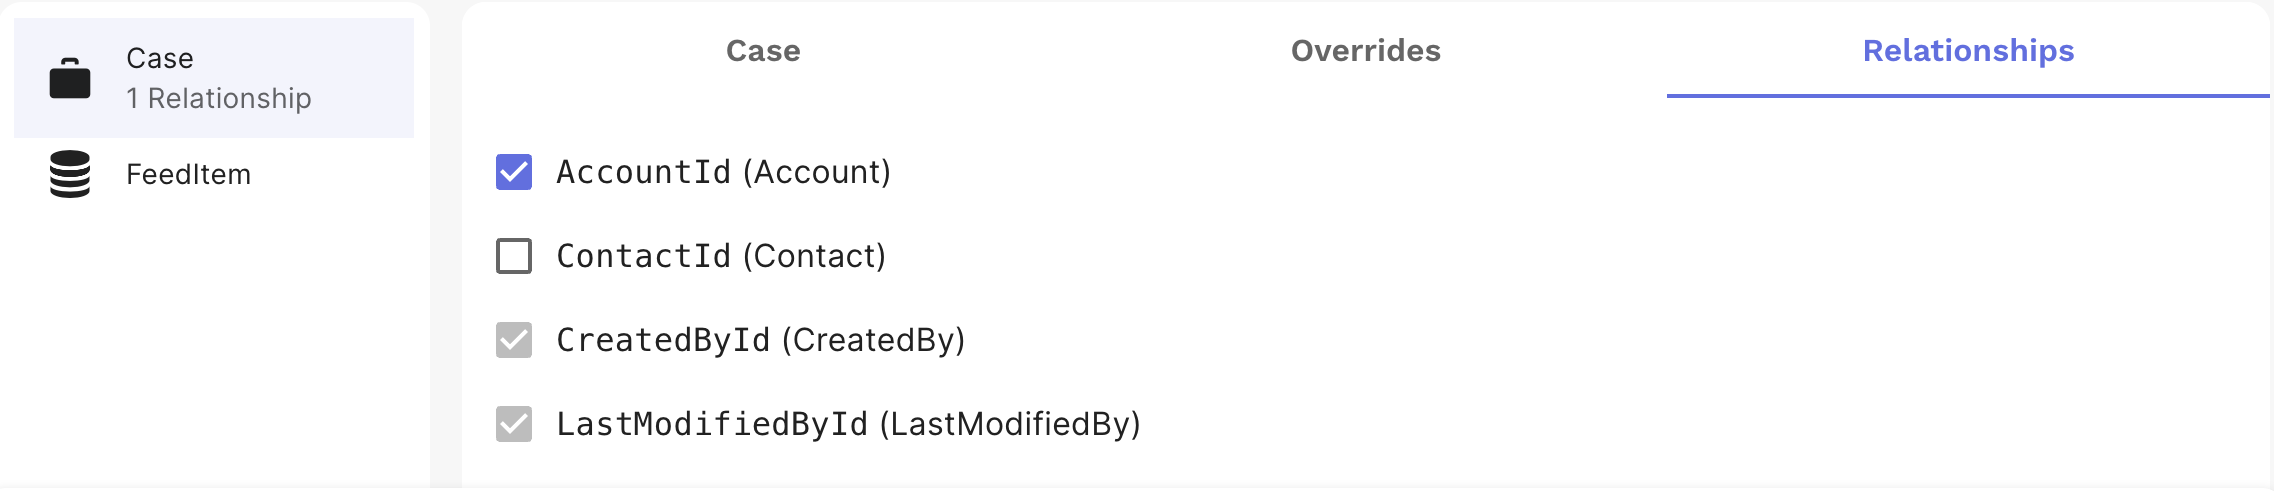
The relationships tab allows you to select related objects to bring along with the seed. If you experience an error due to a missing object, try including it with this tool.
After clicking Seed, the GRAX App prompts you to confirm and warns you if this is a Production org.
You will be presented with a progress indicator as the data is seeded to your target org.

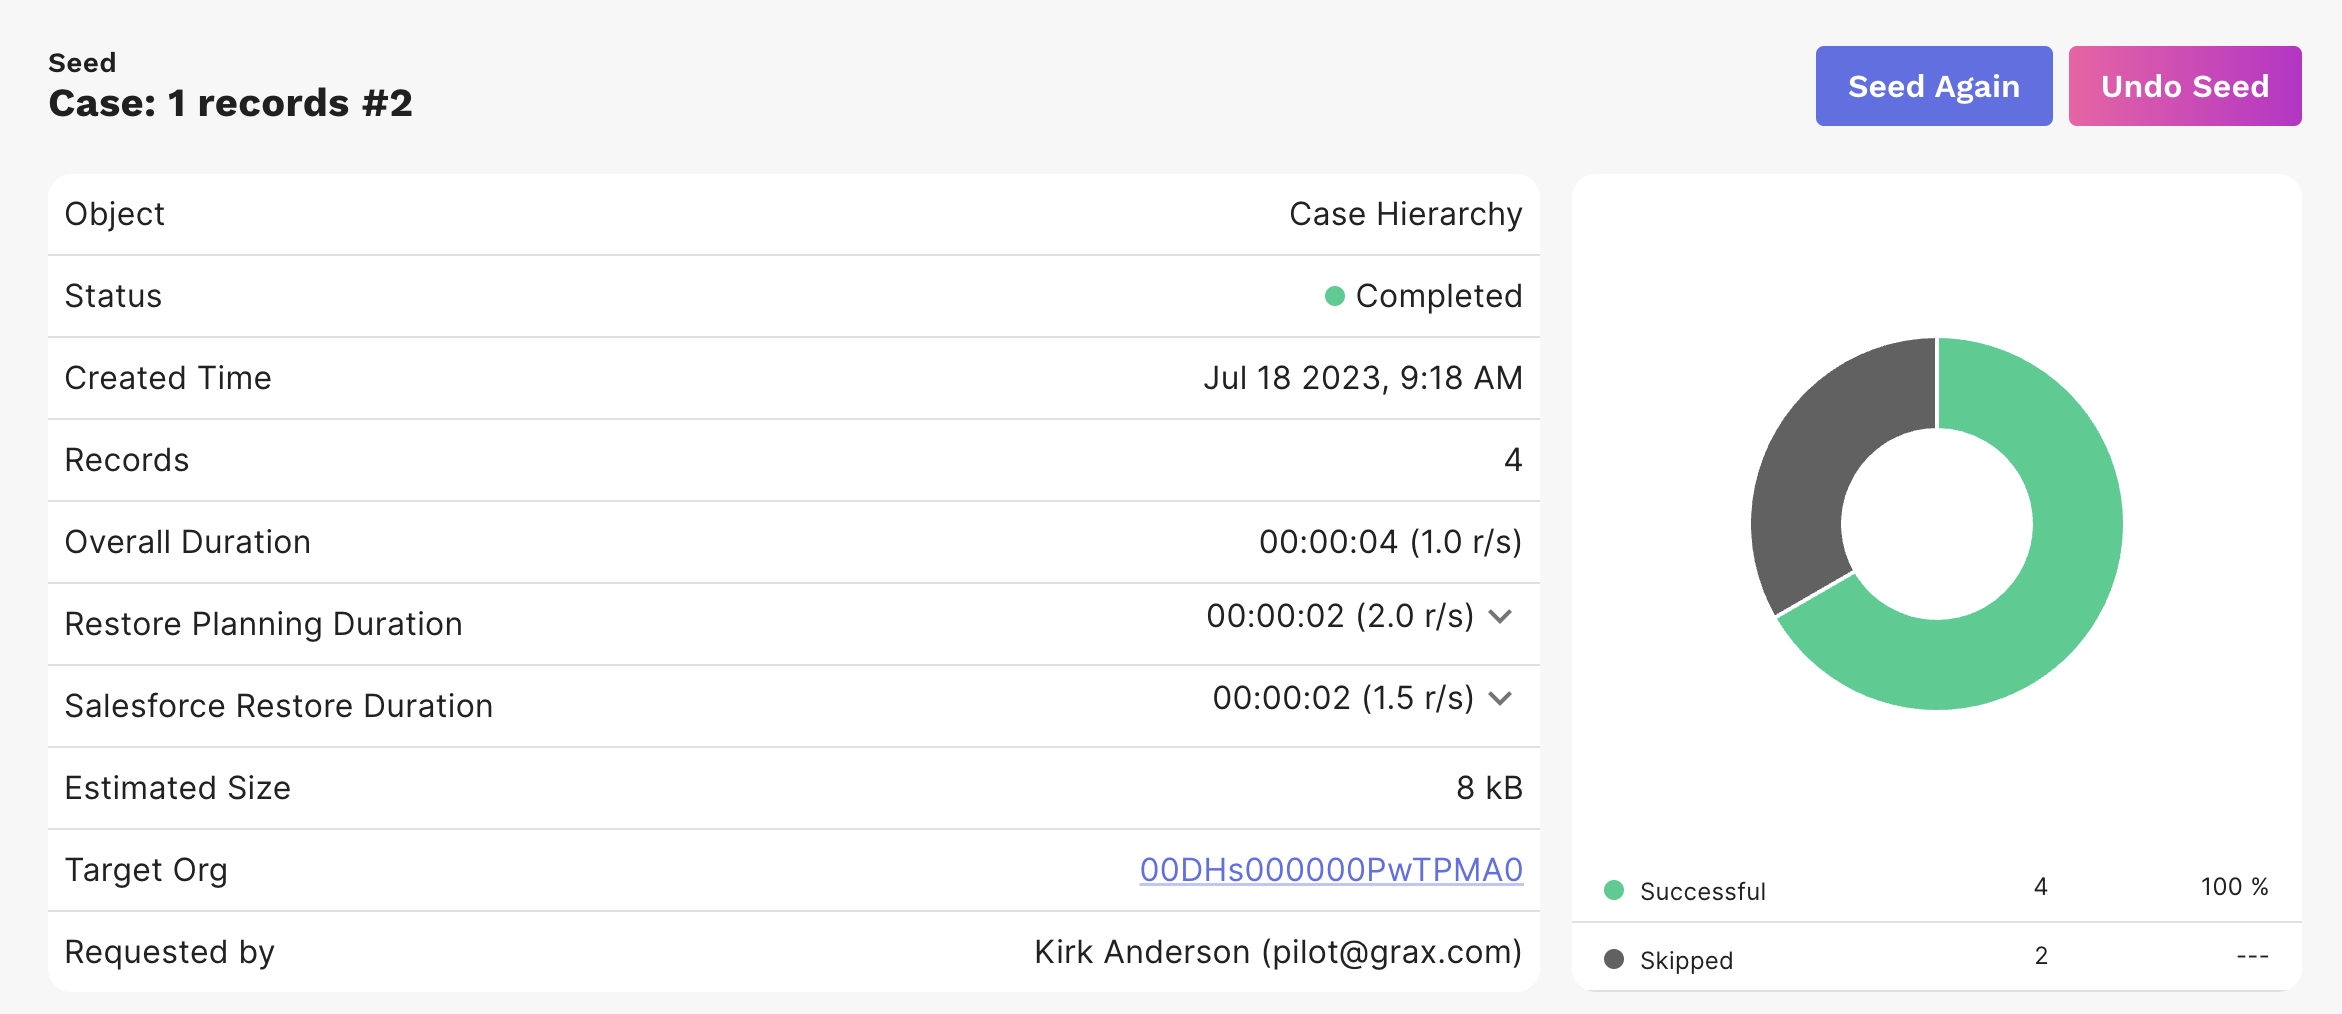
Undo Seed, Seed Again
The Undo Seed feature allows you to seed data to a sandbox, do experiments, test things, and then remove the data from the org. Right next to this is the button to Seed Again to put a fresh copy of the data back into the sandbox to replay your tests. If you have added child records to a parent that was seeded, an error is shown that we couldn't remove all of the records and a list of records that need to be manually deleted in Salesforce is provided.
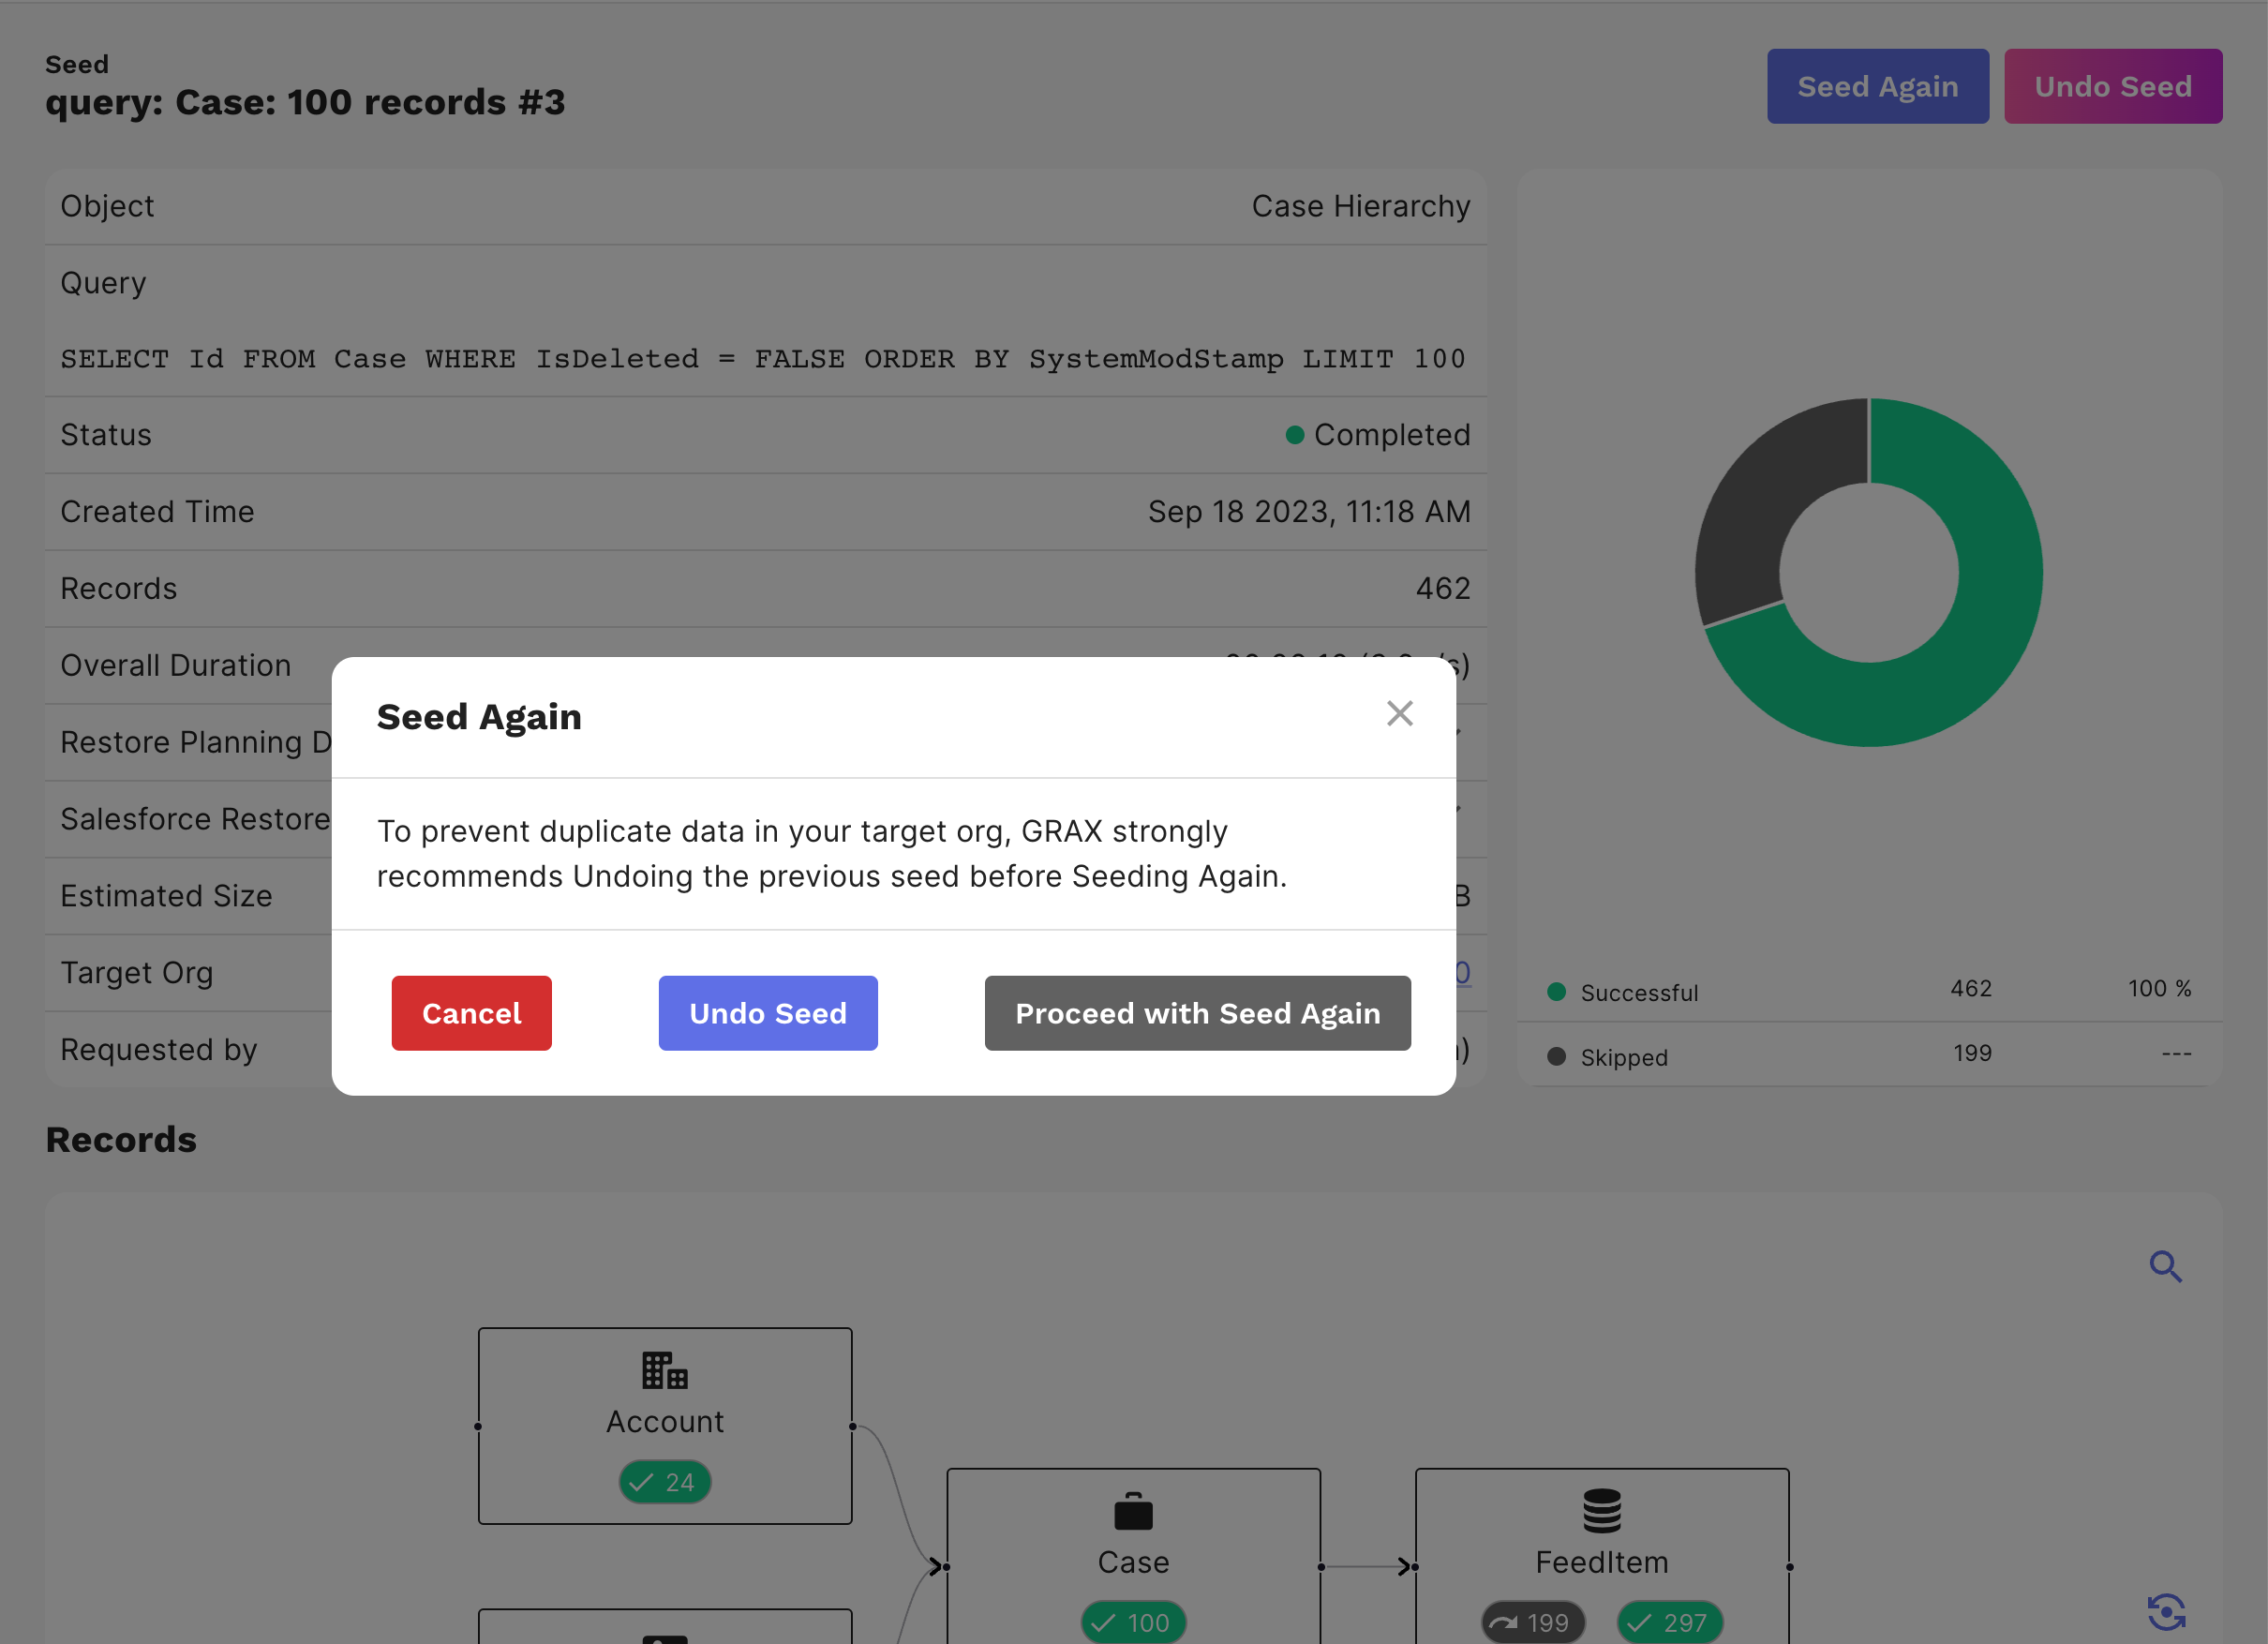
If you have not yet undone a seed and click "Seed Again," you will get a pop up modal warning that prompts you to undo that seed.
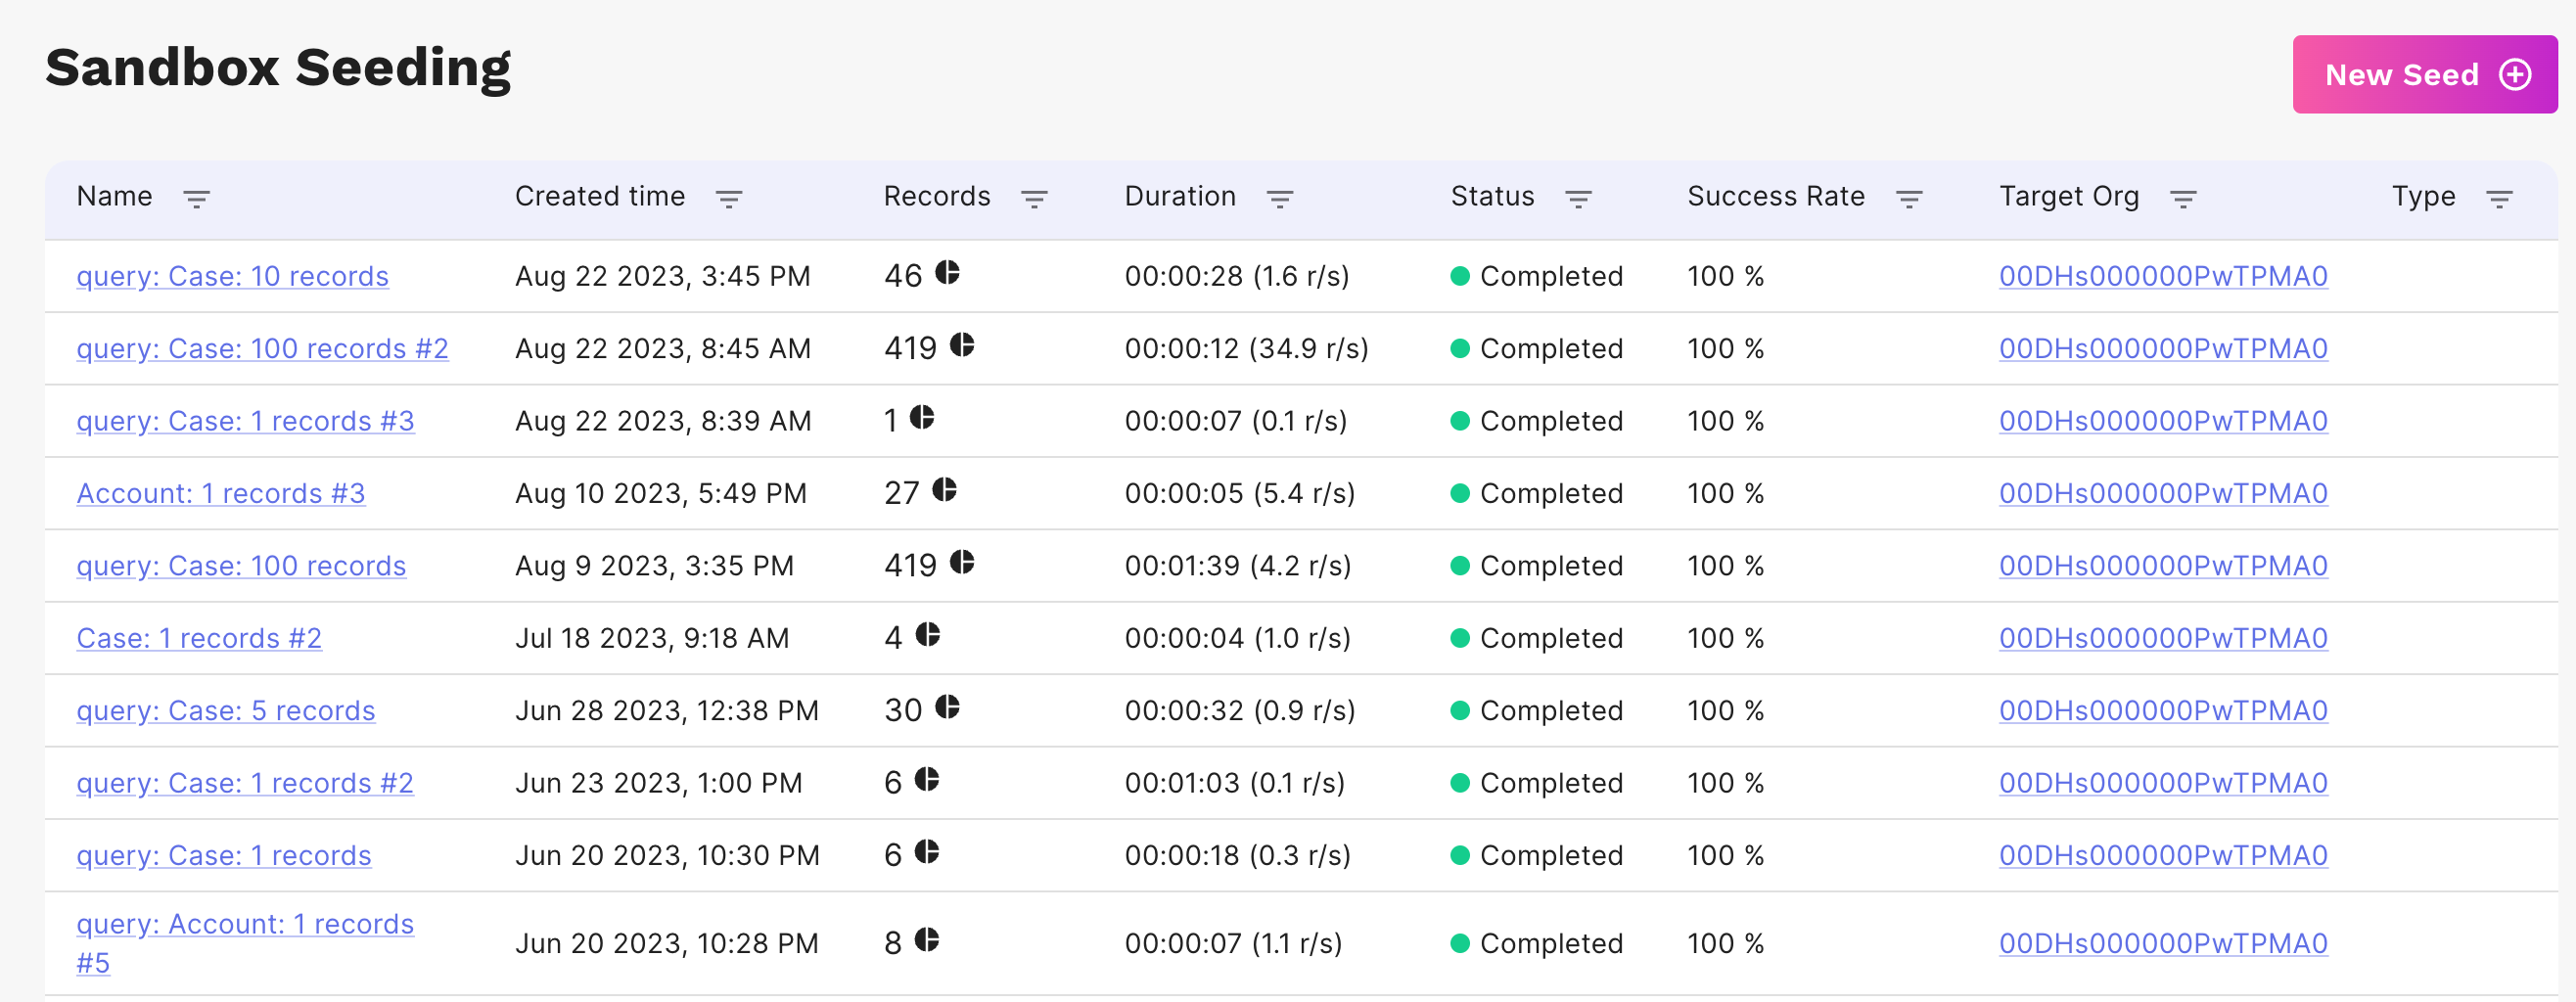
Seeding Jobs
Prior seeding jobs are shown in the Sandbox Seeding tab of the menu with detailed information on each. In the details of a Seeding job you have the option to seed the data set again.
Seeding Permission Set
GRAX Sandbox Seeding can be enabled for users by adding the permission set: "GRAX Console Seeding Permission". Contact your GRAX or Salesforce Administrator to request access to this permission set.
Manage Sandbox Seeding Targets
This can be found within the Archive, Restore & Seeding section of the Settings page and allows you to see a list of connected target orgs, remove them, or add new target orgs.
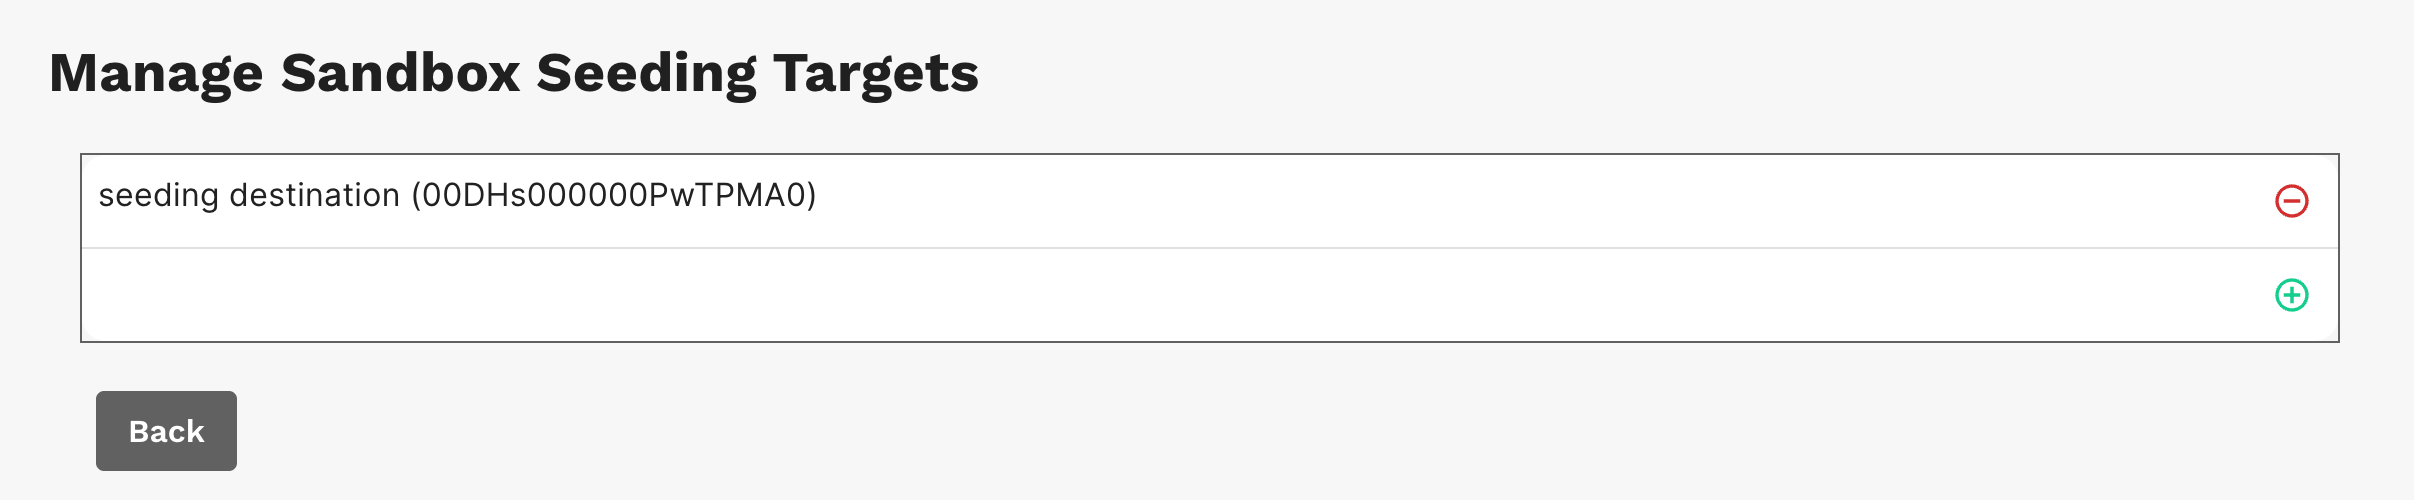
You will also see an option for Allowed Production Orgs; adding a production org to this list will then allow you to add it to the Sandbox Seed Targets list, but this should be used with caution as seeding to a production org is not a regular use case.
Feedback
GRAX regularly schedules meetings with customer teams to capture input on functionality and features. Please send all comments, feedback, refinements, or bugs to our Support Team.
Troubleshooting
Salesforce Errors
Due to the complexity of Salesforce, you will sometimes experience errors when Seeding that require your intervention to get 100% of the records to seed. Some of these errors can be resolved by skipping objects, overriding fields, or adding relationships but sometimes they are purely due to Salesforce API rules. Causes may include triggers, permissions, or old data and such issues will be prefixed by 'Salesforce error:'. A partial list of these errors with suggested resolutions can be found here. There is typically some back and forth to fully satisfy Salesforce rules, but with normal usage, troubleshooting becomes easier. GRAX also logs each error in our systems to help you debug. To open a support case, follow the 'Get Support' link in the menu.
Updated 9 days ago