Purge
This feature is currently only available by request and replaces the Delete Forever feature once activated.
Do Not Modify Data Directly
The GRAX data storage layer is a proprietary, compressed, bit-level data store that isn't human readable or editable. Never modify the dataset in storage yourself, including the deletion, modification, renaming, or moving of storage objects. All interaction with the stored data should occur via the GRAX app.
What Is Purge?
Purge is the new Data Lifecycle Management feature offered by GRAX that supersedes Delete Forever. Purge allows you to define data retention rules that manage the permanent deletion of data from the GRAX Data Vault. This feature is included with GRAX Enterprise and Data Archive and Lifecycle Management licenses.
Please note that the Purge feature is not intended for storage cleanup or reducing storage capacity (Archive is the functionality to be used for those purposes); it is designed to permanently delete data for privacy, legal, and/or compliance reasons and should be used with caution, as data can not be recovered after it has been purged.
How to access Purge
Purge is integrated in two places within the GRAX Application.
-
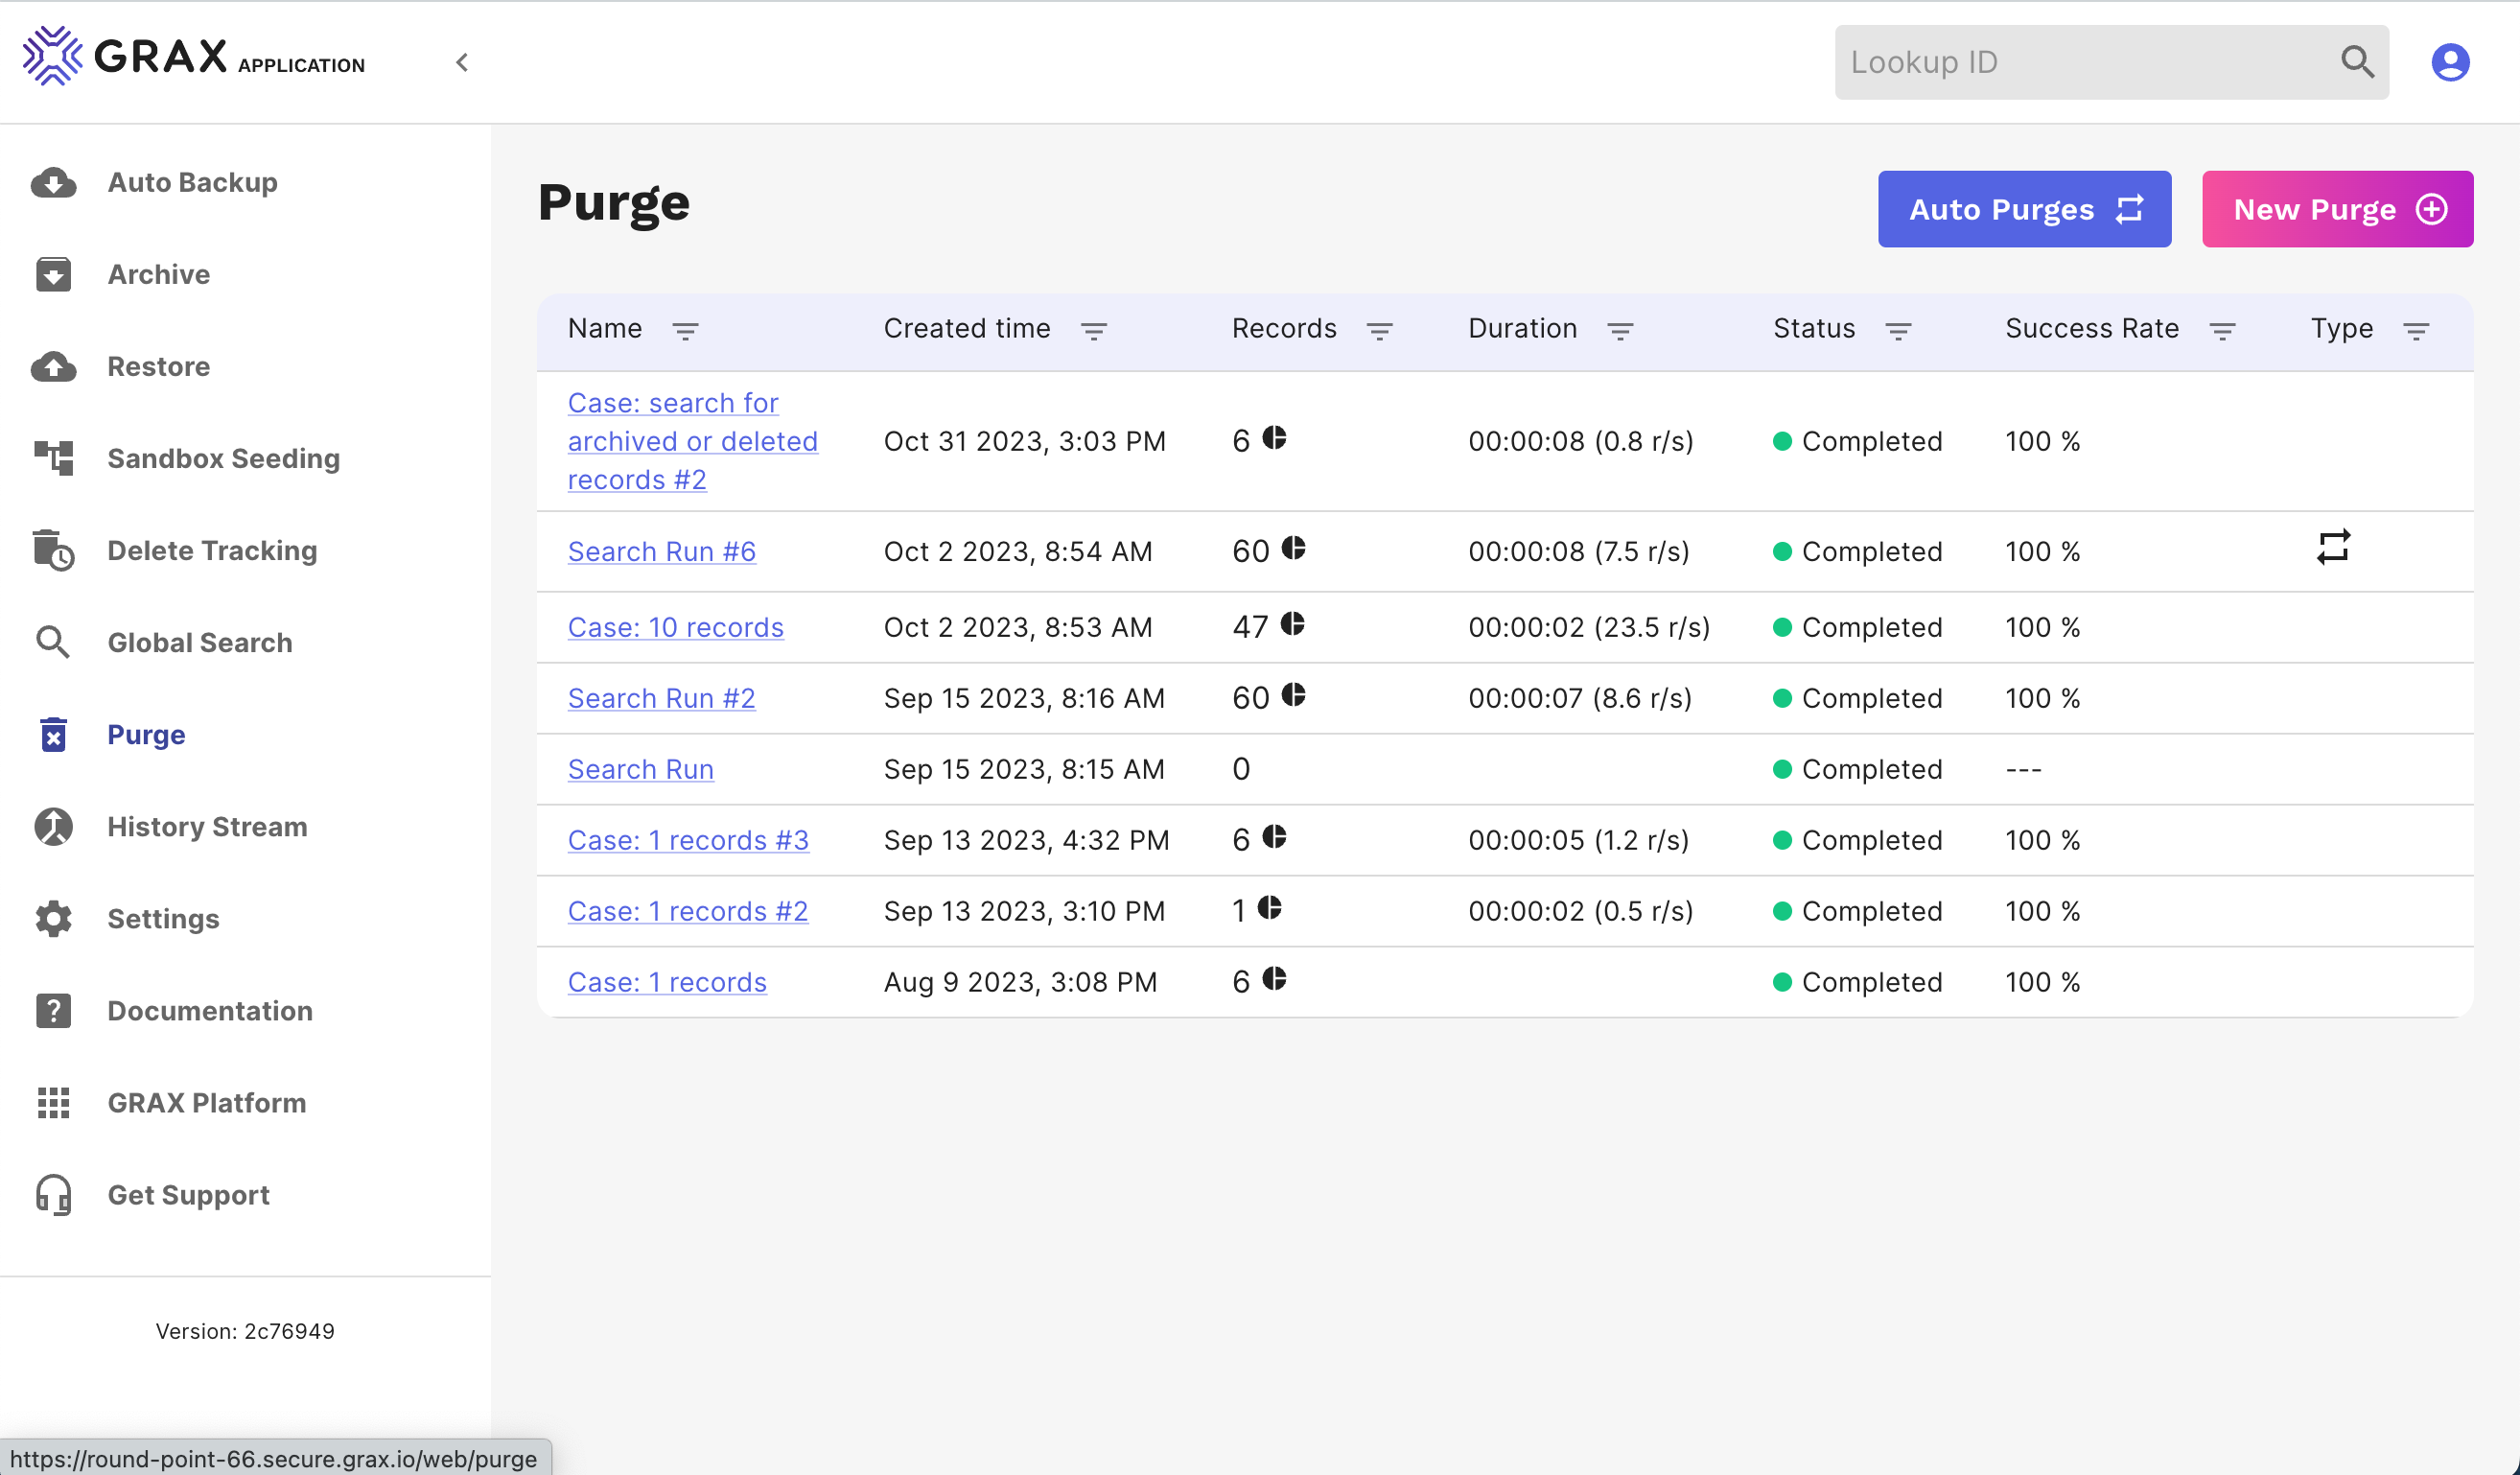
Purge Menu Page
Click on Purge in the menu and you will see the button New Purge. This takes you into the Purge workflow.
-
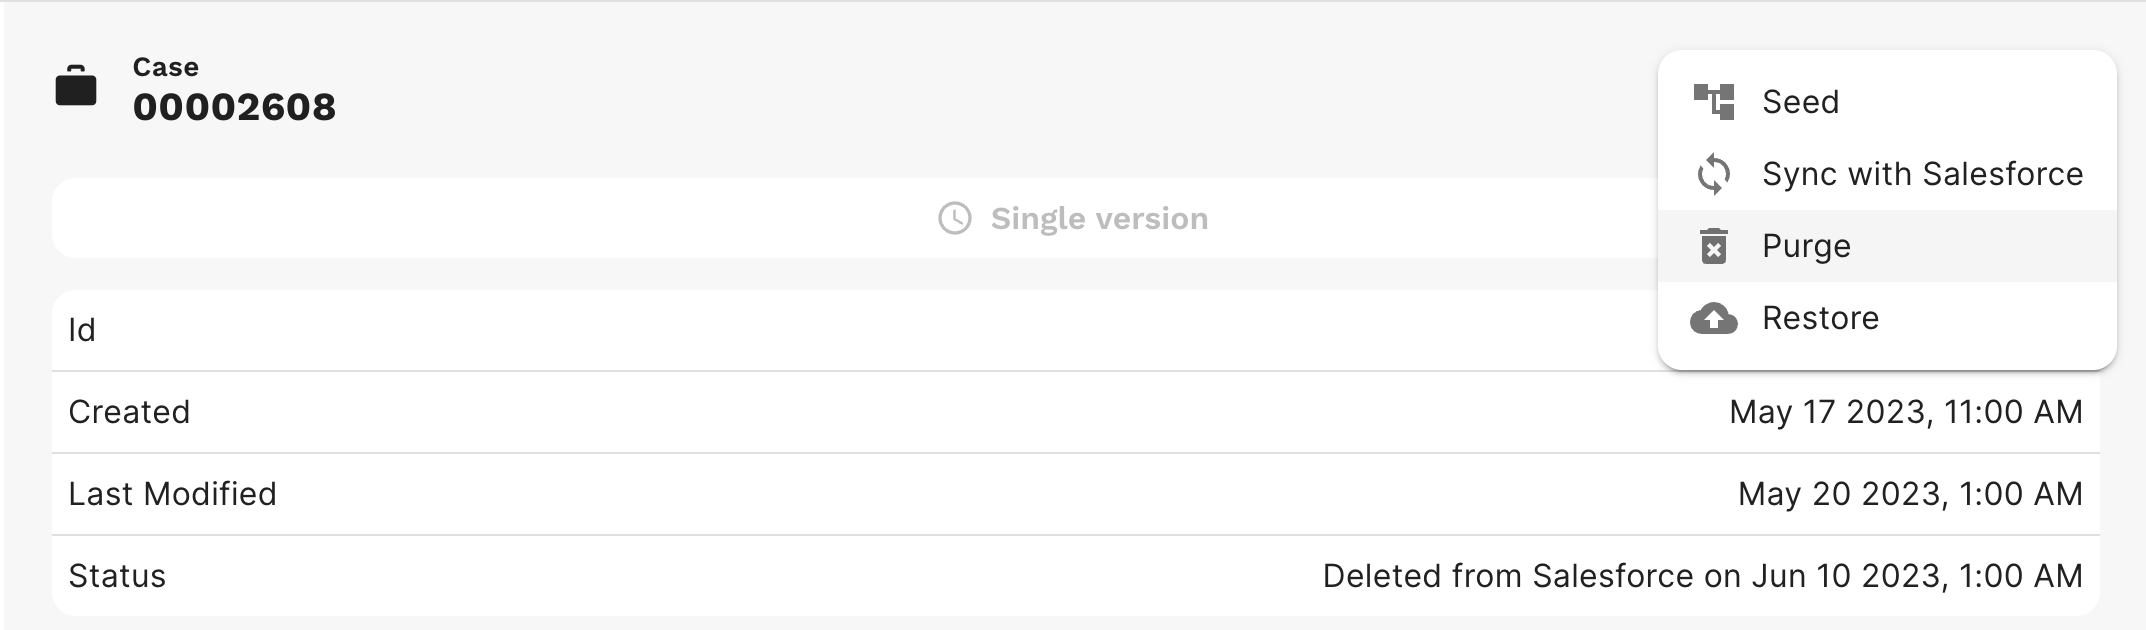
Record Details
A second method of selecting records to purge can be accessed through record details. Either click on any record link or enter the ID in the Lookup By ID box in the header to arrive at the record details view. Clicking on the vertical ellipsis in the header gives you the option to purge.
Purge Workflow
To purge data, the records must first be deleted in Salesforce or Archived by GRAX. Purged records will be permanently removed from the GRAX Data Vault and will no longer be available to review or restore. Purge provides a workflow to guide you through the steps to purge data.
-
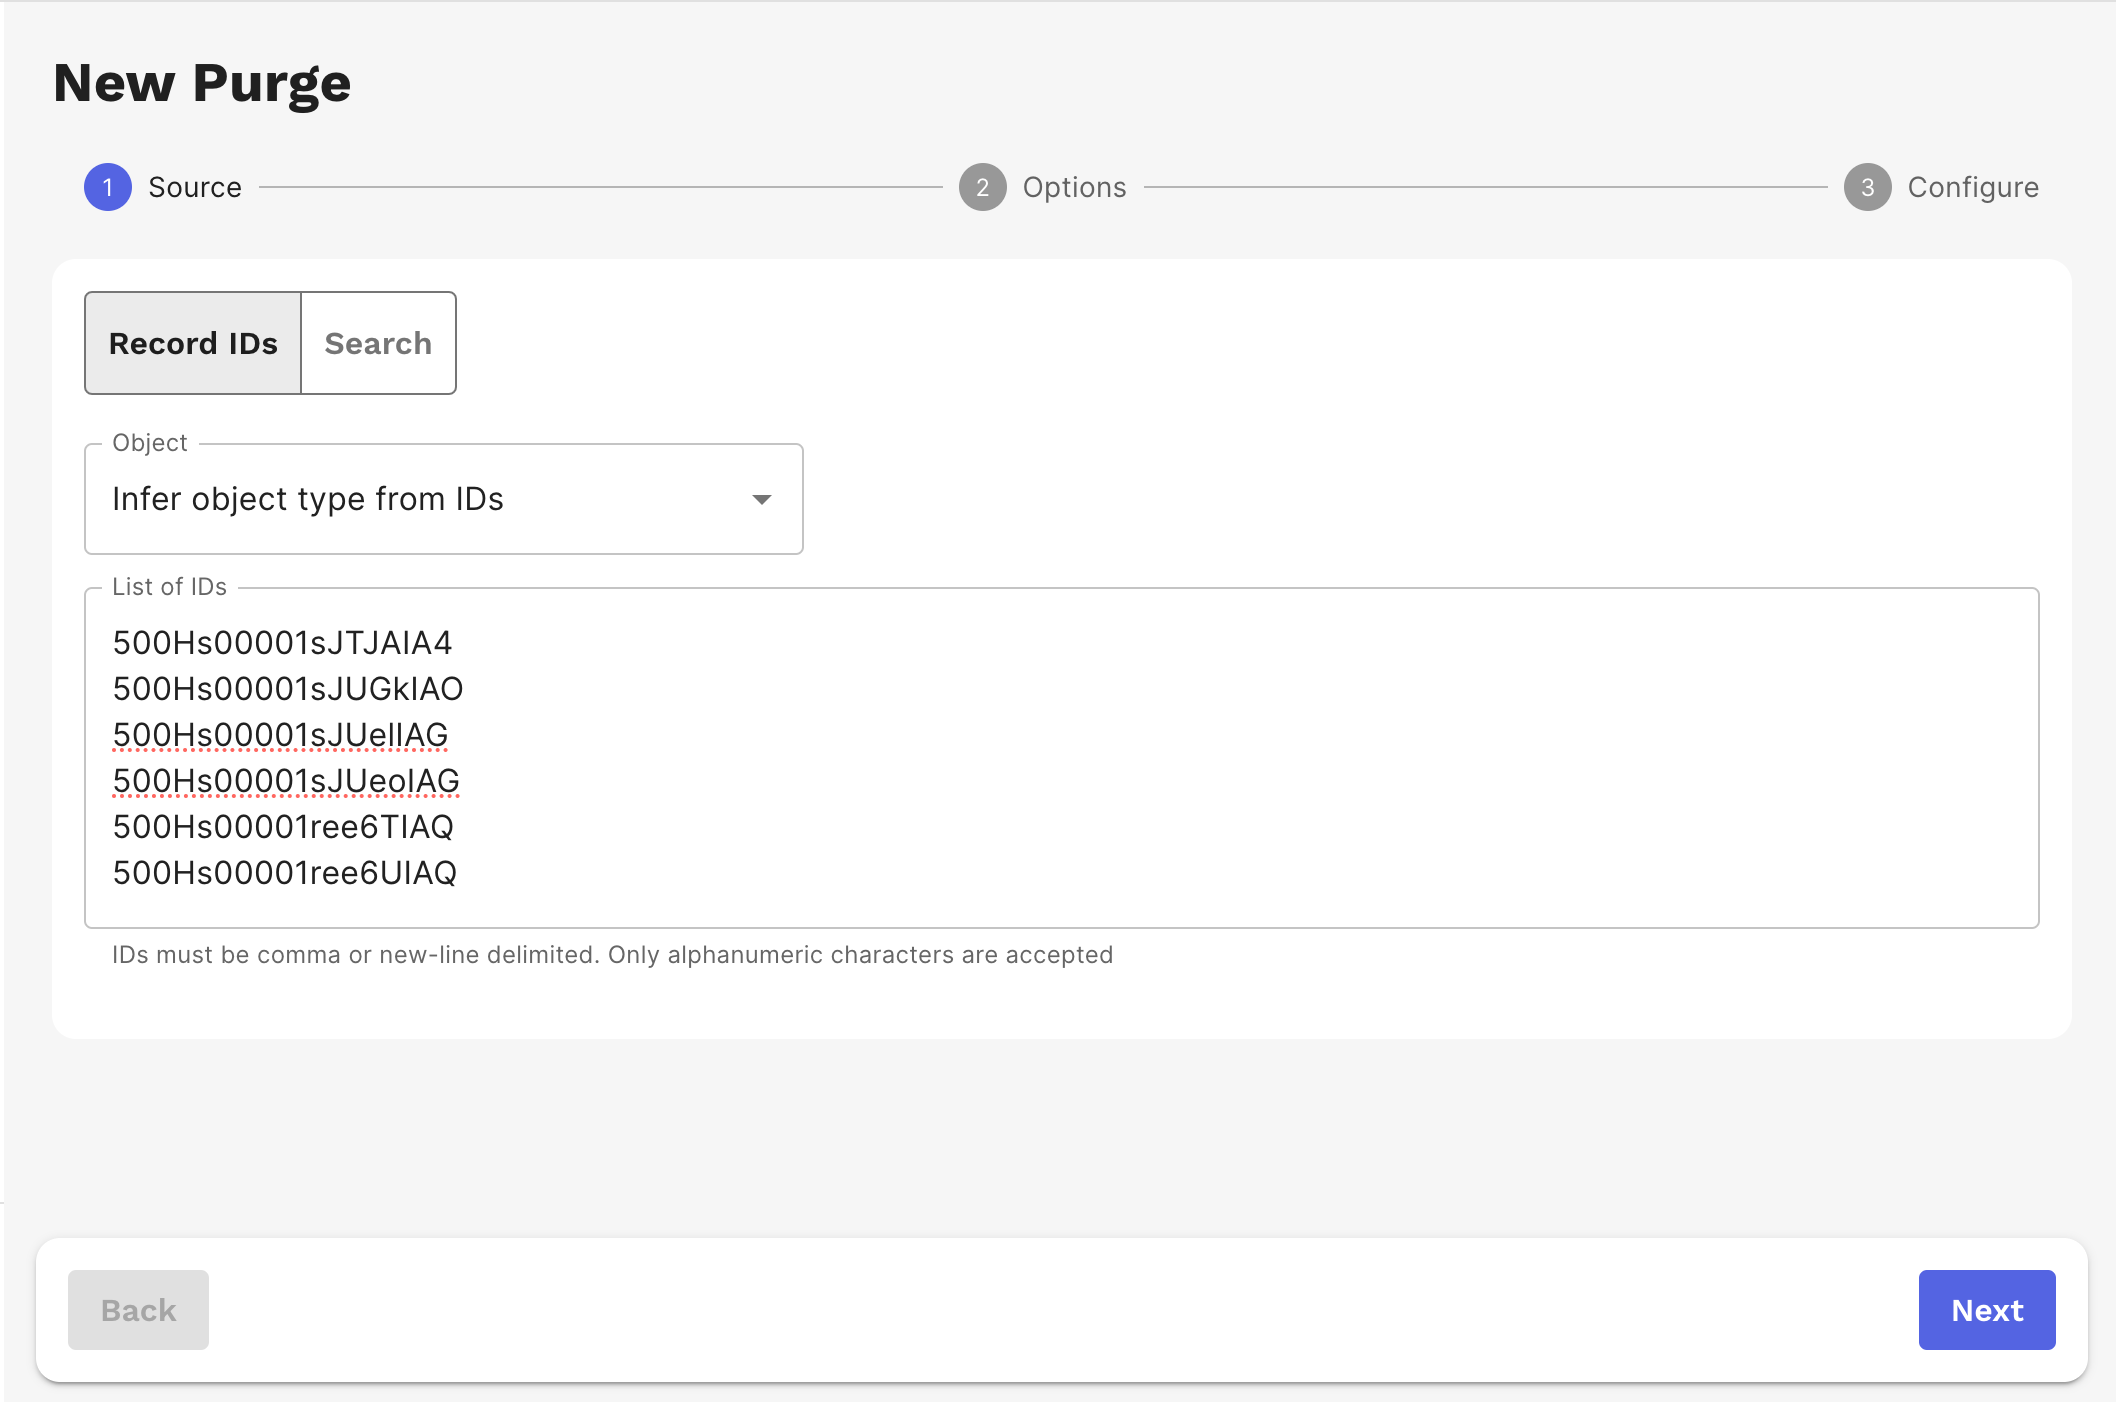
First, select the Purge source or records you want to purge. You can either enter a list of record IDs:
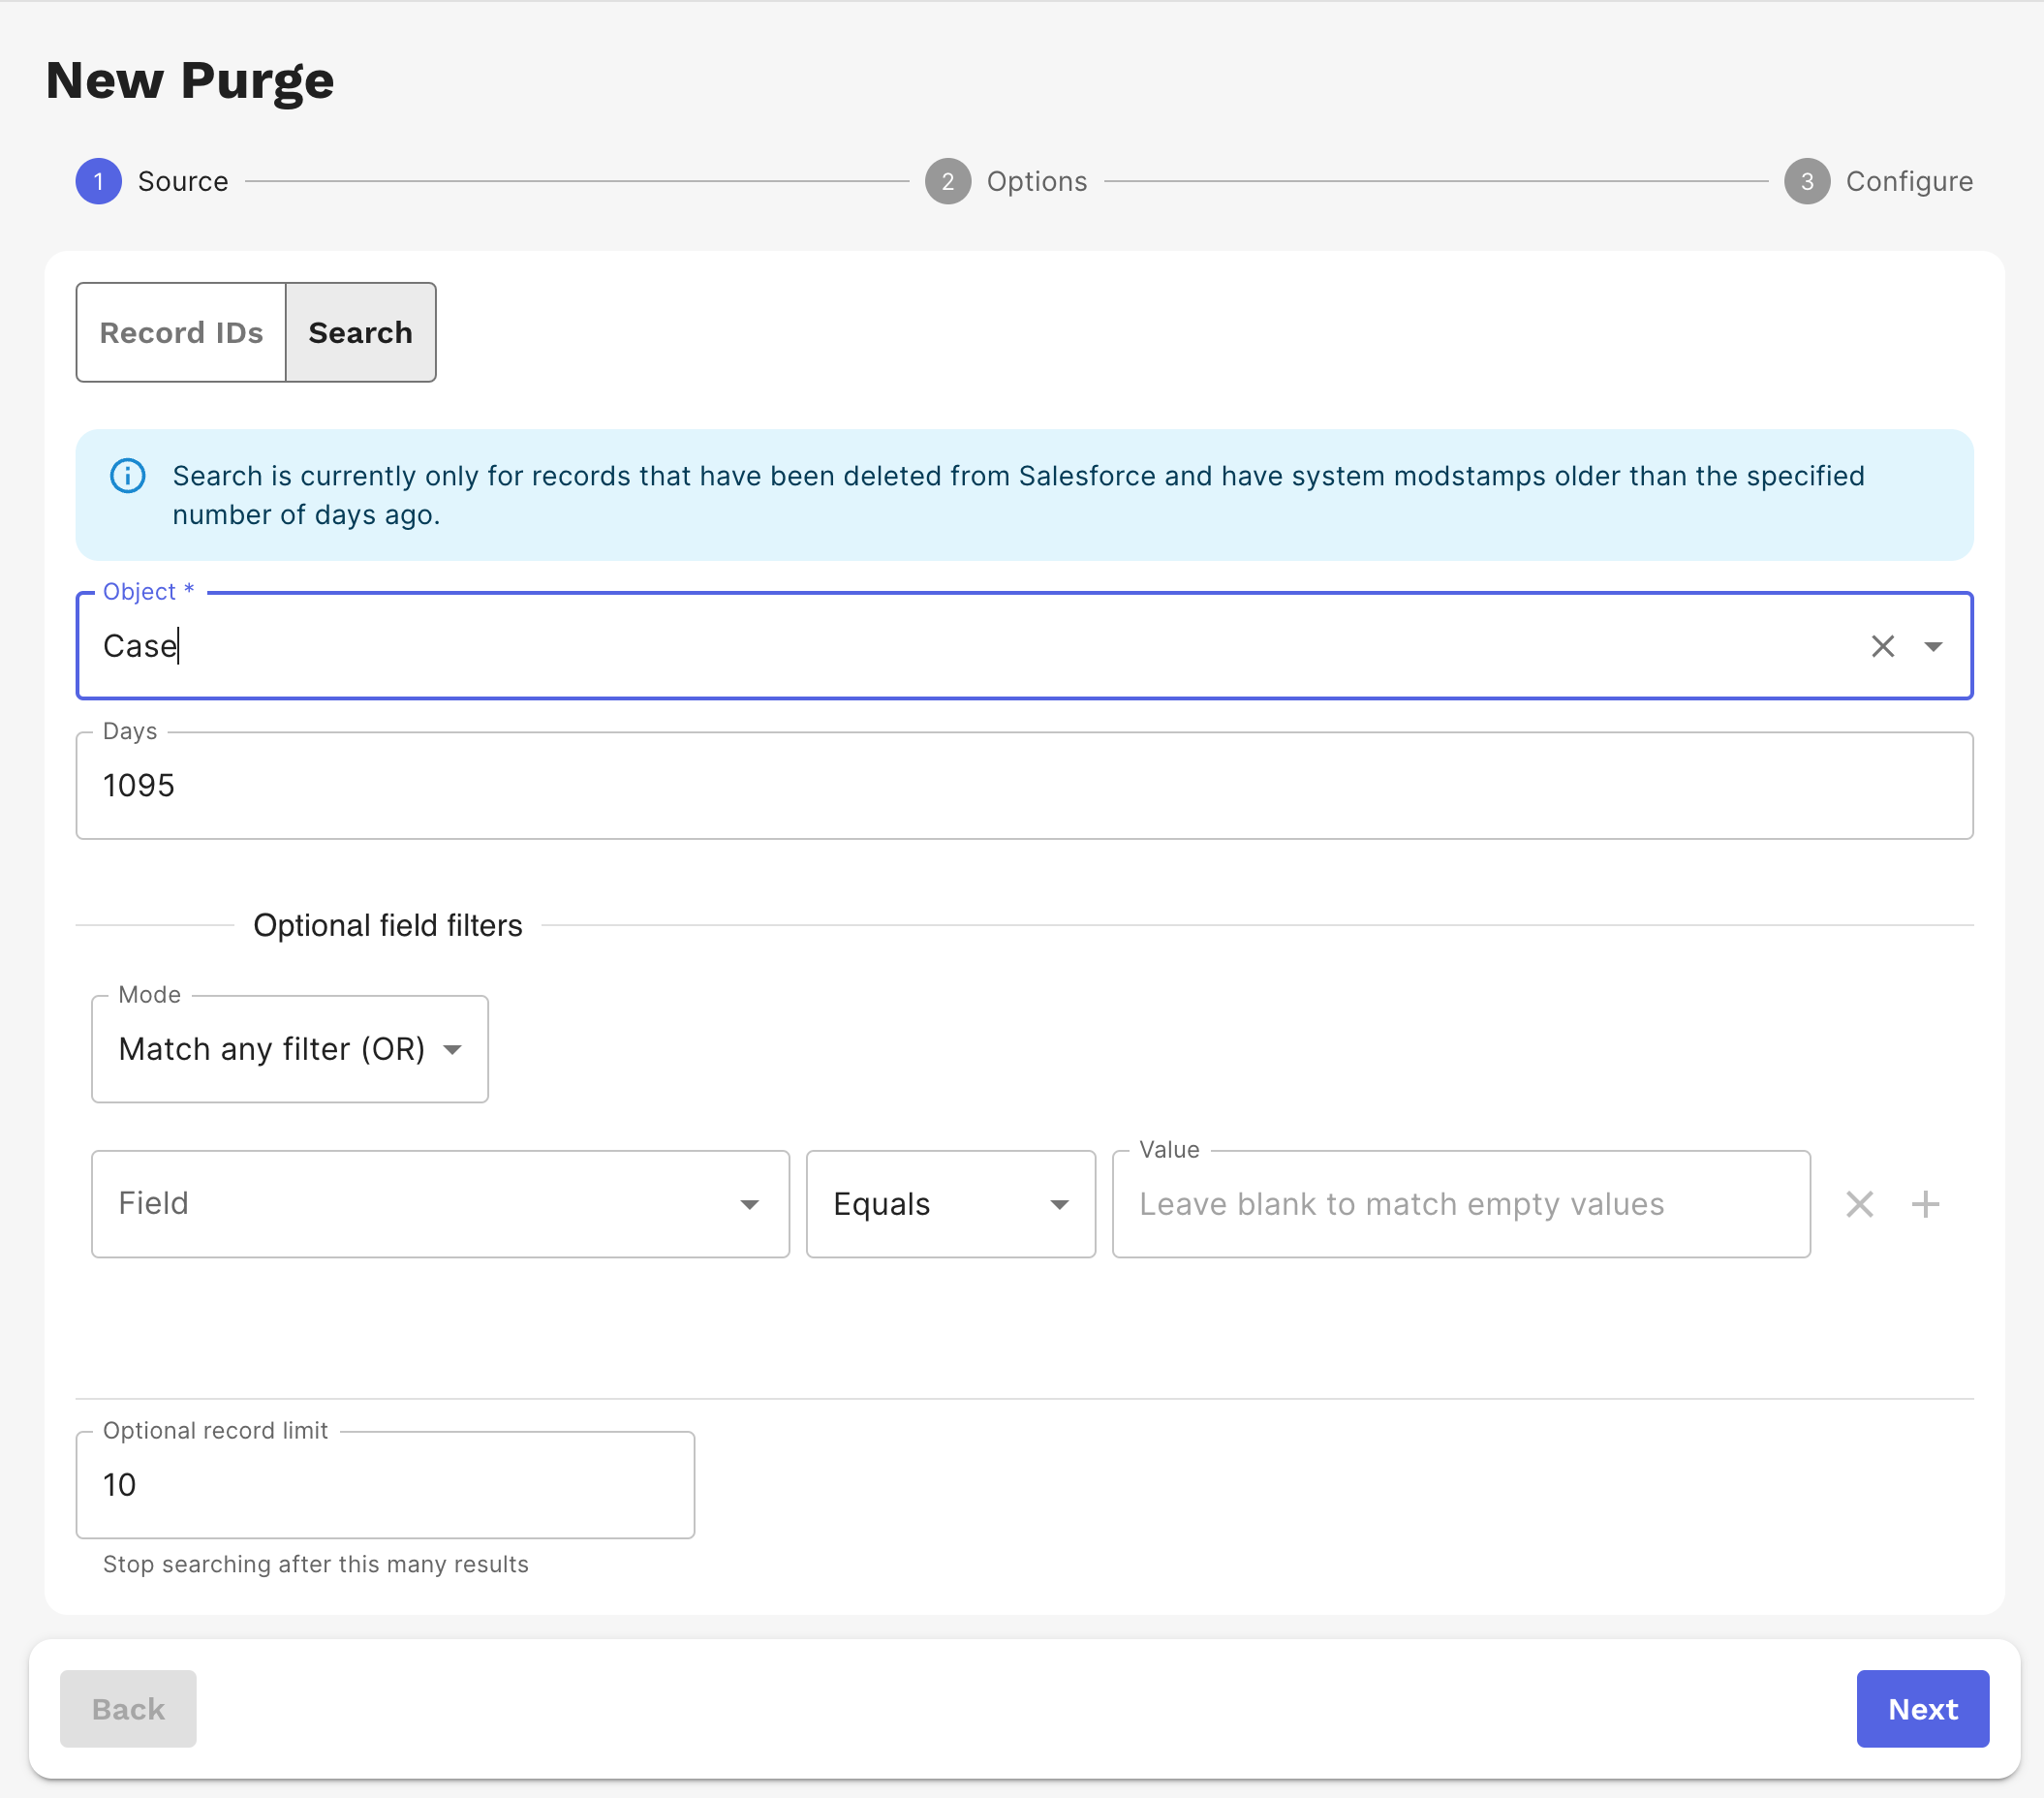
or search for records that have not been modified in more than X days based on SystemModstamp:
-
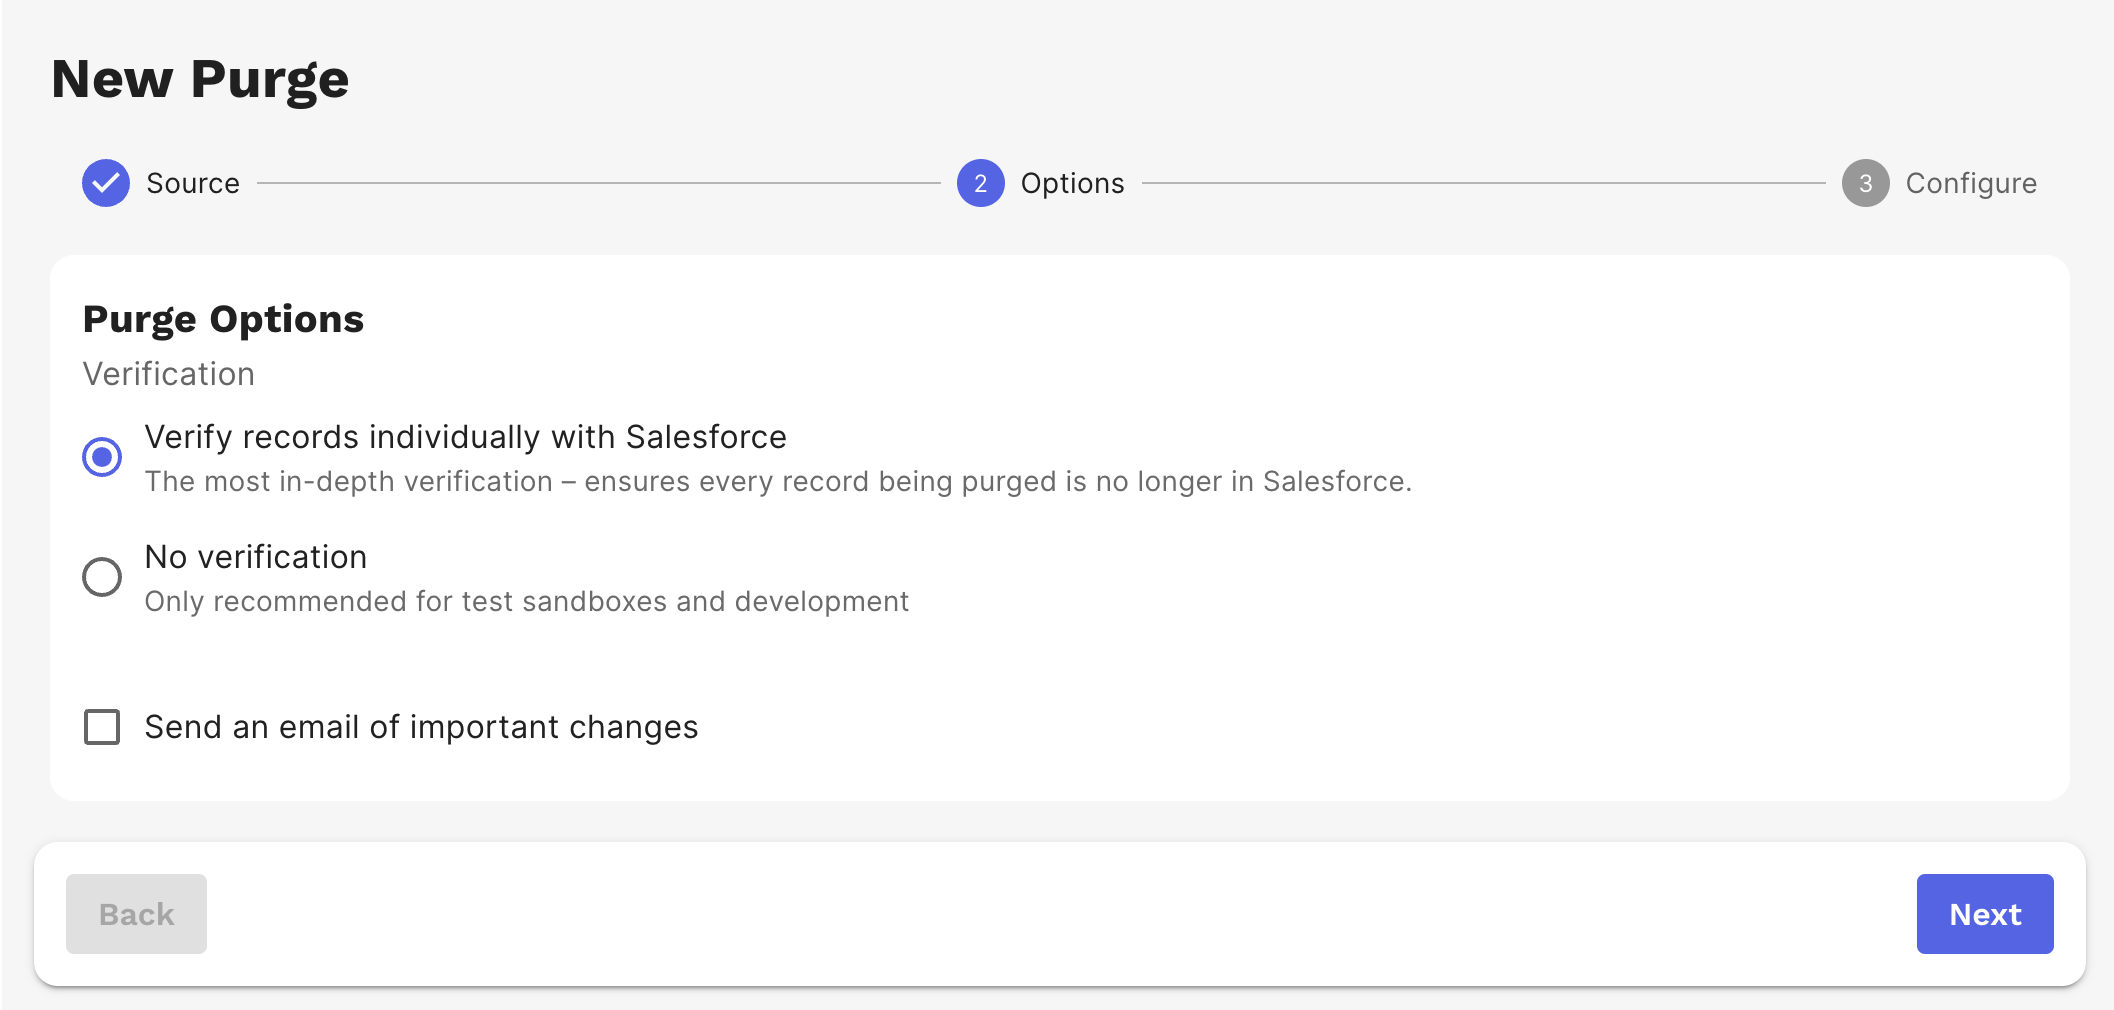
Choose Purge options. We provide the option to verify the records in Salesforce and receive an email of important changes.
-
GRAX builds and graphs the hierarchy of your records to prepare for purge. You can see the graph of your records and the number of records that will be purged.
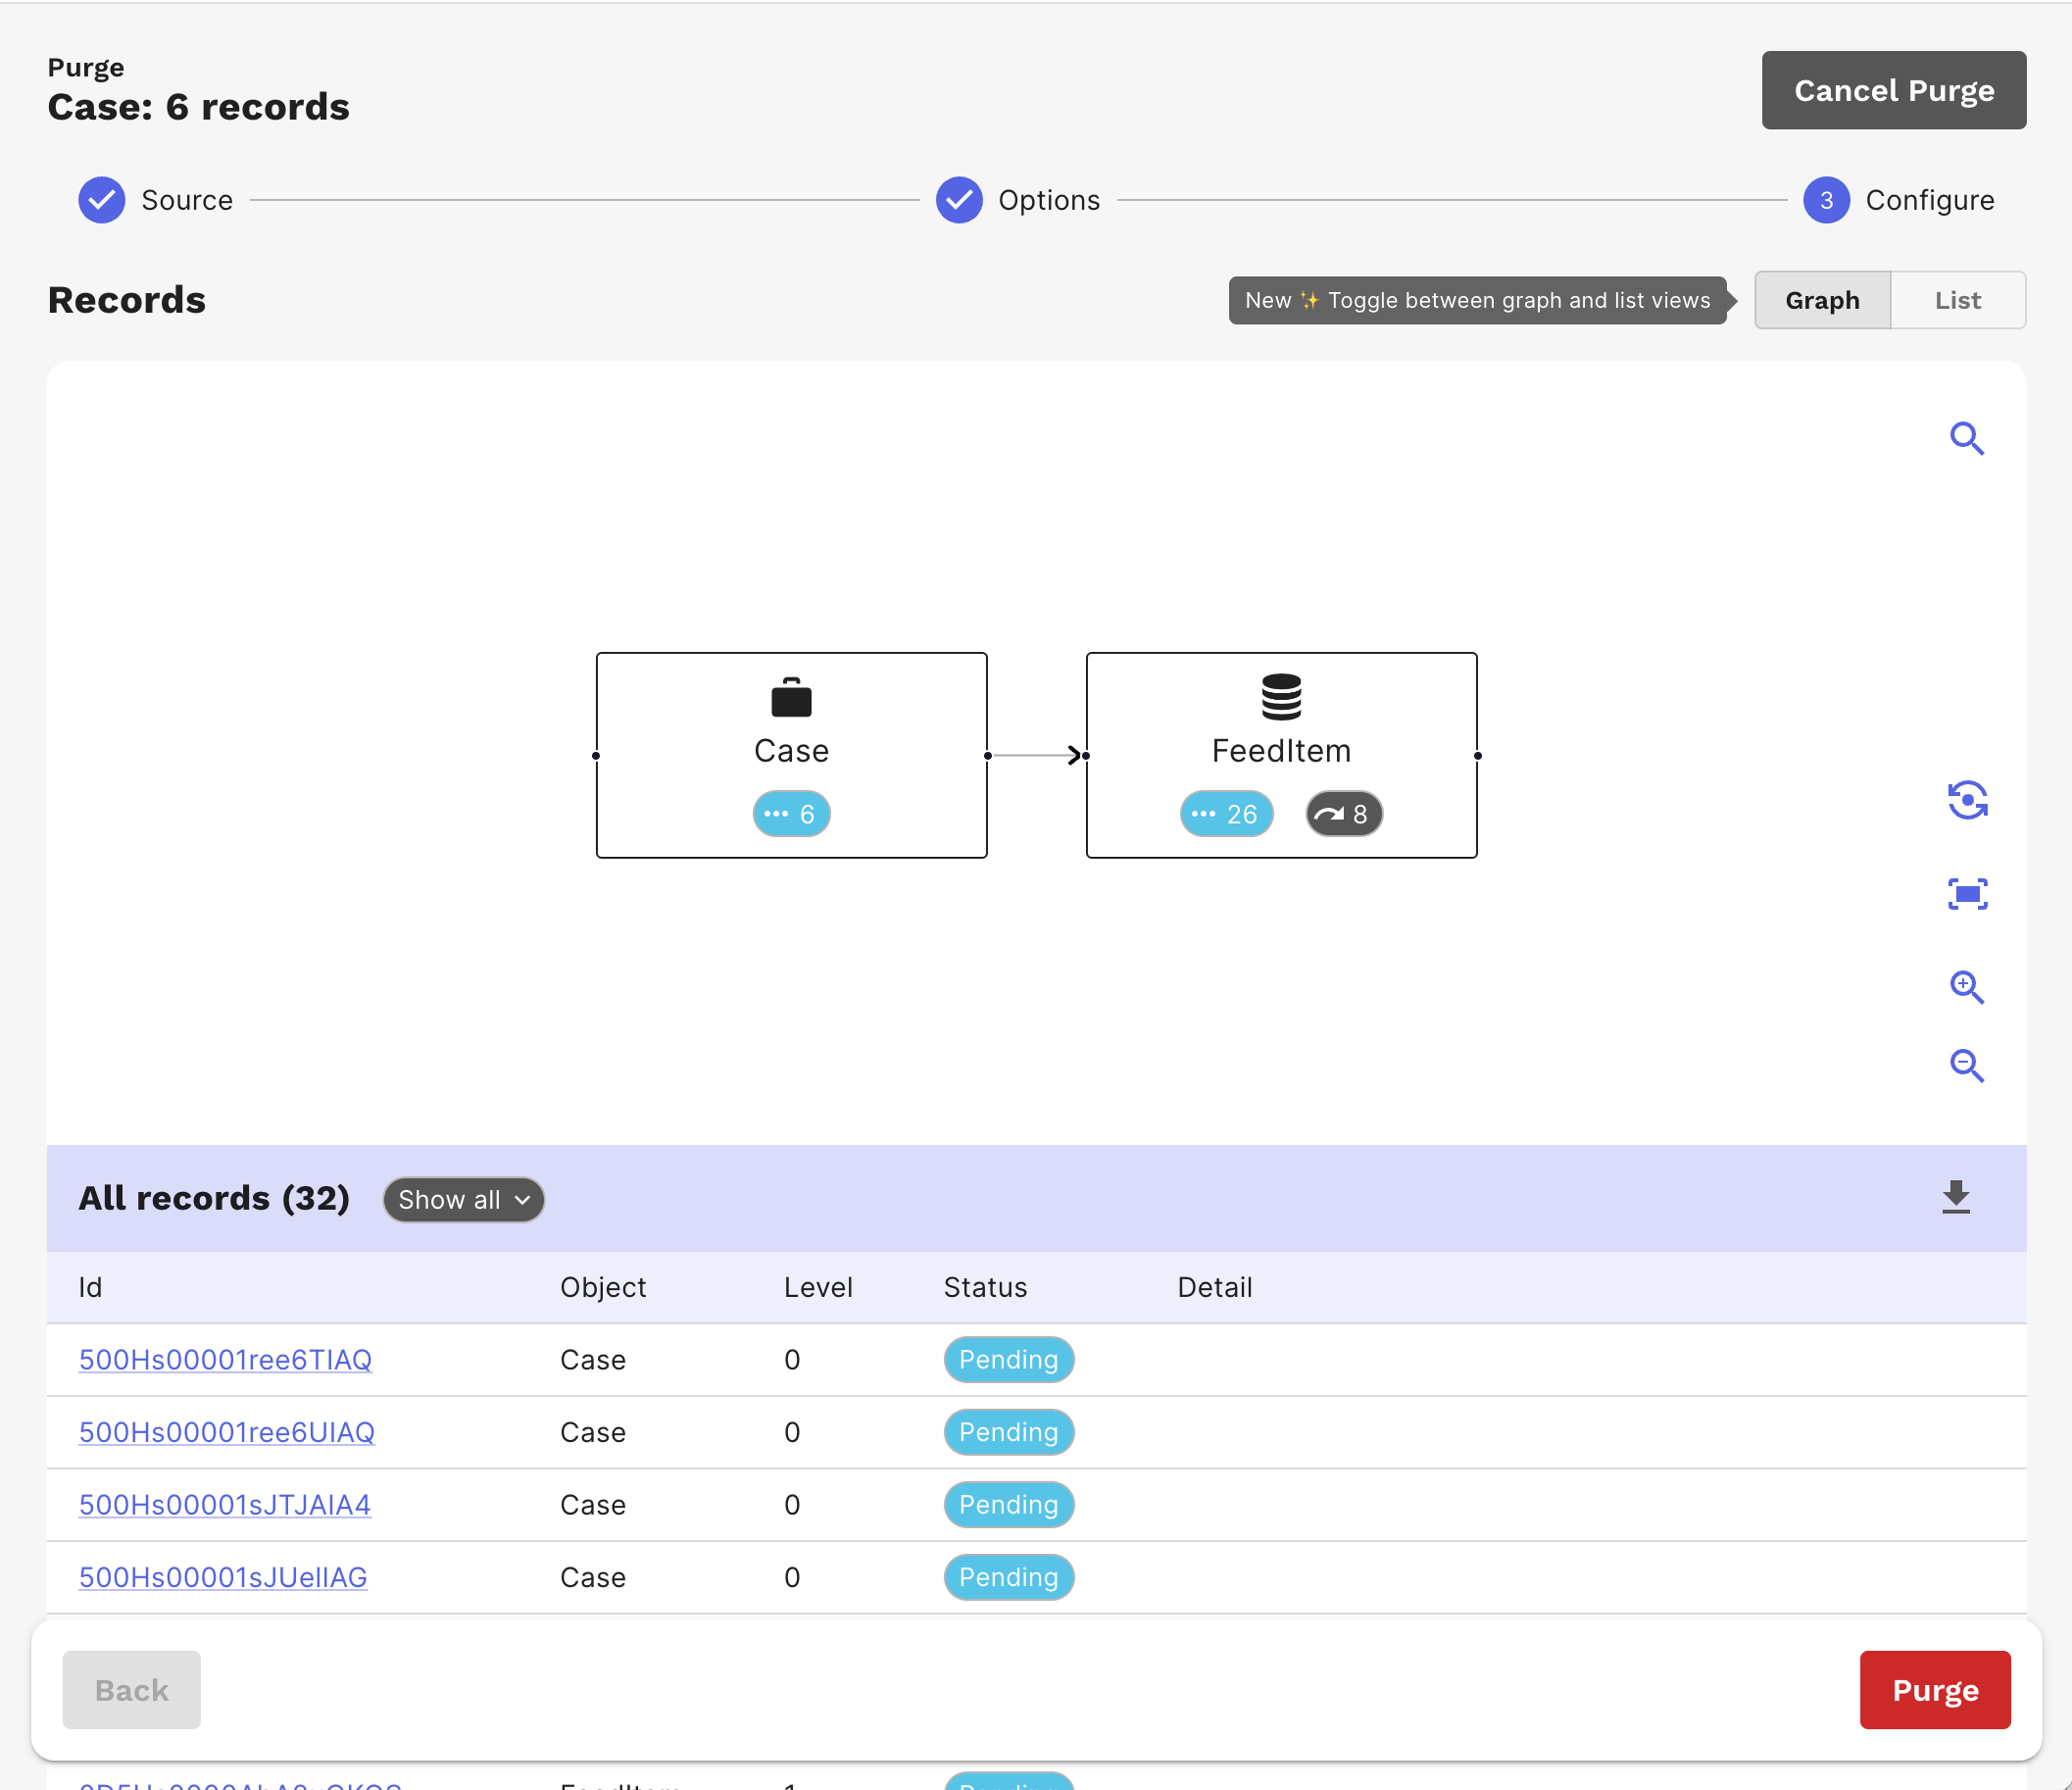
There is also a list view where you are presented with tools to configure a purge allowing you to skip records or include additional objects referenced by your purge data.

You may not want all objects that are referenced in the graph hierarchy. You have the option to skip objects that you don't wish to include. You can define additional referenced objects to include via the Relationships tab.
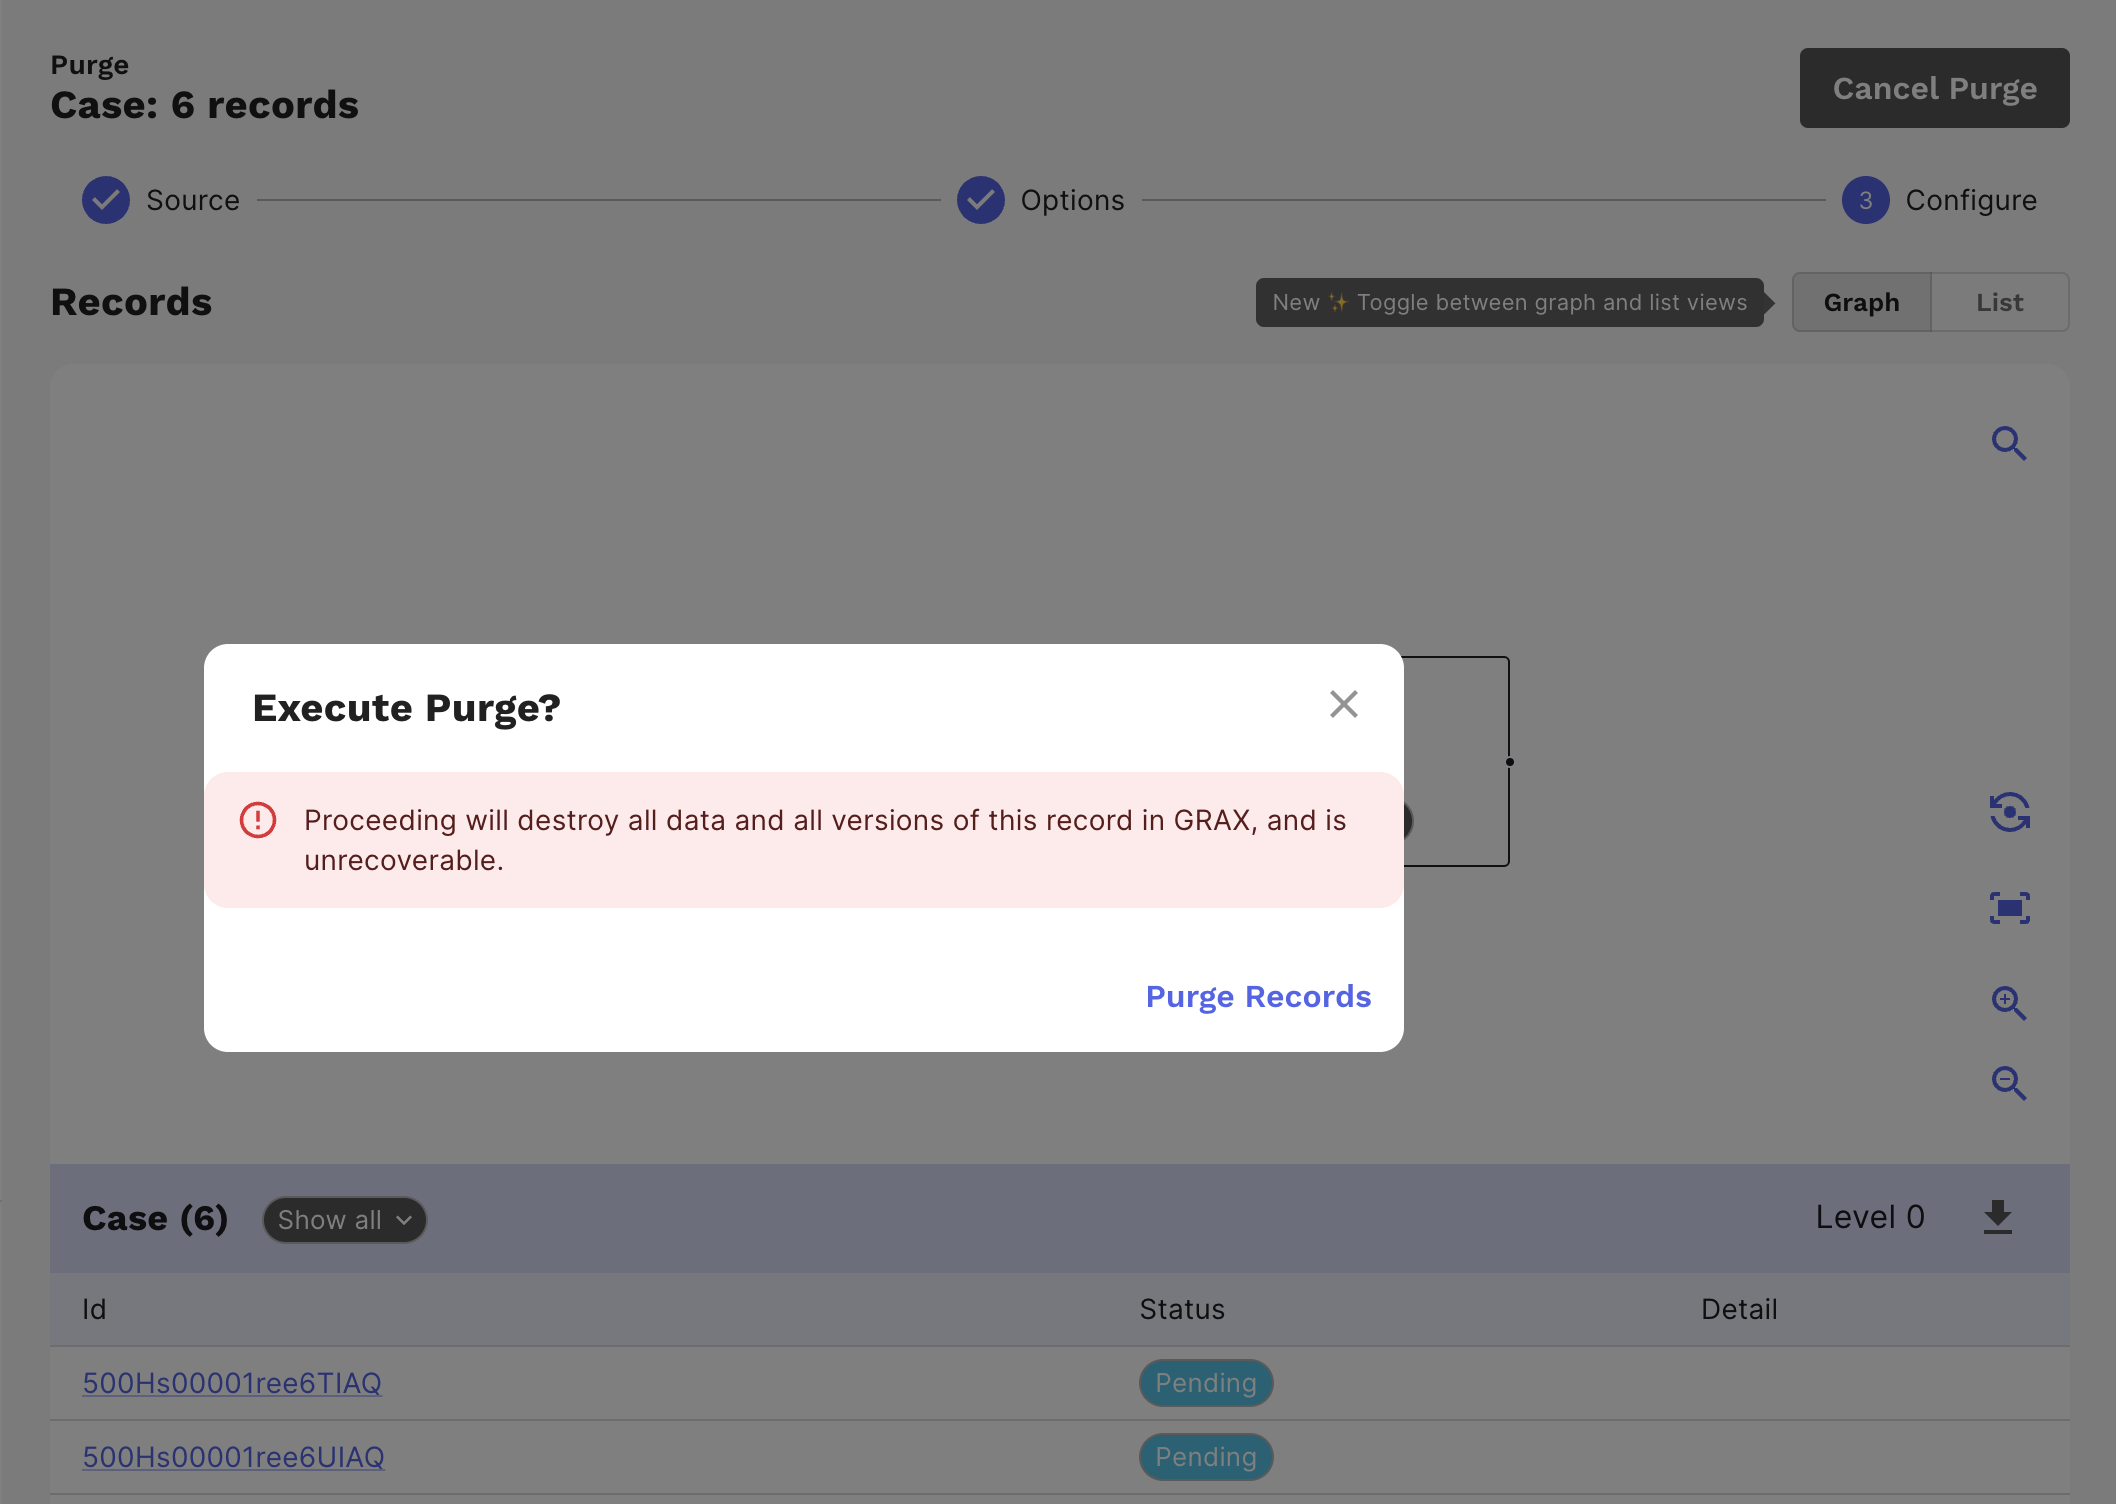
After clicking Purge, you are prompted to confirm.
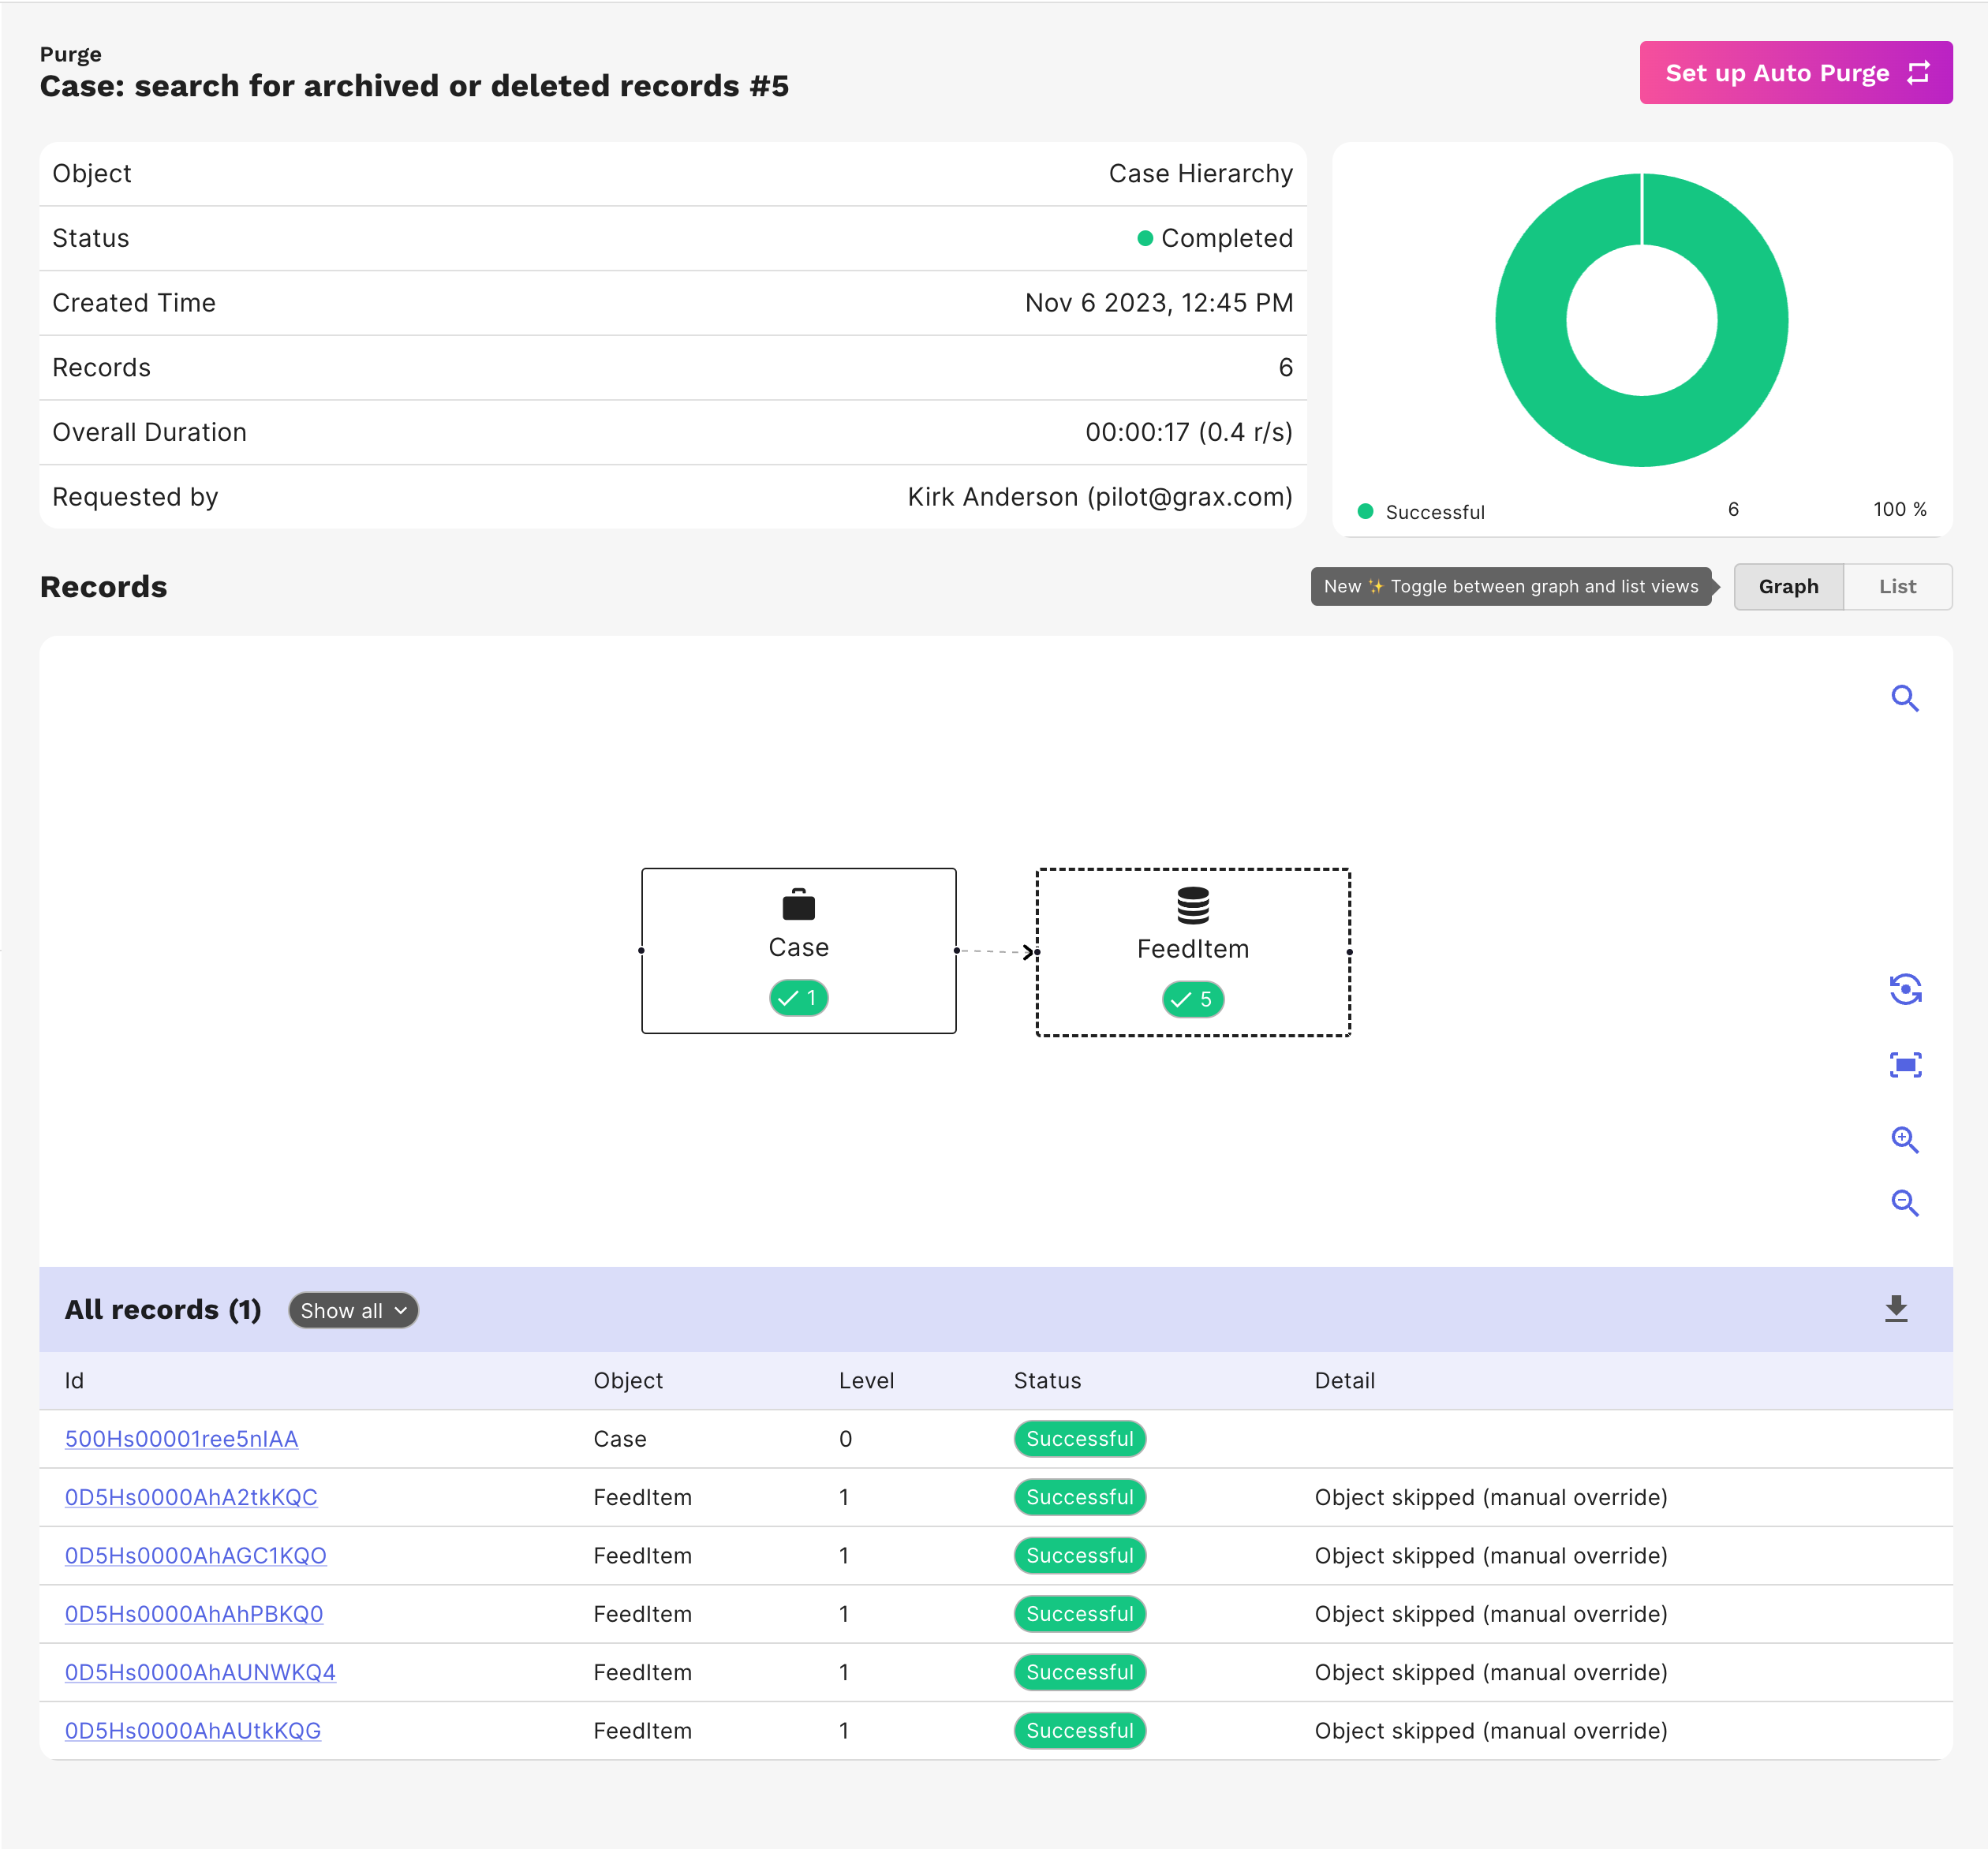
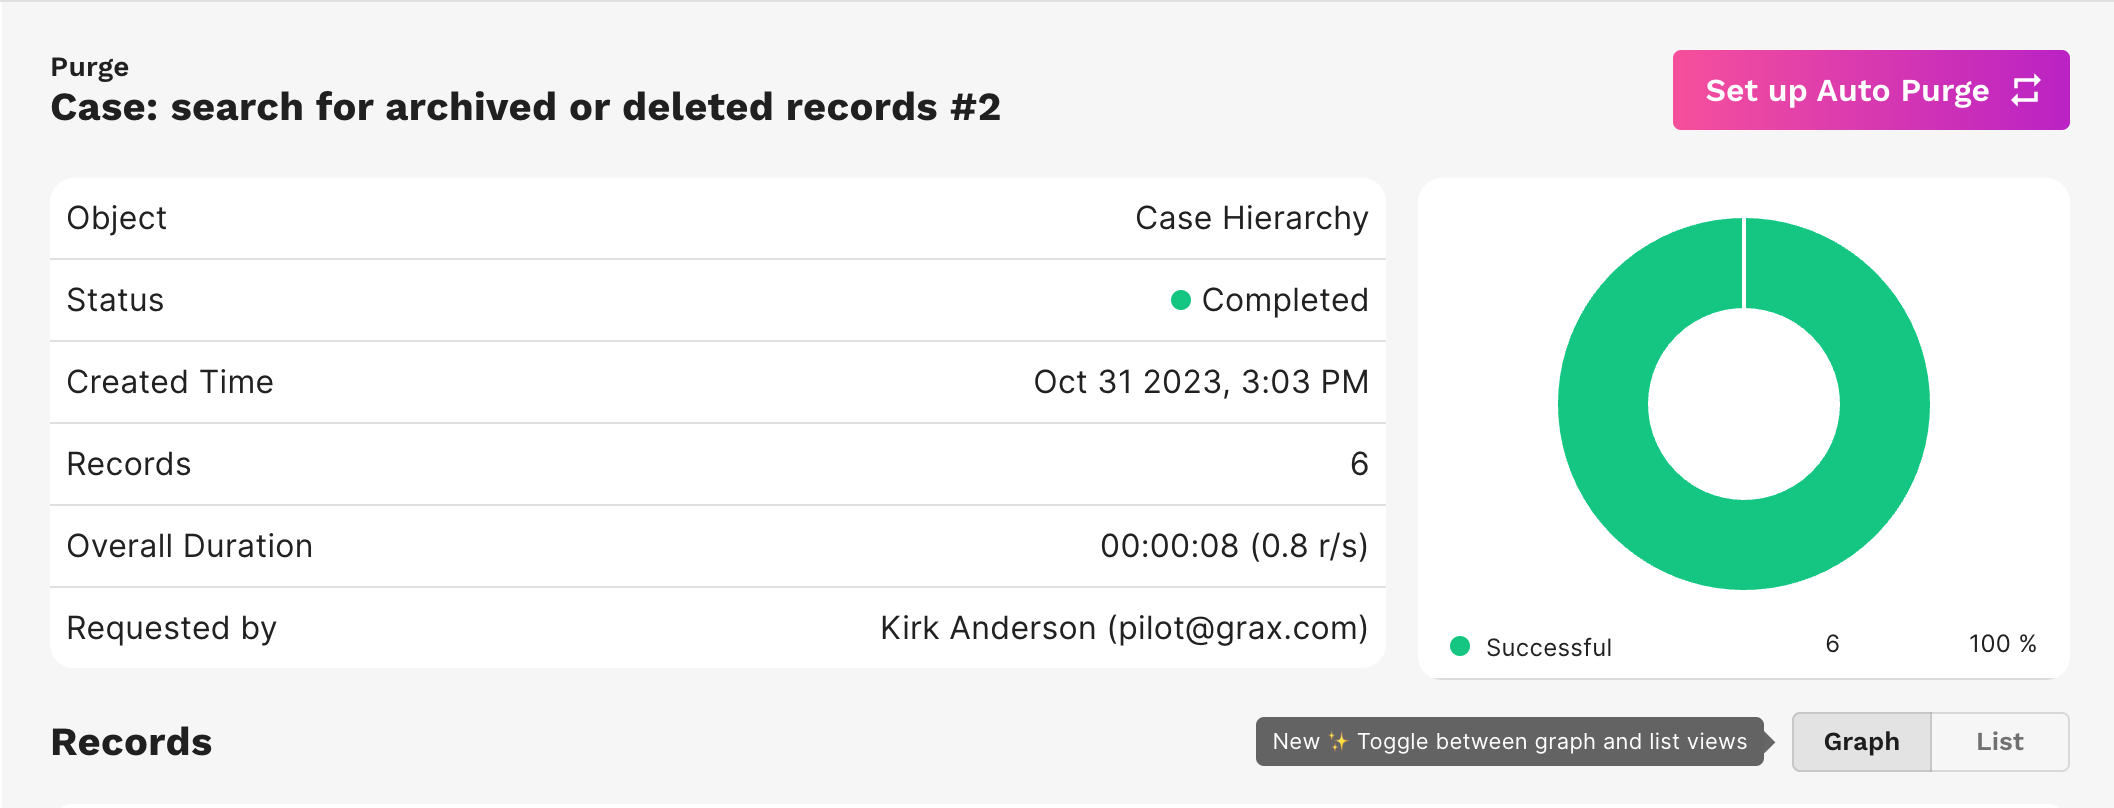
You will be presented with a progress indicator as the data is purged. Once complete, you will be presented with a summary of the purge. You can see the number of records purged, the number of records skipped, and the number of records that failed to purge. You can also see the number of records that were purged from each object.
Auto Purge
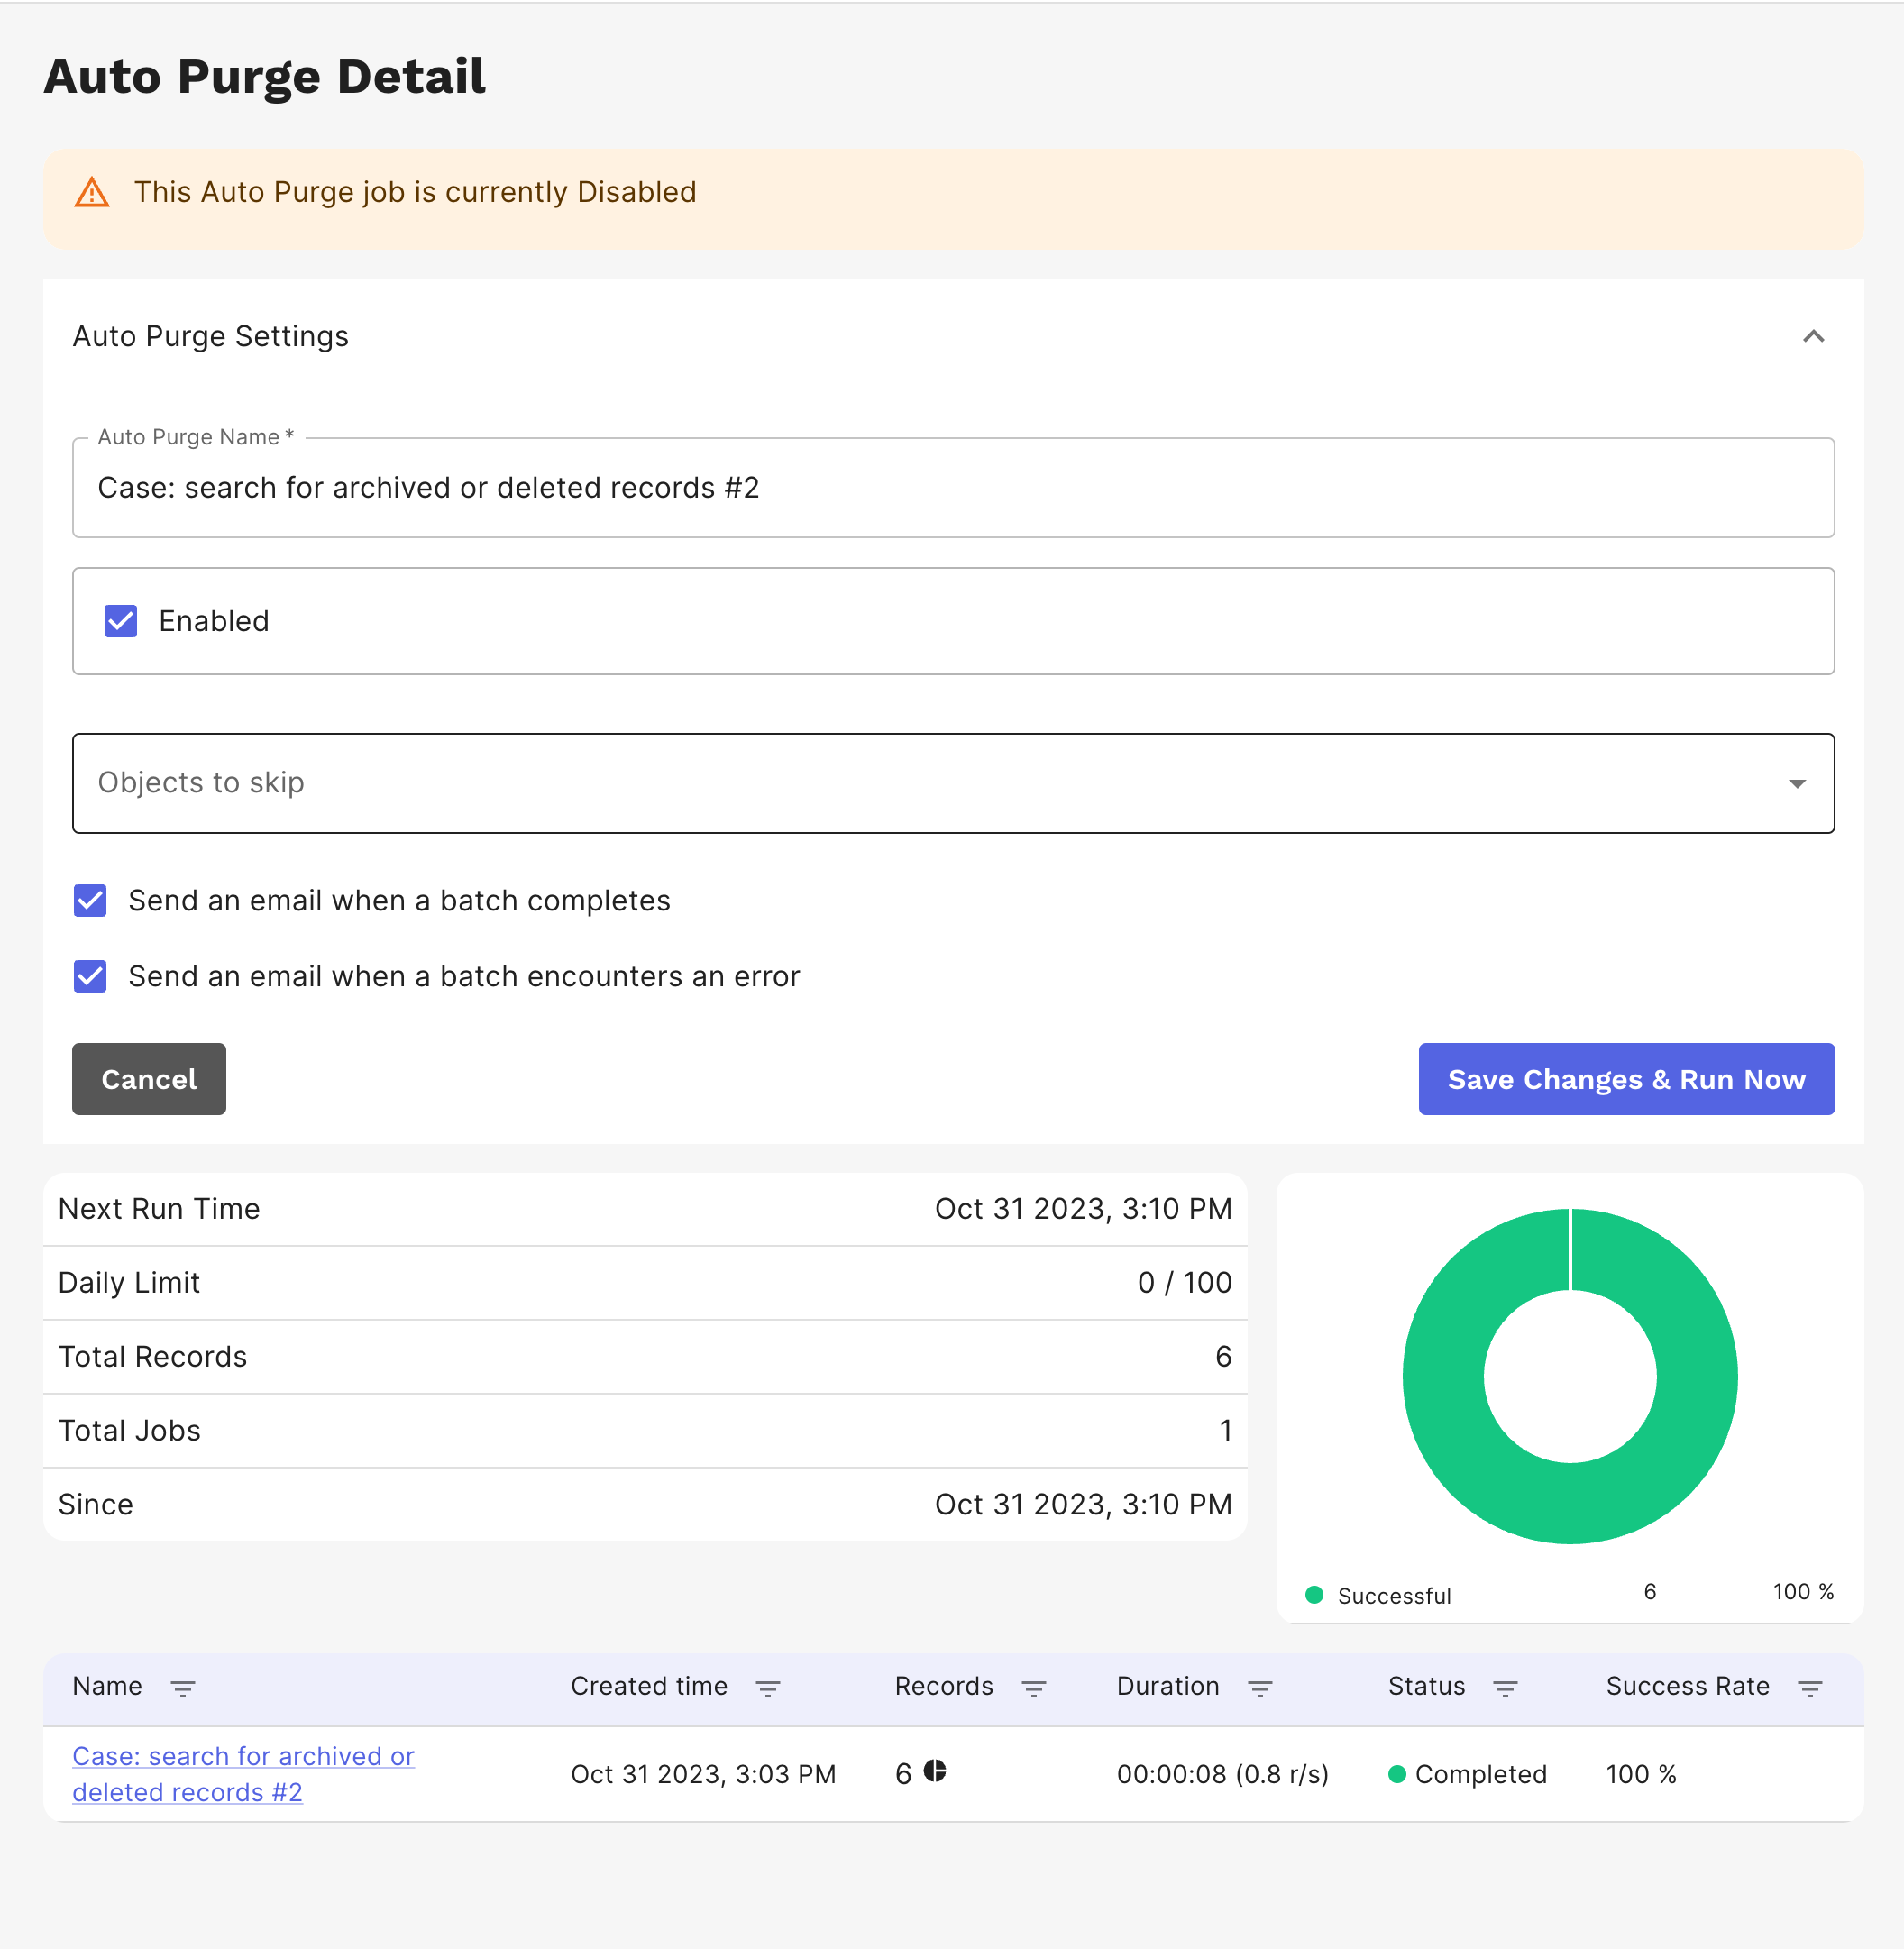
After completion of a purge job created from a search source, you can choose to set up an auto purge.
This takes you to the Auto Purge Detail page. You can rename the purge job, skip new objects, and enable it to run as an Auto Purge. You can also choose to receive an email notification when each purge batch is complete or if the job encounters an error.
Purge Jobs
Prior Purge jobs are shown in the Purge tab of the menu with detailed information on each. You can see the status of the job, the number of records purged, the date the job was created, the duration of the job, and the success rate. Clicking on the job name takes you to the job details page where you can see the records that were purged.
Auto Purges can be accessed from this page as well. Clicking on the Auto Purges tab shows you a list of all Auto Purge jobs.

Currently enabled and paused auto purge jobs are displayed on this page with details on when the job was last modified, the number of records purged, the date the job was last ran, and the next scheduled run. Clicking on the job name takes you to the job details page where you can see the records that were purged.
You can pause all auto purge jobs by clicking the Pause all Auto Purges button. You can also disable individual jobs by disabling the check box on the job detail page.
Global Search for Purged Records
Global Search now allows you to search for records that have been Purged (permanently deleted). To search for Purged records, select any Status other than "Live" and add a date filter configured with "Order By: Purged At" and select an appropriate time frame. The Purged records returned by Global Search will not contain any field data other than RecordID. The CSV download of Global Search results will now contain a purgedAt date column.
Updated 9 days ago