Auto Backup
With GRAX Auto Backup, you have a simple interface to backing up your entire Salesforce org.
- In Salesforce, create an integration user for GRAX with access to every object you want backed up
- In the GRAX Webapp, establish an OAuth connection to Salesforce with the integration user
- In the GRAX Webapp, enable the Auto Backup advanced feature module
- In the GRAX Webapp, use the Auto Backup dashboard to see progress on backing up your entire org
GRAX is now automatically and continuously backing up your entire org, with no objects to select or schedules to configure. Please review our permissions documentation to ensure that no data is lost or missed.
Auto Backup Toggle
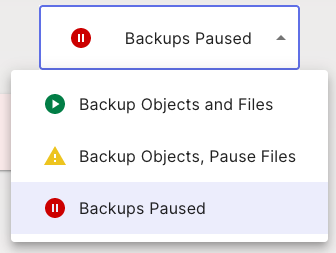
To control the behavior of Auto Backup, you have simple options:
- Backup All Objects
- Backup All Objects Except Files
- Backup Nothing
The selector on the related dashboard can be used to select an option:
How It Works
Once the integration user is connected, GRAX:
- Periodically describes all the objects and schema in your org and adds them to the Auto Backup system.
- Starts periodic jobs that pick an object and back up everything new or changed since the last backup.
When setting up Auto Backup for the first time, GRAX begins to back up object data from the oldest modified to most recently modified in Salesforce. After some time, all the initial object data is backed up and Auto Backup begins periodically capturing the most recent data changes.
Disabling an Object Backup
There are two methods for excluding objects from backup, one on the Salesforce end, and one on the GRAX end.
Preventing backup by Salesforce permissions
Auto Backup is built to back up all possible Salesforce data by backing up every object the Integration User has permission to view. This design lets you manage what objects are backed up with standard Salesforce permissions and automatically backs up new custom objects or fields without the need to modify GRAX settings. If you don't want GRAX to back up an object or field because it isn't restorable or isn't valuable to your data strategy, deny access to the object or field for the GRAX integration user.
Excluding objects from Auto Backup in GRAX
On the Settings page, under General Settings, there is a field titled Auto Backup Exclusions that can be filled with a comma-separated list of object API names to be excluded. In subsequent backups, these objects will be ignored by Auto Backup. Note that if an object has already been backed up, it will still appear in the Objects list with a corresponding Excluded status.
Monitoring and Dashboard
The Auto Backup Dashboard within the GRAX webapp is the primary point of reference for related metrics and statuses. This dashboard includes information related to how much data has been backed up by GRAX in total, the time frames for which backup safety can be assured, and how much work Auto Backup has completed historically. The dashboard also contains statuses, explained below:
- "Backfilling": GRAX is backing up the history of your org, and at least one object has never been fully backed up
- "Behind": All objects were fully backed up previously, but GRAX has fallen behind since on at least one object
- "Running": GRAX is operating as expected and up to date on all objects within expected SLA
- "Paused": Auto Backup has been paused by a user for records, files, or both
- "Error": An error has been encountered by the app while backing up data
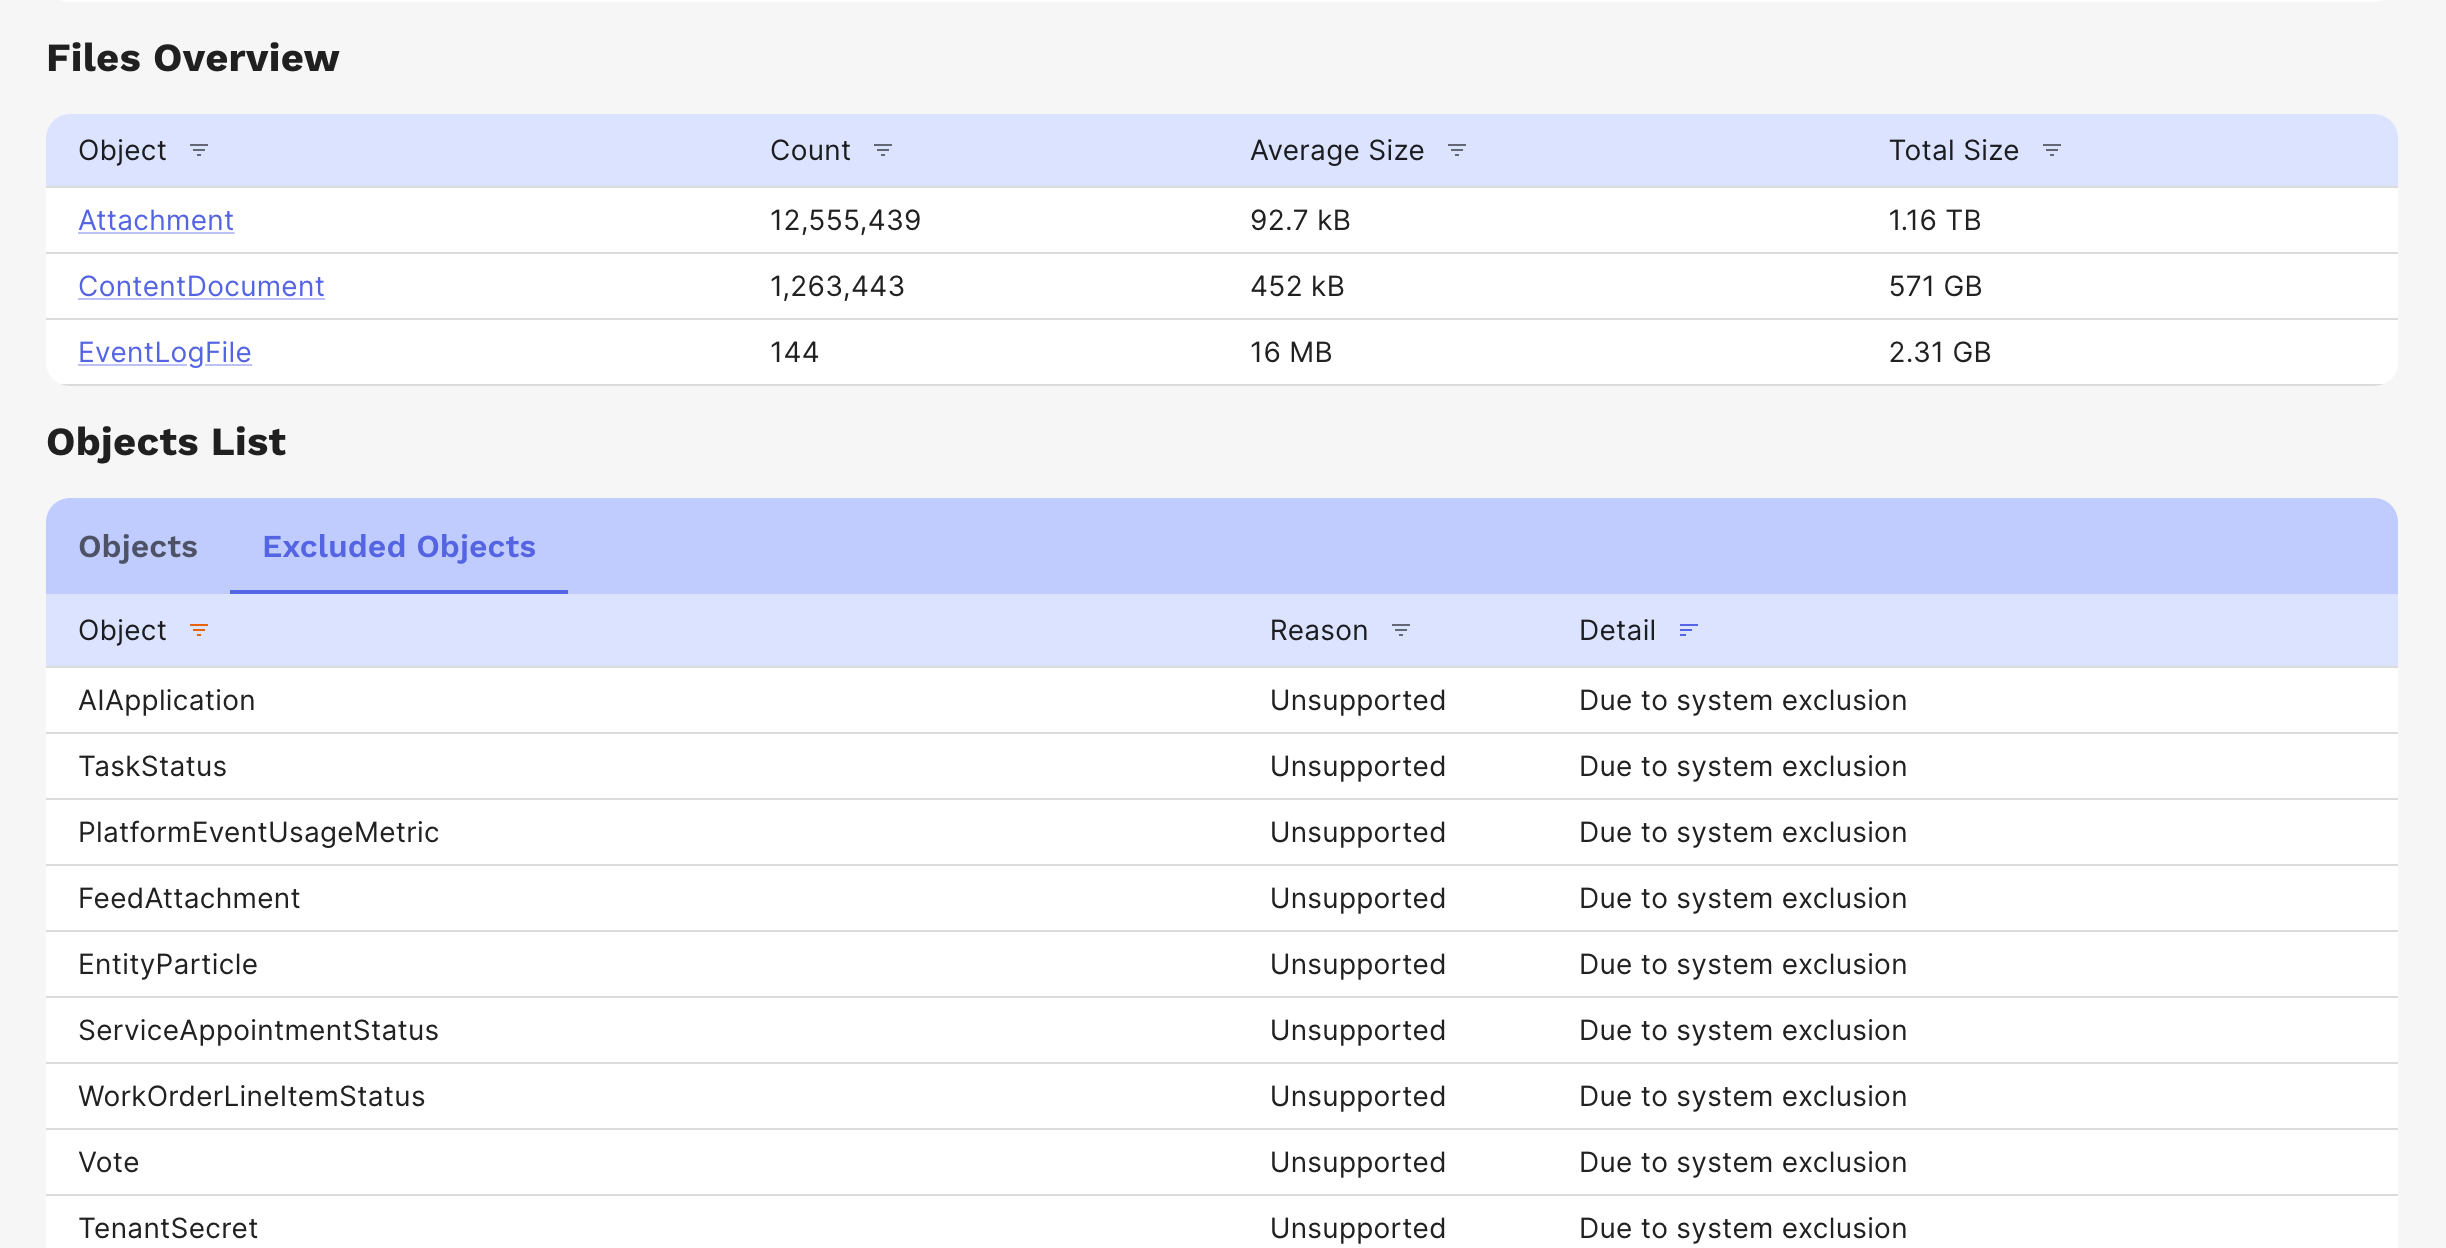
Alongside this table is another containing all objects that aren't being backed up, like unsupported objects, objects for which GRAX has lost permission to sync, and explicit exclusions set by the user.
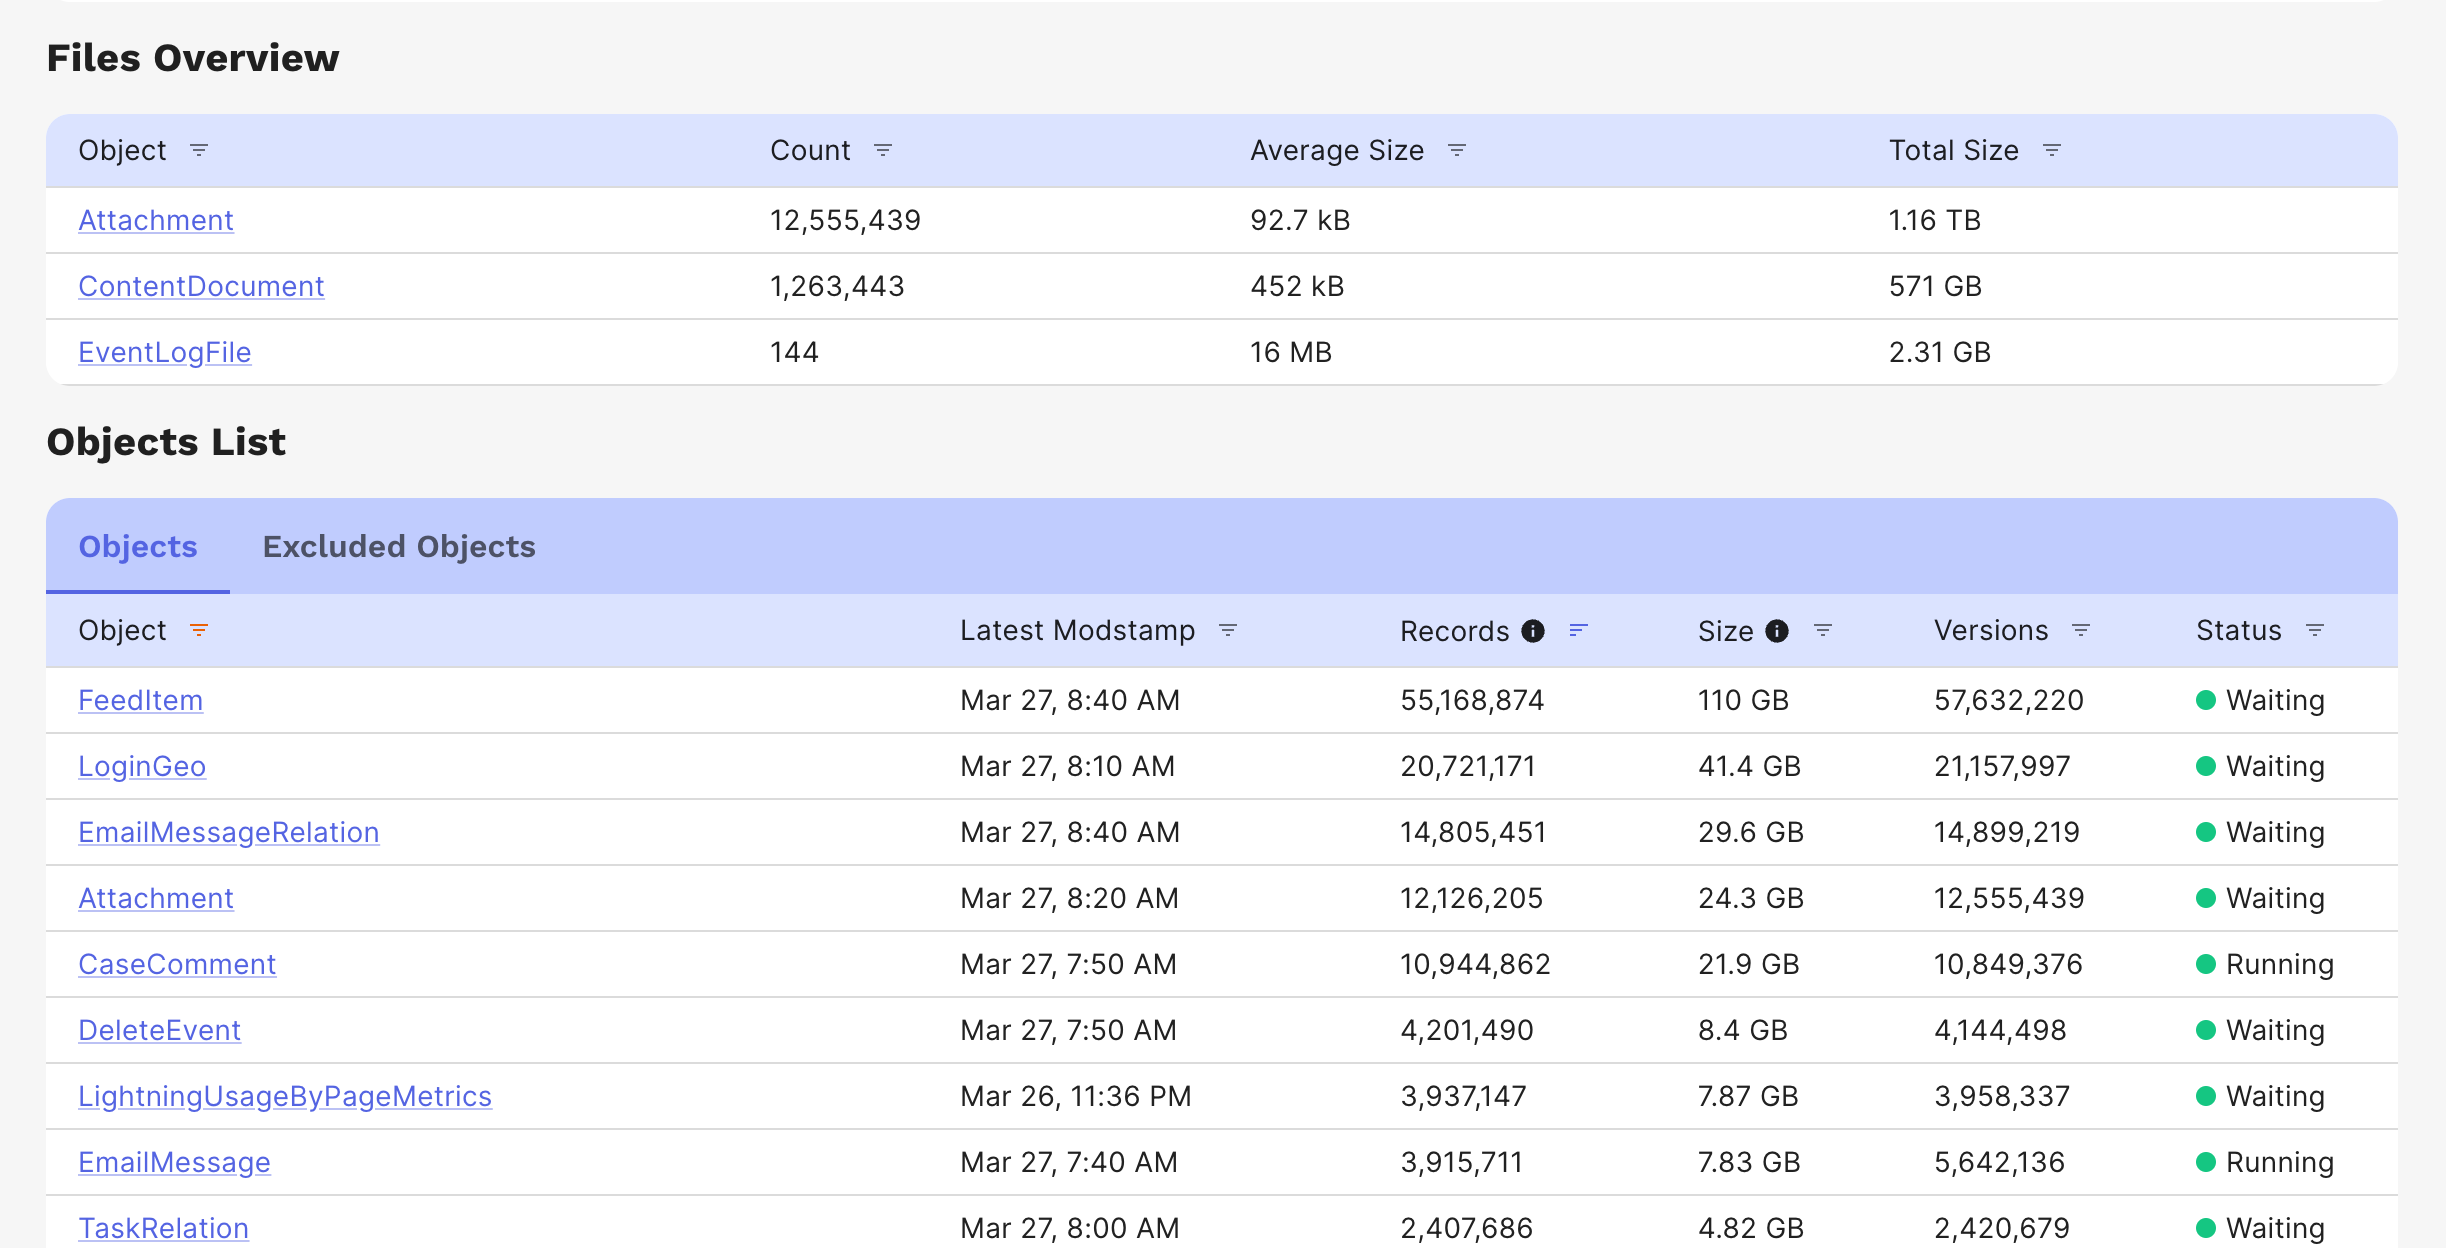
The dashboard also contains a list of files and objects being backed up along with record count and version count. Objects can have the following statuses:
Waiting: object is caught up and waiting for new dataRunning: object is nearly caught up and backing up new dataBackfilling: object is still backing up initial dataPaused: object isn't being processed because Auto Backup has been turned offExcluded: object isn't being processed because it has been explicitly excluded by the userUnavailable: object isn't being processed because GRAX has lost access to the object in Salesforce
If there are errors currently being encountered by the system, a status of "Error" appears for Auto Backup as a whole as well as the specific object that the error is present on. A banner also appears on the dashboard with a link to the error summary page, where a CSV can be downloaded with the full stack traces if necessary.
The Dashboard offers several different views to highlight the specific data of interest.
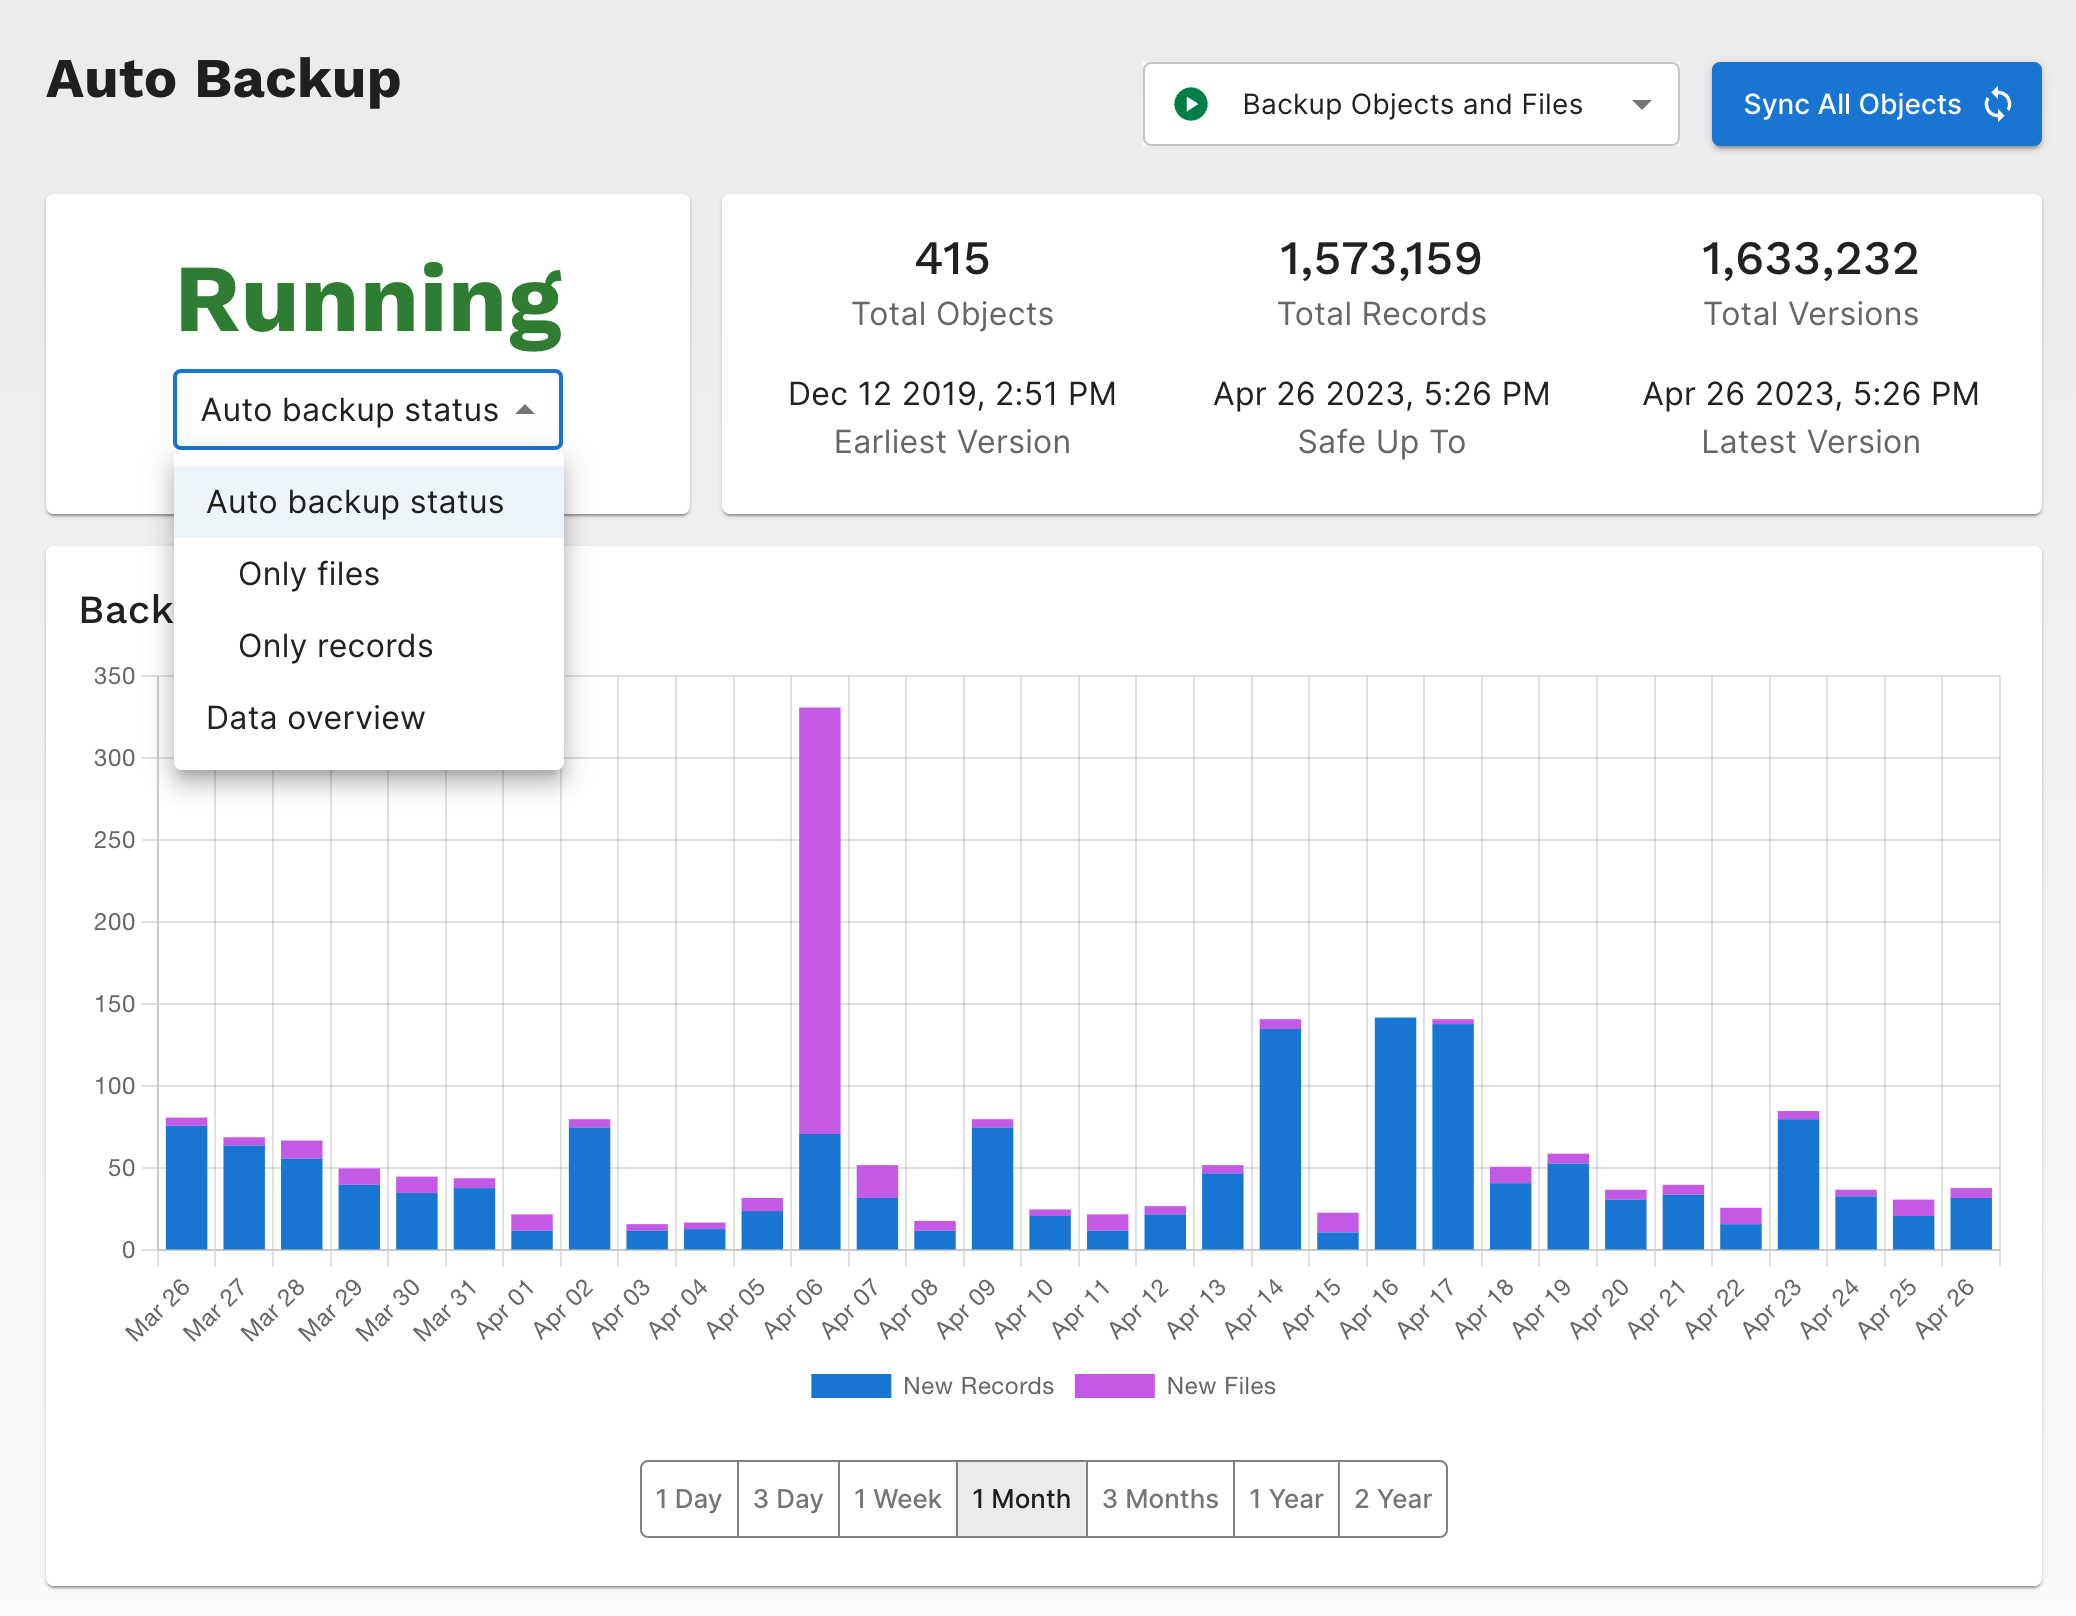
Those views are:
Auto backup StatusOnly filesOnly recordsData overview
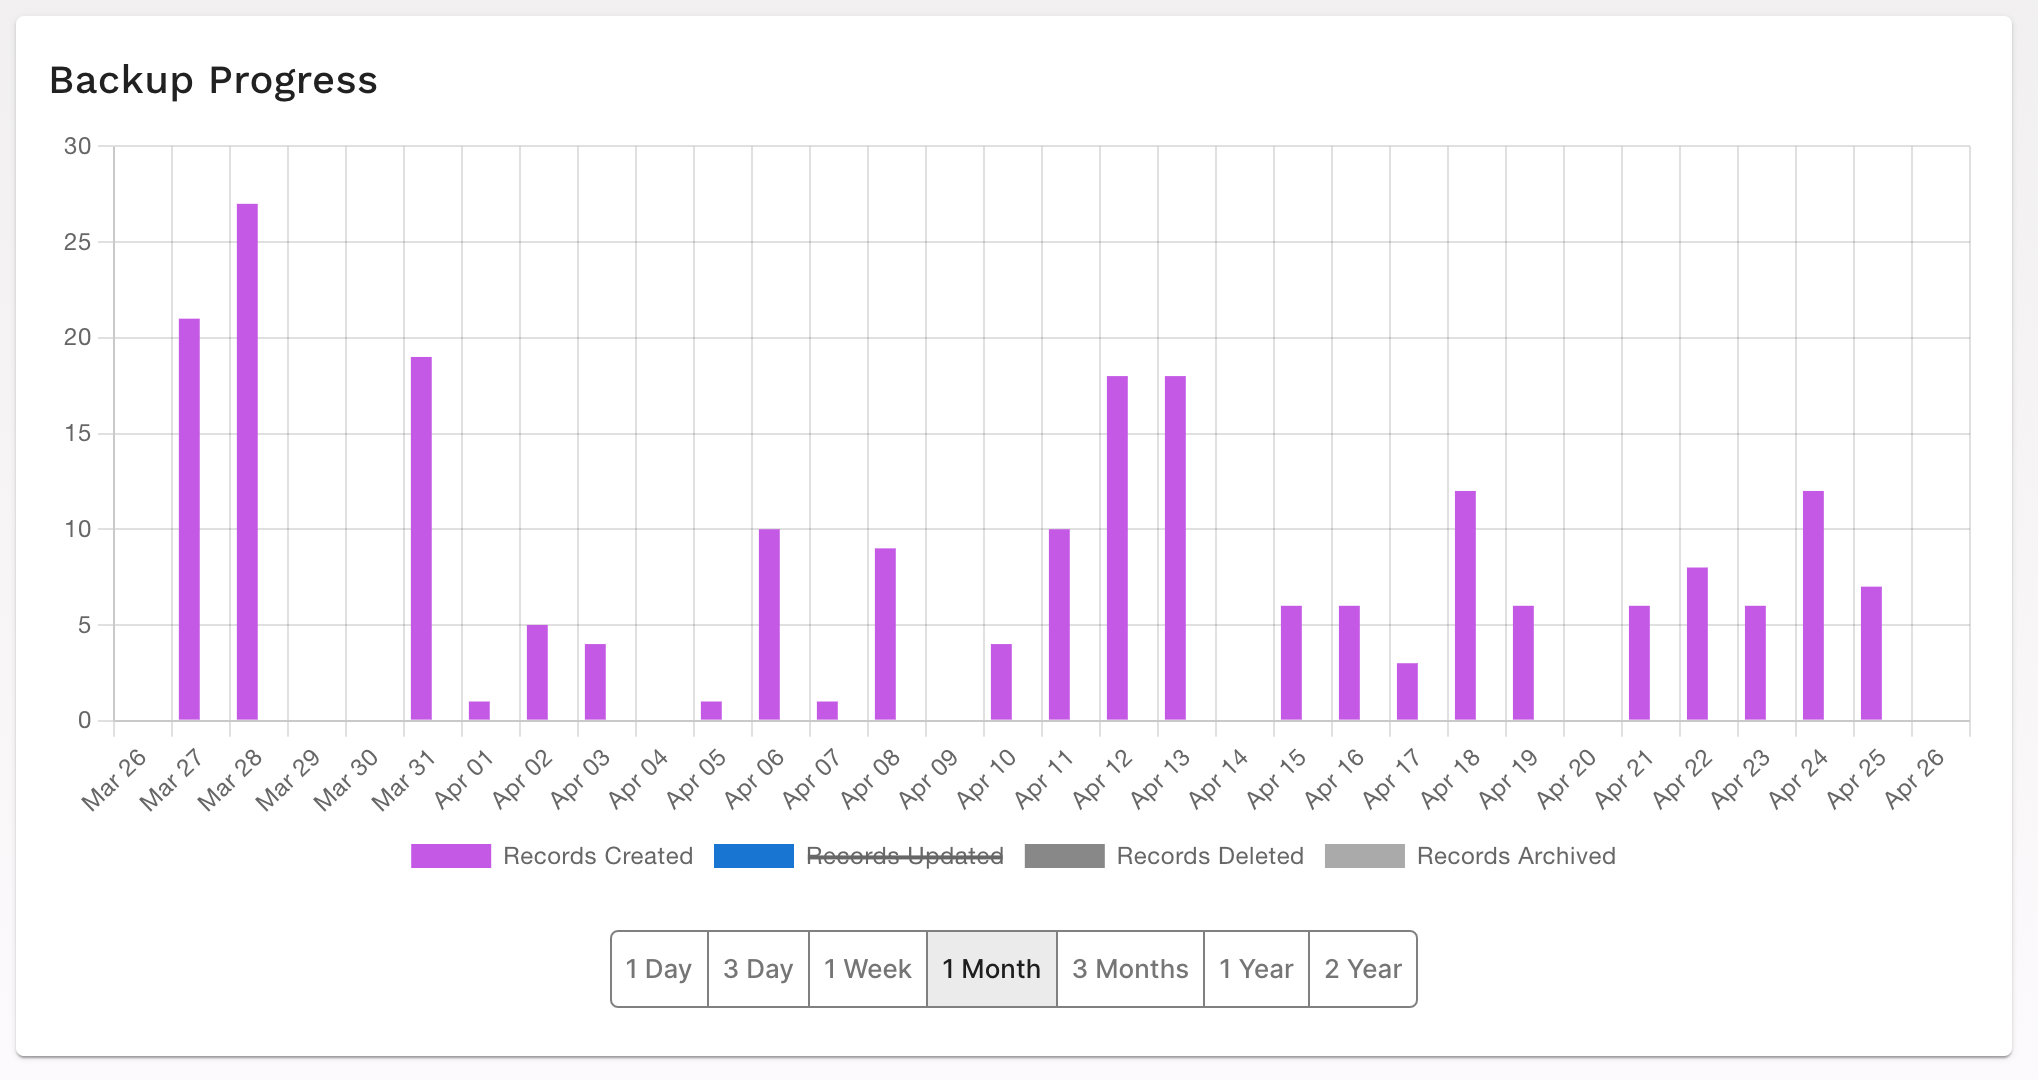
Data overview provides a comprehensive insight into GRAX by allowing users to view created, updated, deleted, and archived records.

Within any view, users have the ability to enable or disable the display of each data type by clicking on the data type in the dashboard legend.
Updated 9 days ago