Point-in-Time Restore
The GRAX Point-in-Time Restore feature gives users the ability to update selected records to an earlier state which was backed up by GRAX. This is crucial for users who have a catastrophic event and need to restore records but it isn't the only challenge Salesforce Data Administrators face. What about a data corruption that only affects a few fields, or one that has escaped the notice of the team for a few days or weeks? How would the administrator mass restore thousands, or a hundred thousand records, to a version of this record from a few weeks ago?
This is where GRAX Point in Time Restore is effective. With GRAX Point in Time Restore, administrators have the ability to restore individual field level changes, or multiple fields, to any Point in Time in the history of the GRAX Backup.
Execution of a GRAX Point in Time Restore has a few simple steps.
- Find a collection of Salesforce records to restore
- Select a Point in Time to restore this data to
- Select which fields are to be restored
- Review and launch
- Review and retry if errors exist
To configure a Point in Time Restore:
Restore in the GRAX Console
Open the GRAX Console and navigate to the Restore tab.
The GRAX Console
The GRAX Console is a completely new user experience for GRAX customers. Contact GRAX Support if you need this to be enabled in your deployment.
The Restore Home page shows a list of all the previously configured Restore Executions and the different states that they can be in. This list doesn't include any Restore Executions that have been configured and launched from the GRAX Package, as these are viewed through the Restore Log in the GRAX Package.
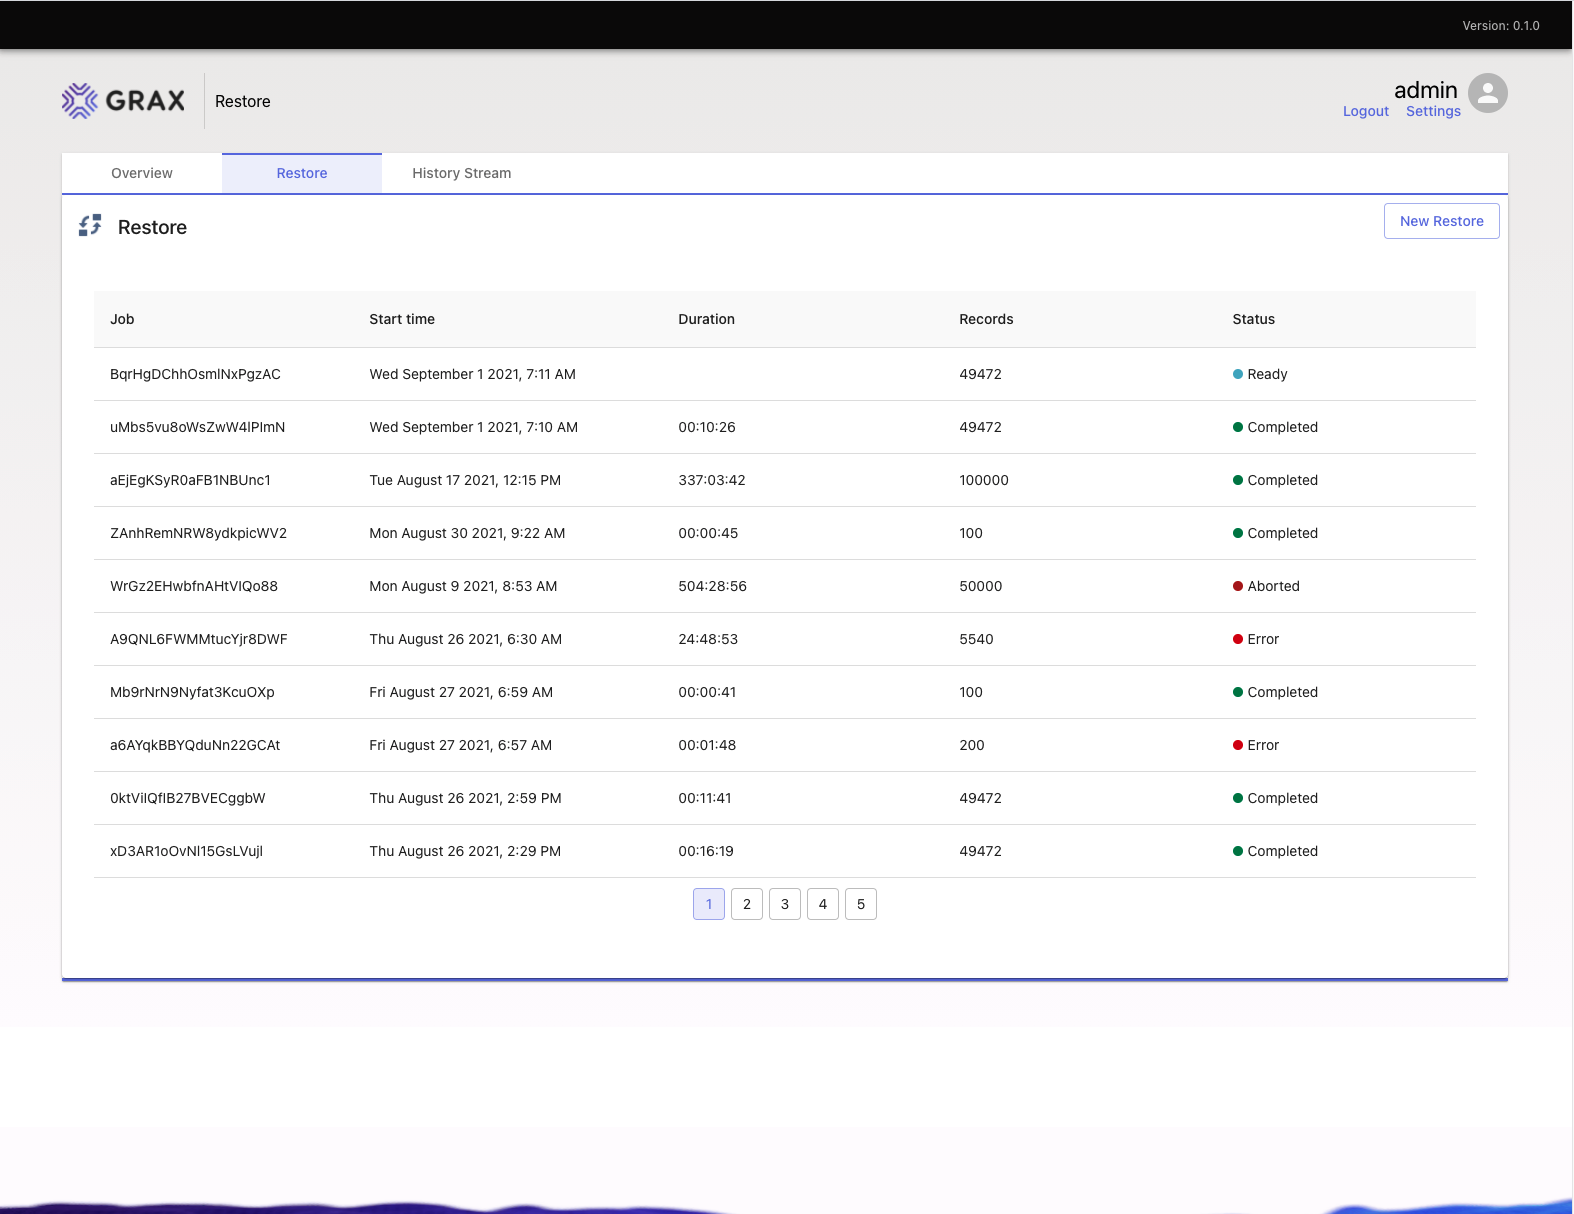
Possible Restore Status
GRAX Point in Time Restore Executions can be in a number of different statuses
| Status | Description |
|---|---|
| Pending | A Restore execution is in a pending state if further configuration is required before the execution can be launched. |
| Ready | A Restore execution is Ready when it has loaded data from the Report seed and validated which records of this data set exist for the specified Point in Time. |
| Queued | A Restore that a user has submitted but that is waiting for a previous restore execution to complete. |
| Running | The Restore Execution is currently running. \n\nThere can only ever be one running Restore Execution at a time. |
| Completed | The Restore has completed with zero errors reported back. |
| Aborted | The Restore has been aborted by a user. |
| Error | The Restore has completed but some (or all) of the records were unable to be restored due to an error. |
Create New Restore Execution
The Restore process starts with the creation of a new Restore Execution. From the Restore tab, click the New Restore button. This launches a small guided process that takes you through the steps to create and launch a Restore Execution.
Select Data
To select the records that are going to be restored, create a report in Salesforce that
- is for a single object only
- contains (at least) the record ID as a column
- doesn't have any cross object joins, grouping or summary information
- is stored in a folder that the GRAX Integration User has access to
GRAX Reports
For the report to be visible in the GRAX Console it must be saved to a folder with the name GRAX in it, or to have the name GRAX in the Report Title. The report also needs to be saved to a location that the GRAX Integration User has access to.
We recommend that you create a specific folder, "GRAX Reports" that you use to keep GRAX specific Salesforce reports in.
This report is now visible in the drop down list as a seed for the Restore.
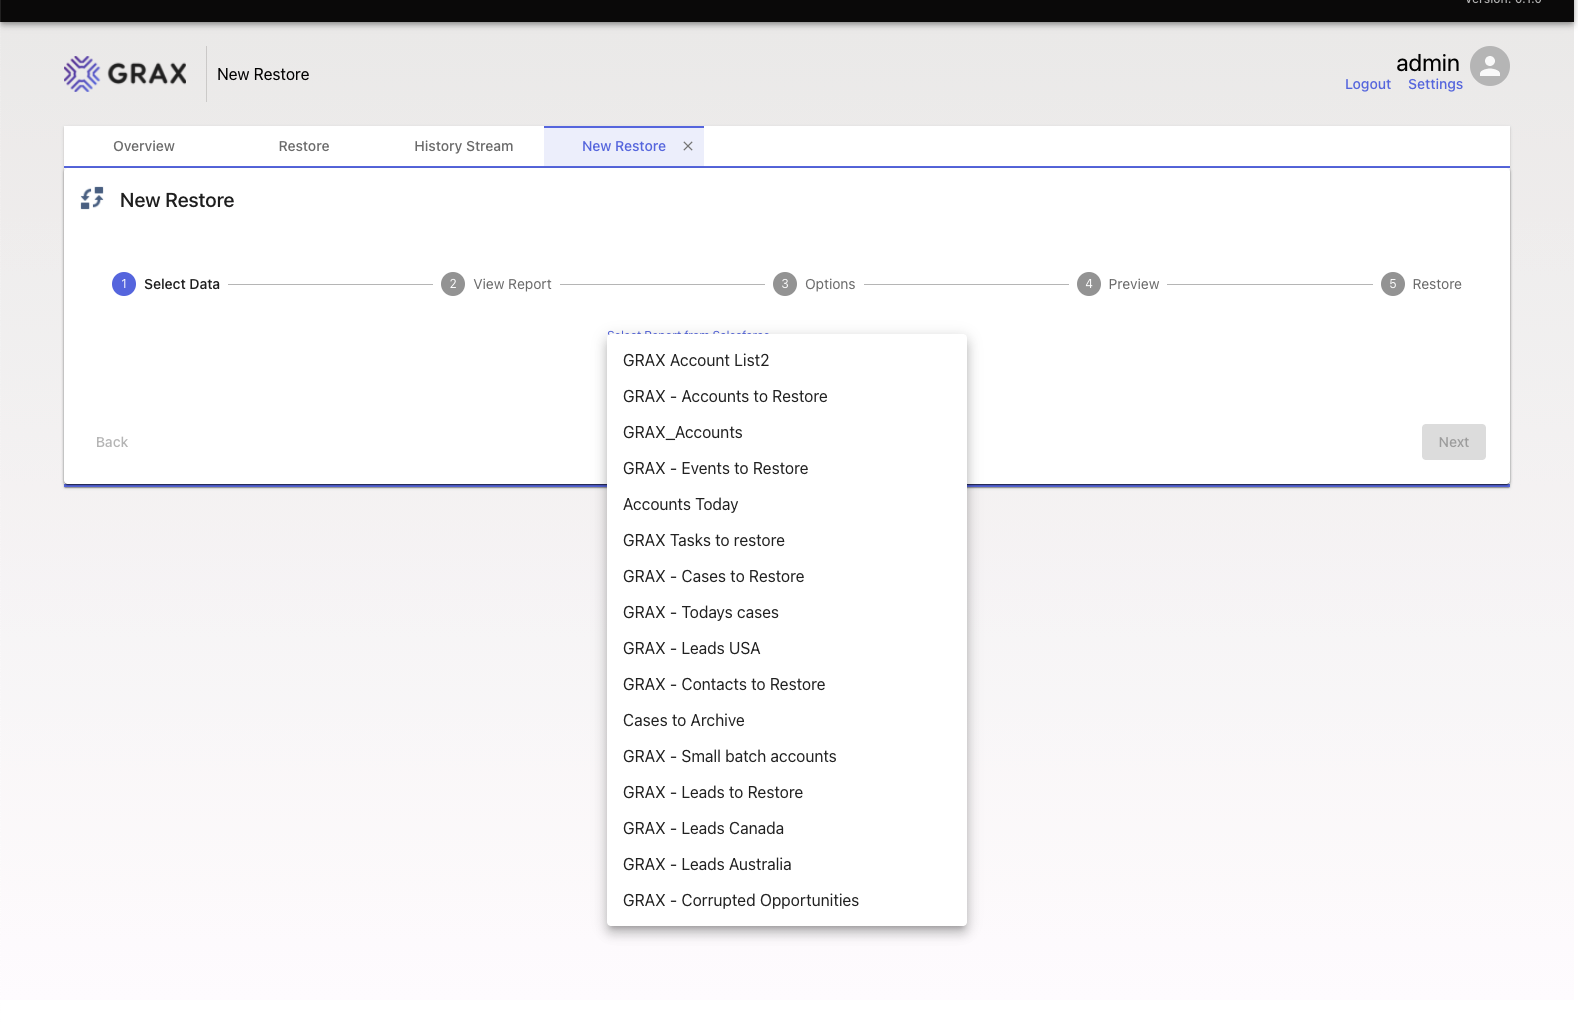
This provides the list of Salesforce record IDs that need to be restored. it's also possible to use the Search capability in the GRAX Console as a Restore Seed as well.
100k Record Limit using Reports
If you seed using the Salesforce Report, there is a limit of 100,000 records that can be loaded into the GRAX Console. If GRAX identifies there are more than 100,000 records in the report, you won't be able to proceed.
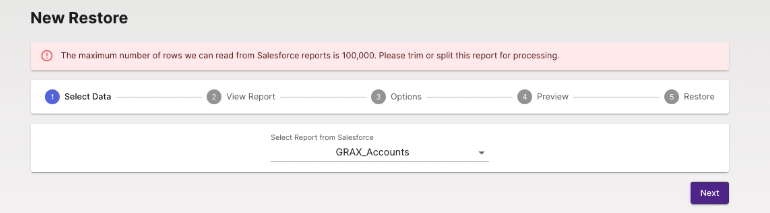
GRAX first takes a few seconds to analyze the Salesforce report to make sure there aren't more than 100,000 records. If there are too many records, the report needs to be reduced in size before continuing.
View Loaded Data
Once you have selected the Restore Seed you can preview the data set and then move to configuration of the Restore.
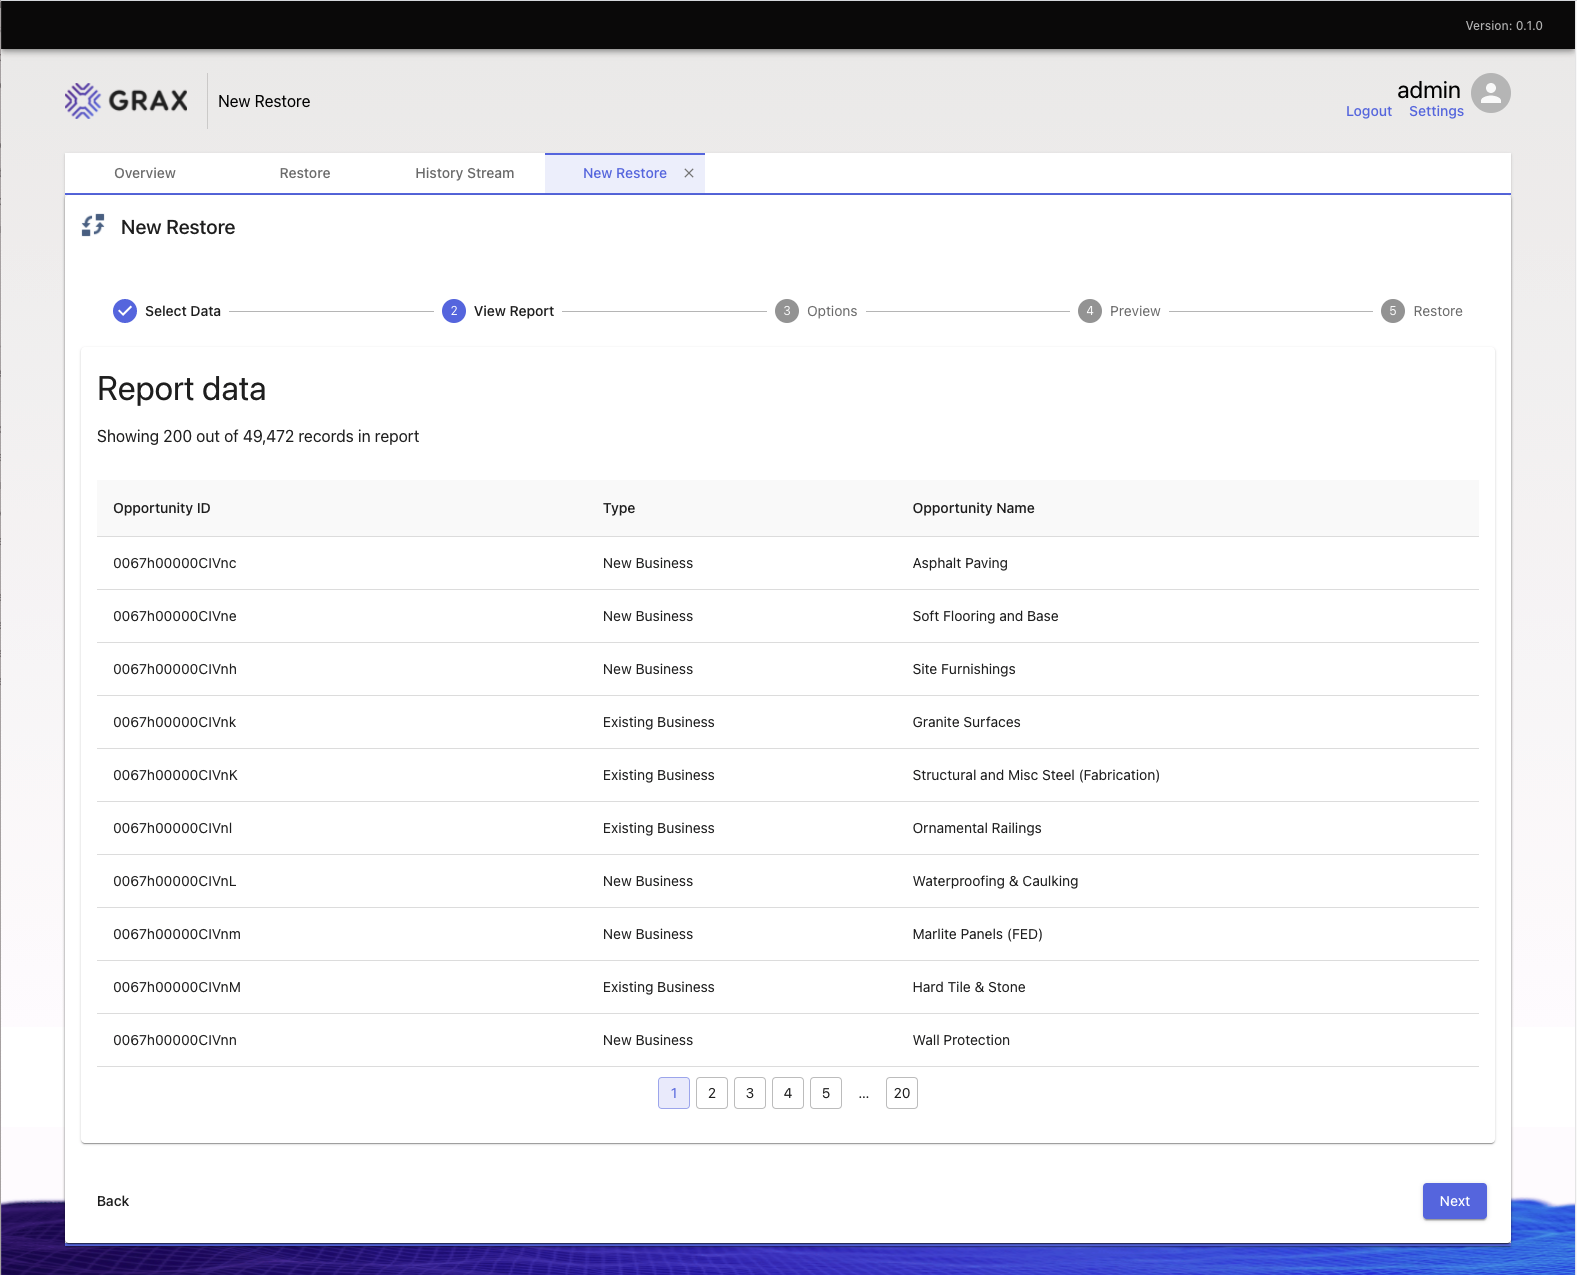
A preview of the data contained in the Salesforce report
Execution in Pending State
If you close the tab here you can return to it by clicking on the newly created Restore Execution in the Restore Home tab which is in the "pending" state.
Cancelling a Restore Execution deletes it from the list on Restore home.
Select Restore Options
GRAX Point in Time Restore allows the user to be specific about which data they wish to restore, allowing a partial update of a record to a new version. This can be particularly useful when a process has been incorrectly updating data, while at the same time users have been working with these records.
Choose Restore Fields
Fields need to be added to the Restore by selecting and moving the fields within the filtered dueling picklist control. To restore all fields, select all fields by moving them into the right hand list.
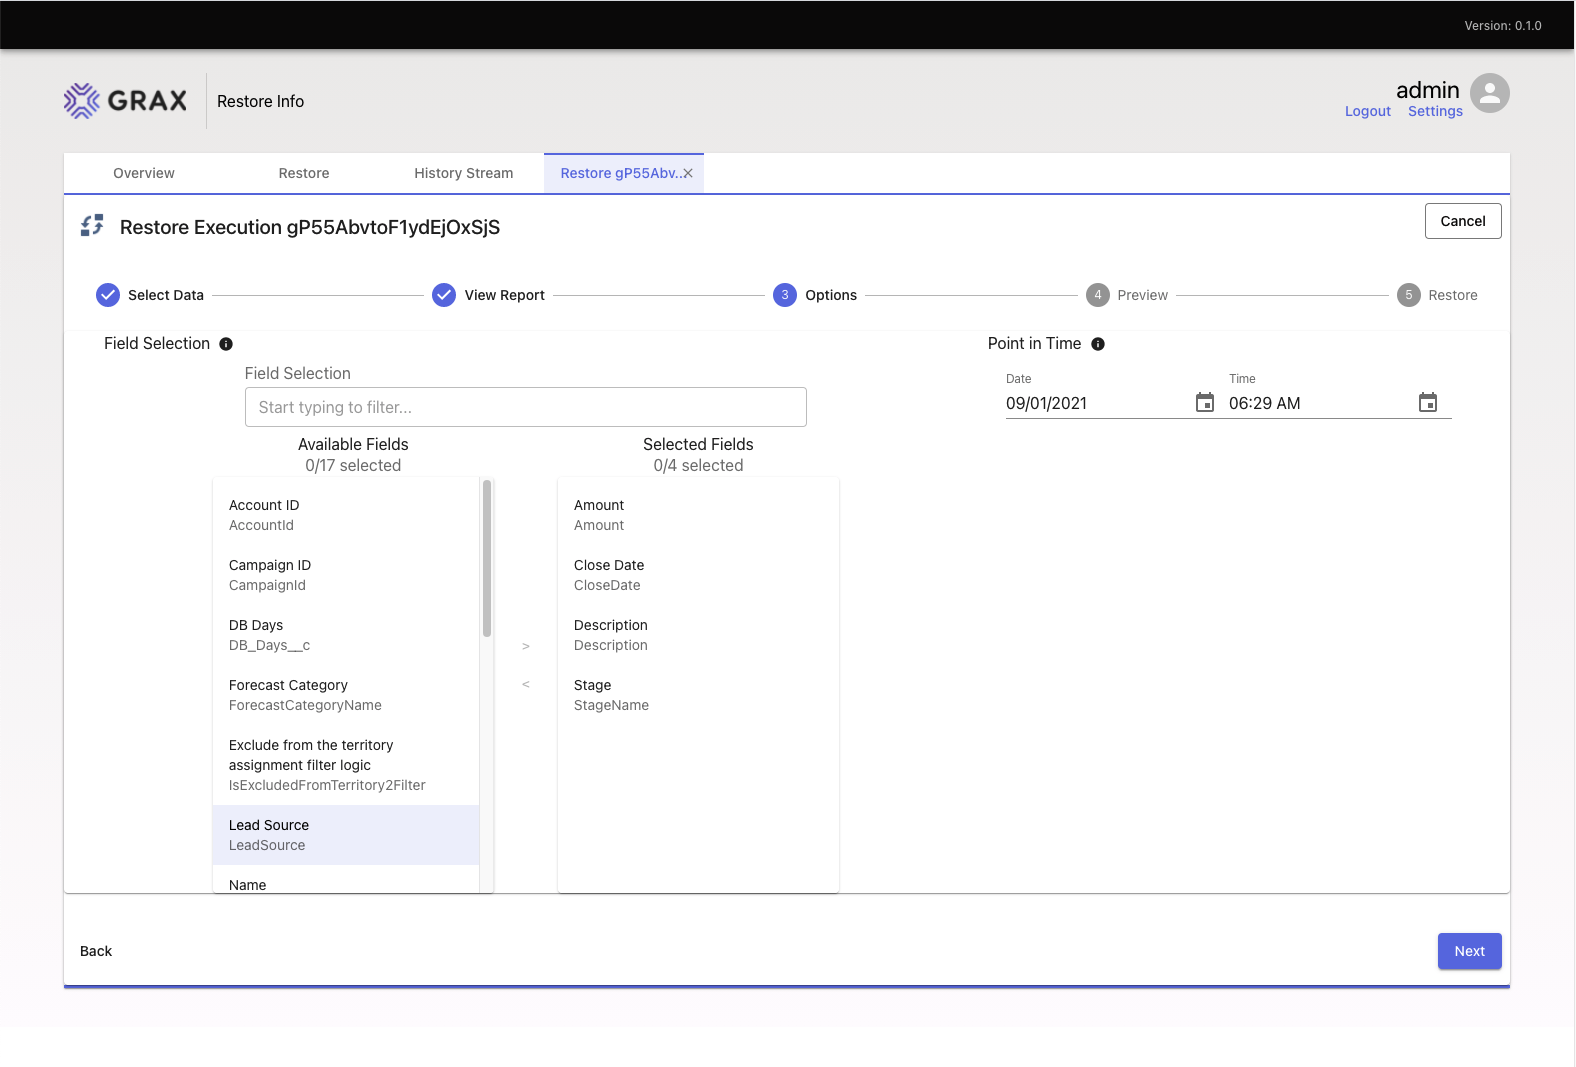
Configure the Point in Time Restore
Select the Point in Time
The Point in Time looks at the date fields on the record and selects the values from the GRAX Data Vault that were the latest version at the date / time specified by the Point in Time. Depending on the object type, this would be the System Modstamp, Last Modified Date or Created Date standard fields.
Records Filtered by Point in Time
it's possible to filter your initial Restore Seed by selecting a Point in Time that is before the created date of the records you wish to restore.
If the Restore confirmation record count doesn't match the expected record count from your Restore Seed, it may be that you have excluded some of these records by the selection of this Point in Time value.
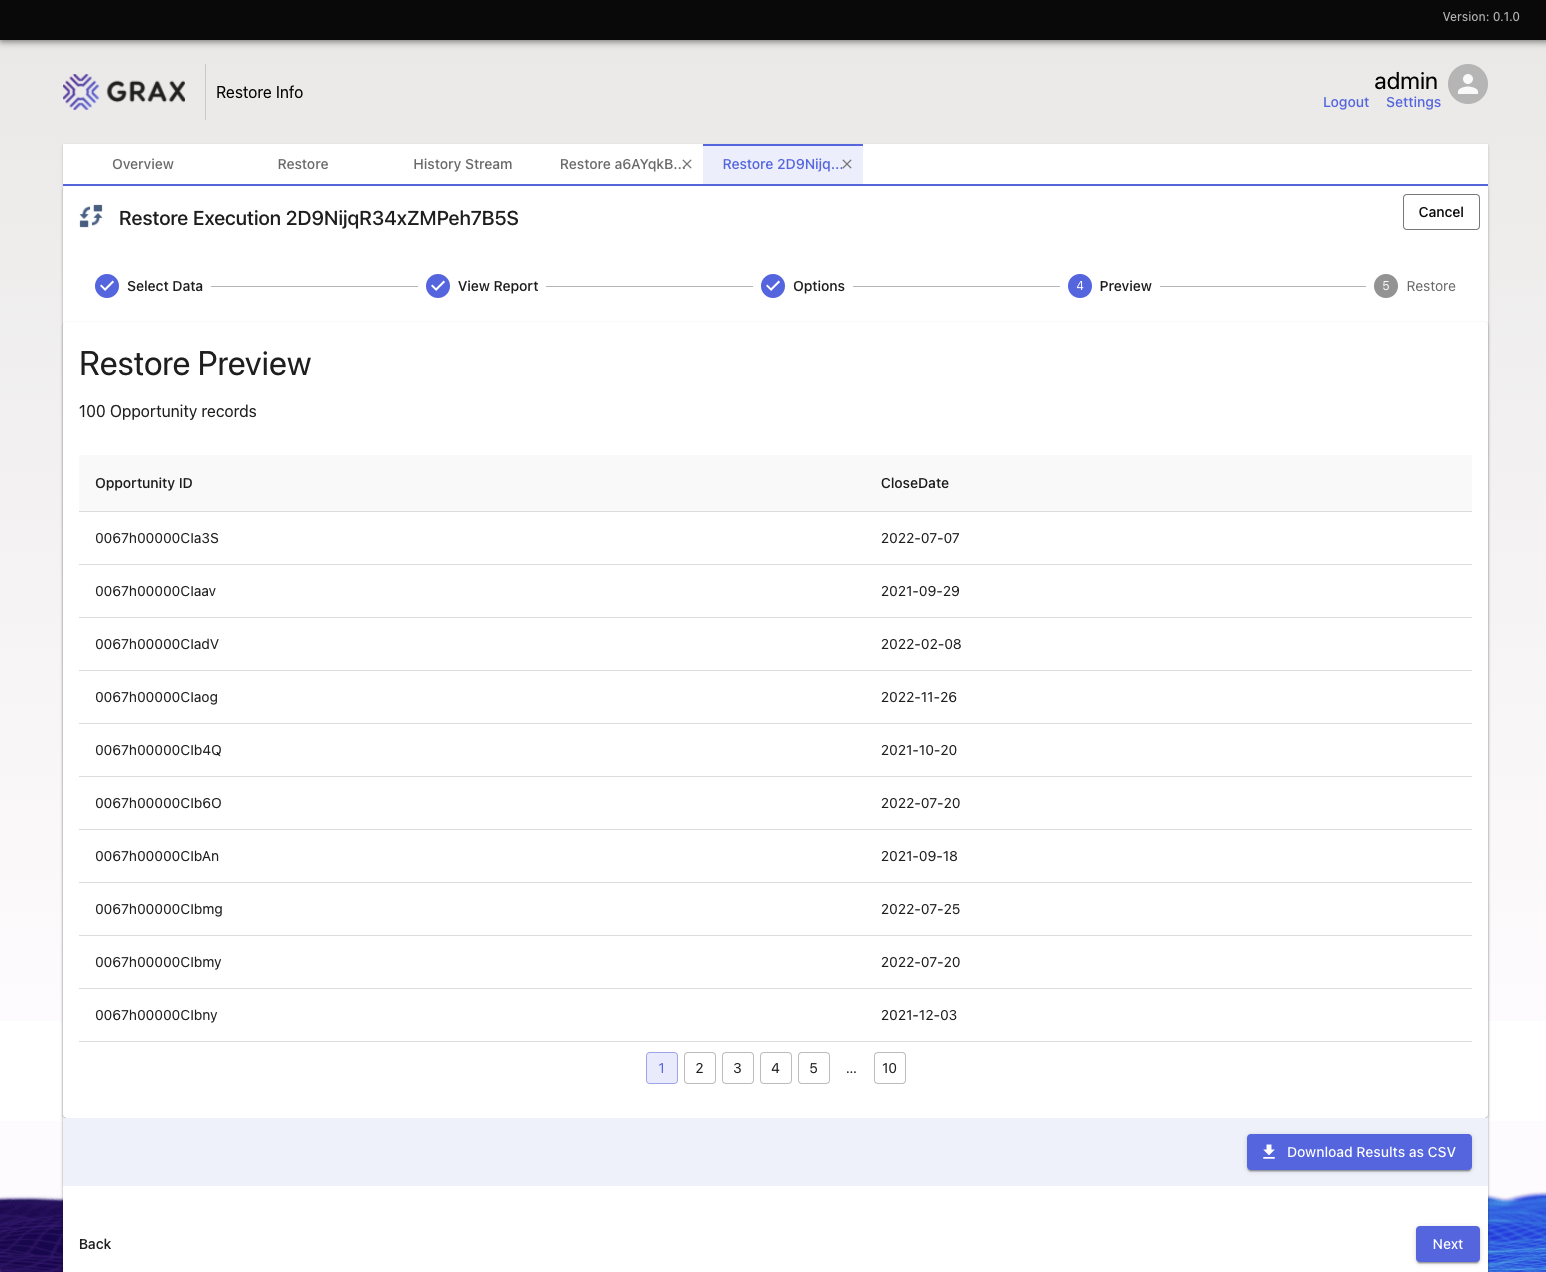
Preview Restore
Once the Restore configuration has been set, GRAX begins to prepare the data set for restore from the GRAX Data Vault. This process can take some time (minutes even) depending on the size of the Restore and while this evaluation is underway you won't be able to proceed from this step.
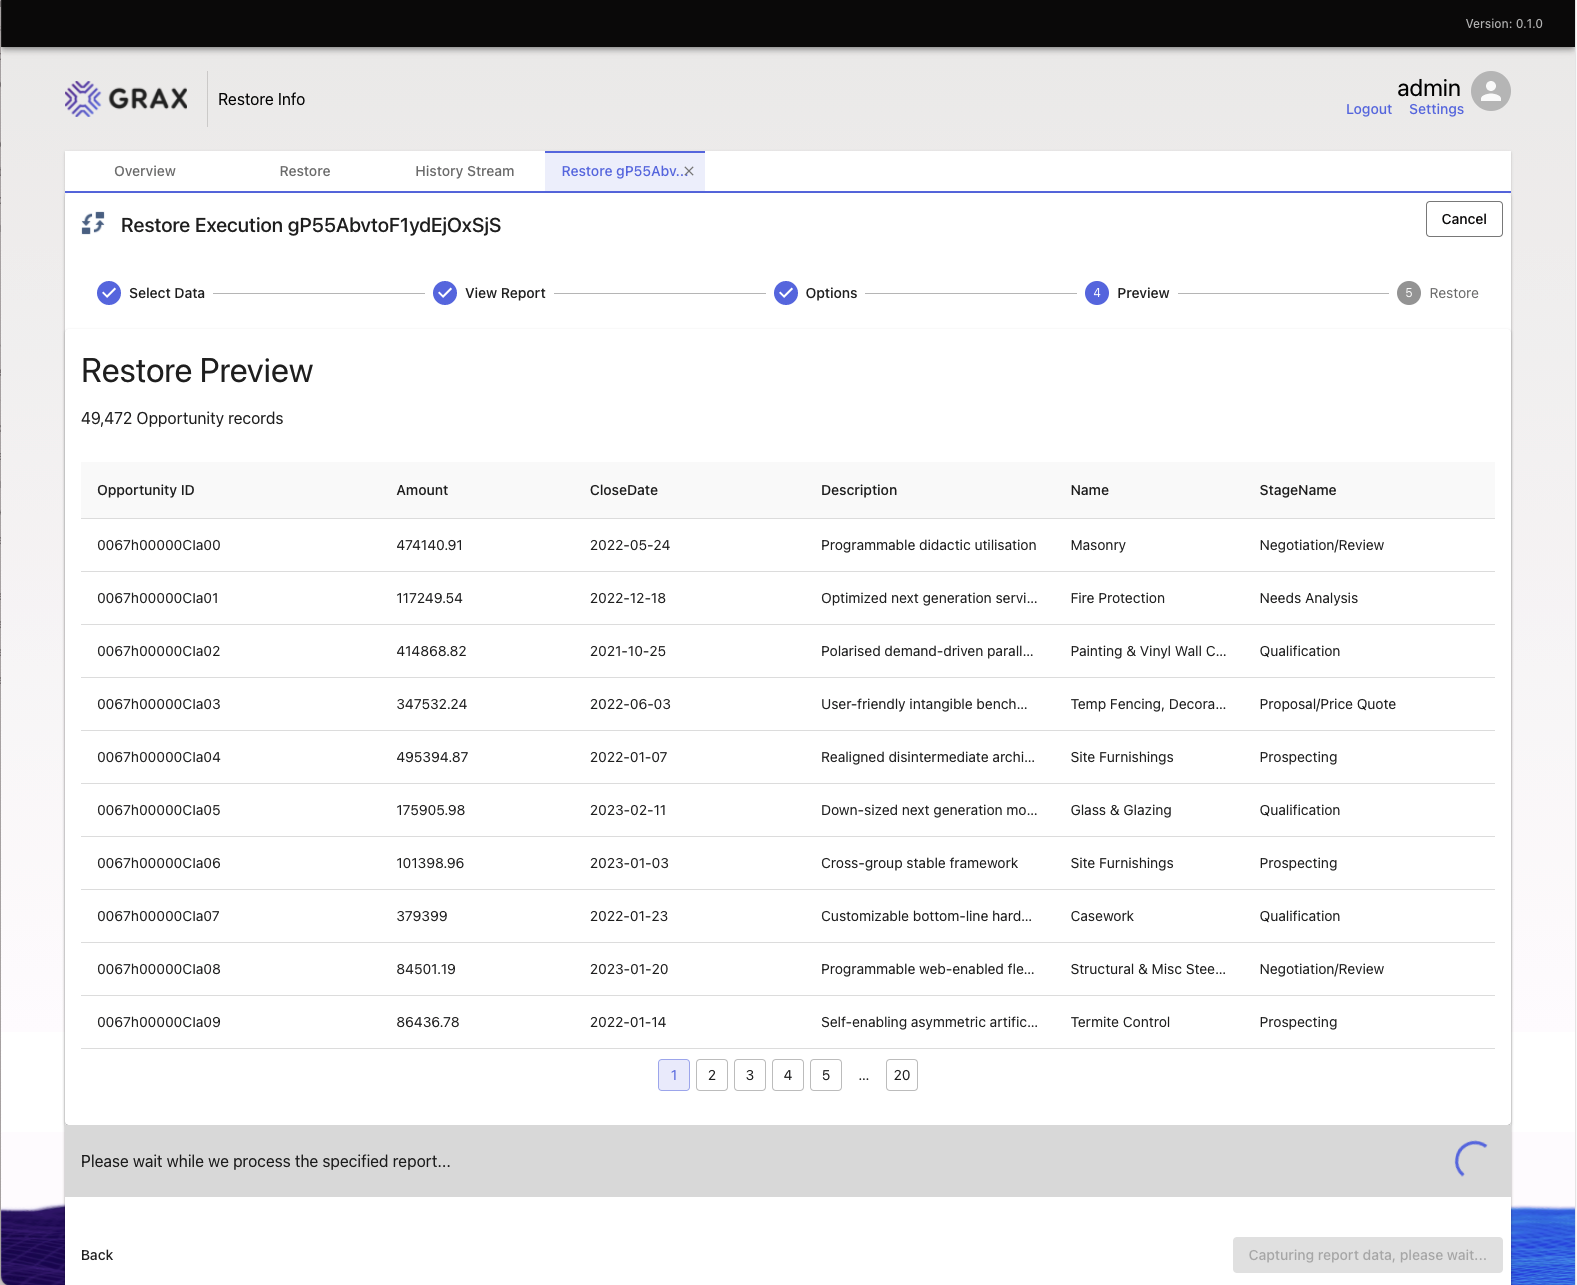
Restore Execution preparing the data
Here you are presented with a preview of the records and values that are going to be restored. This data is different from the Restore Seed - it's the data that is going to be written back to your Salesforce org as part of the Restore Execution, so it's worthwhile ensuring that you are comfortable with your selections.
Once the data finishes the preparation phase, the Next button activates. You could download the complete record set as a CSV file here as well.
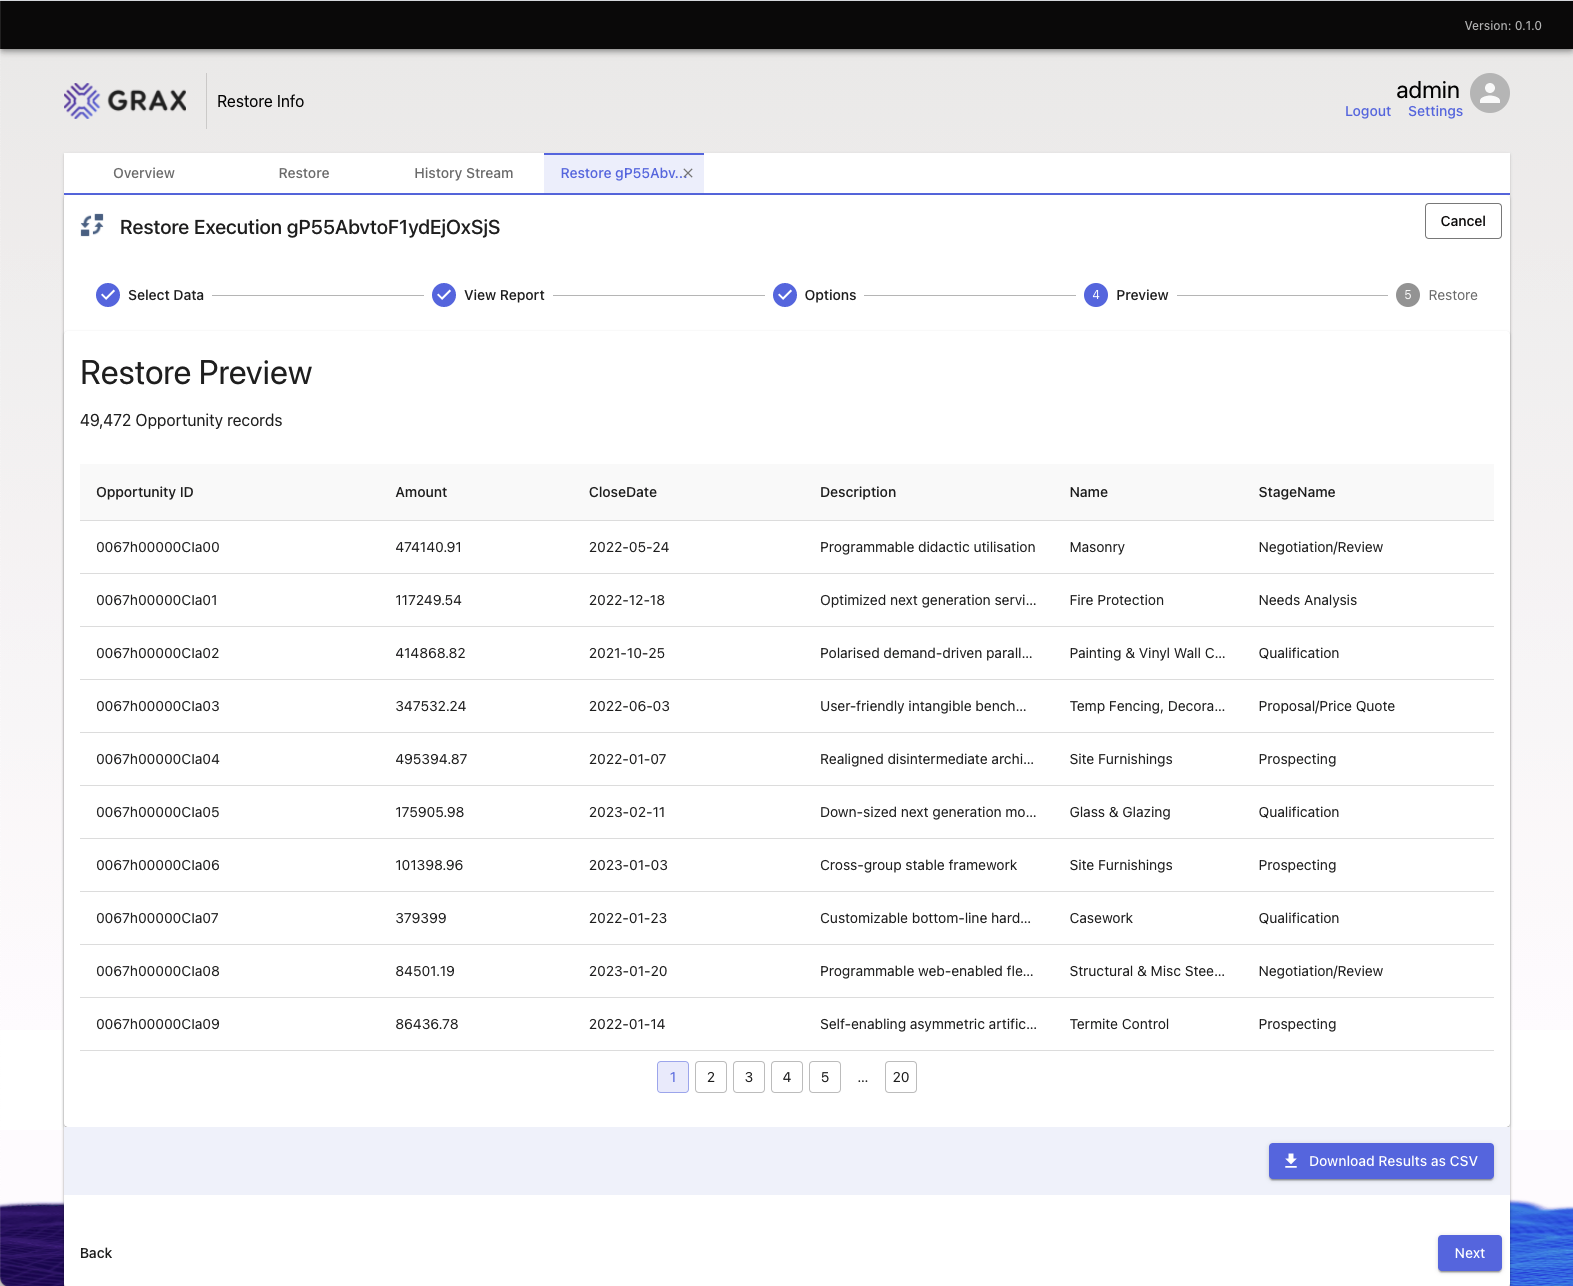
Download the Restore data set
Null or Empty Values
There are a number of scenarios that could mean your GRAX Vault contains records but not values for all fields that you are trying to restore.
- The field might have been empty at the time of the backup
- The field might not have existed at the time of the backup
- The field might not have been accessible to the GRAX Integration User at the time of the backup.
Null values appear in the Restore Preview as #N/A and reset any field values in the record being restored to empty. If this isn't the intended behaviour, deselect this field before continuing.
Launch Restore
The Restore confirmation screen informs the actual number of records that are going to be affected, the fields on those records and the Point in Time to which that data is going to be restored.
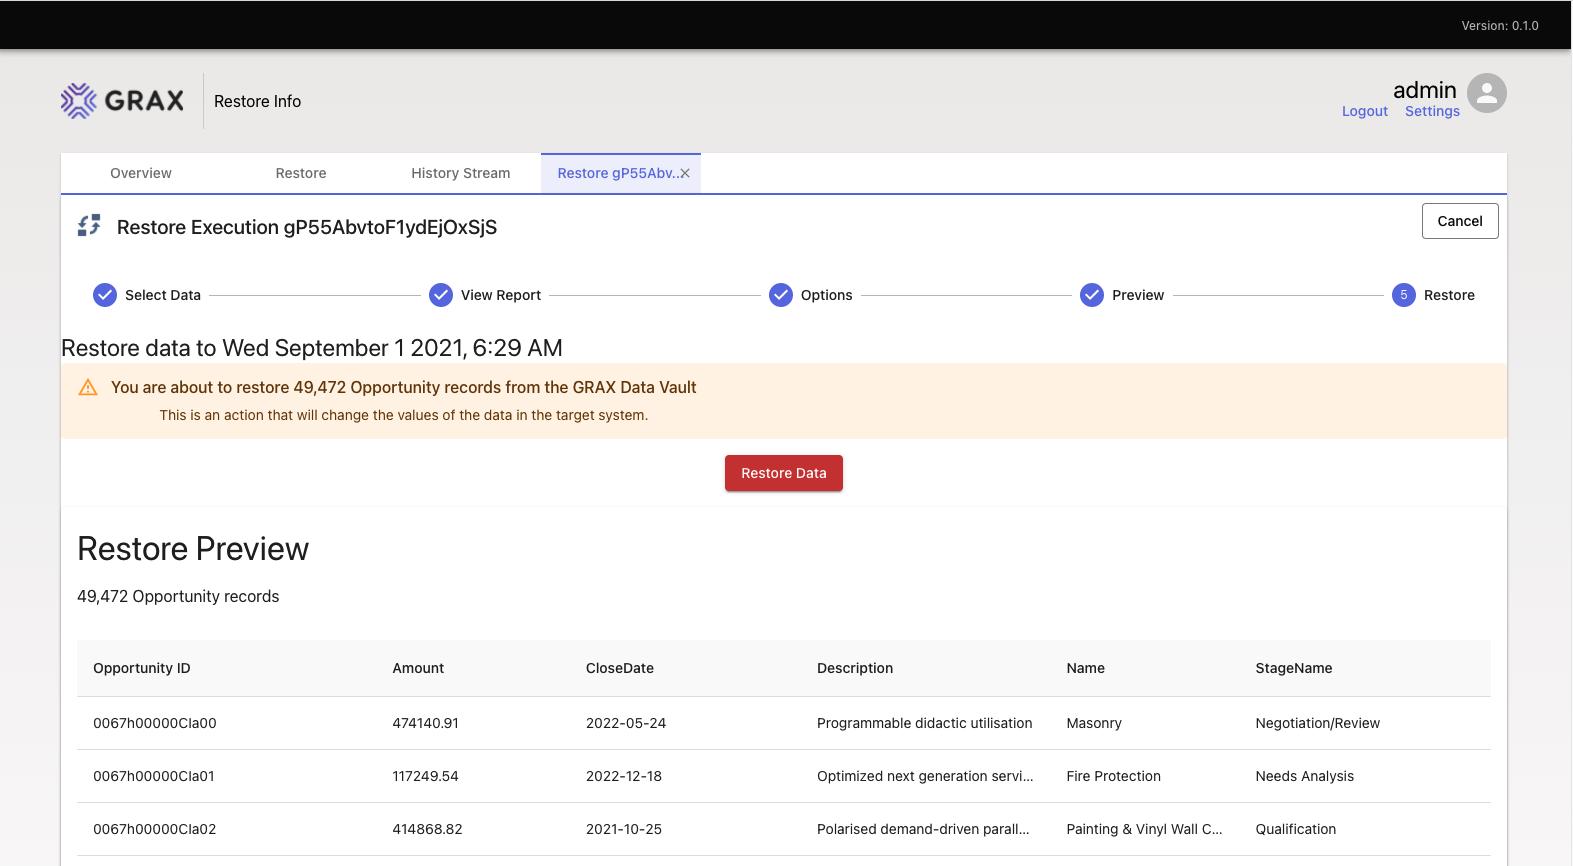
If this all looks good, clicking the Restore Data button starts the process.
Restoring Data is Writing to Salesforce
This writes data to your configured Salesforce environment; be certain you understand the possible ramifications this might have.
The same Restore Best Practices apply to the GRAX Point in Time Restore as well.
Monitoring a Restore Execution
Once the Restore Execution has been submitted it can be monitored in the GRAX Console. This submits records in batches to Salesforce so you can see a number of different outcomes here.
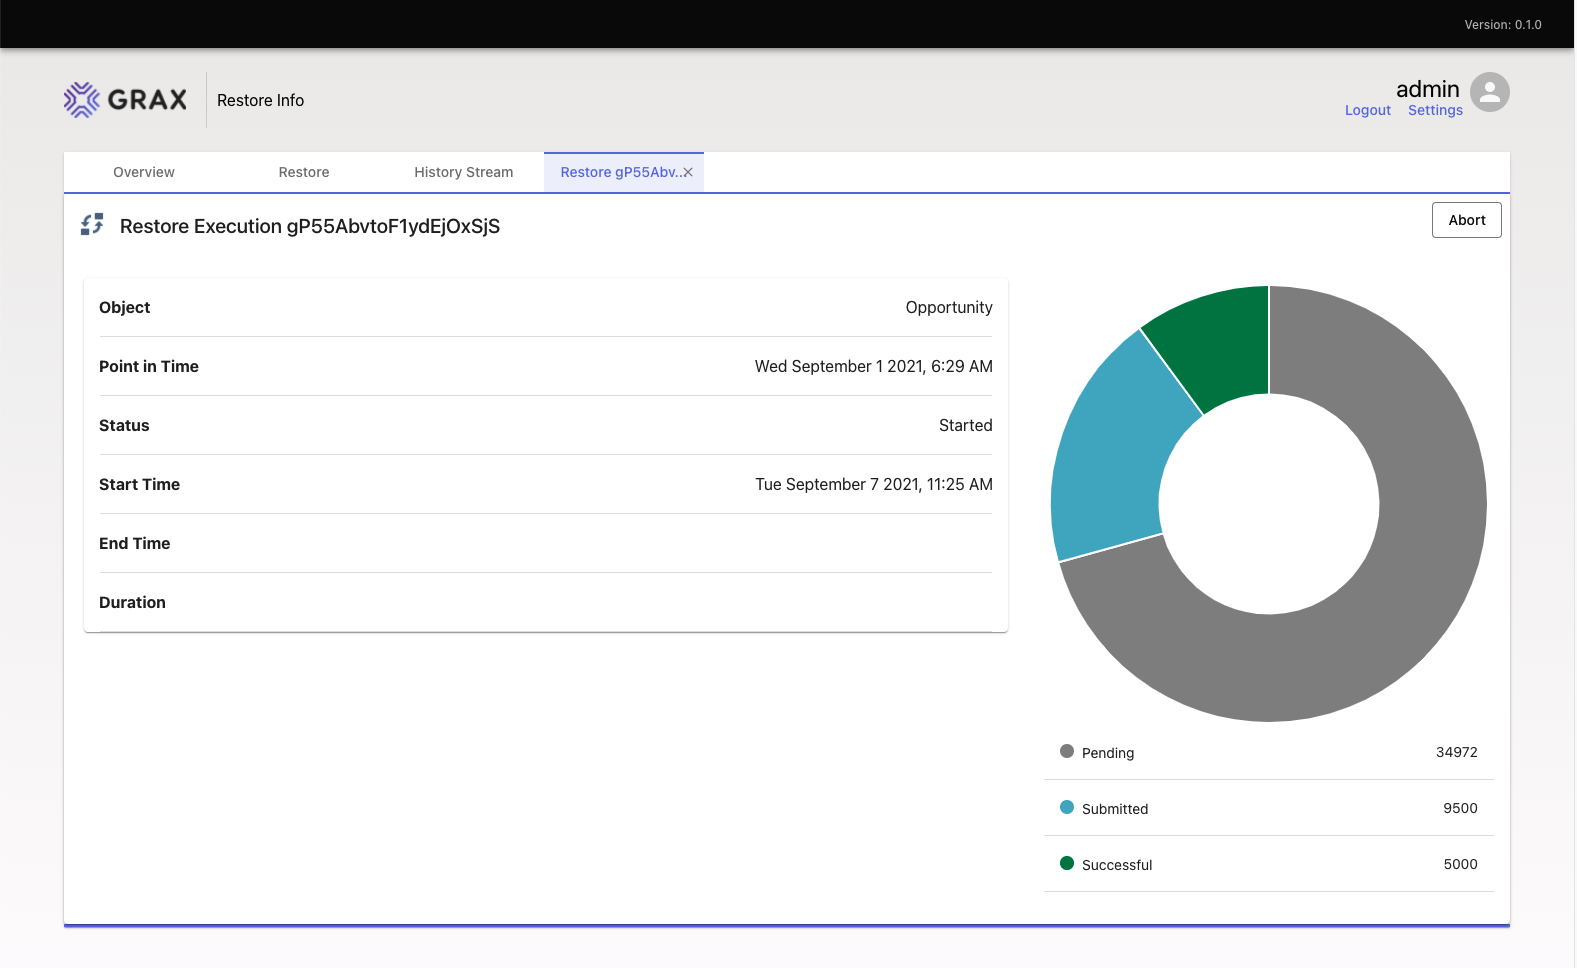
A Restore Execution in Progress
Aborting a Restore
You can abort a Restore Execution but this won't perform a Rollback of data that has been successfully processed as part of this Point in Time Restore. Any data that has been successfully updated would need to be included in a new Point in Time Restore if it needed to be reverted to a previous state.
Restore Records Status
In addition to the status of the job as a whole, individual batches of records have a status while the job is running and once it has completed.
| Status | Description |
|---|---|
| Pending | Data has been prepared but not yet submitted to Salesforce |
| Submitted | Data has been submitted to Salesforce, waiting on the result from this API transaction |
| Successful | Data was successfully restored. |
| Error | Data failed to be restored. |
Restore Errors and the Retry Flow
It is the nature of writing data to Salesforce that you may encounter errors when trying to write data in bulk to the service. Simple things like validation rule failures, changes in the data schema or even that users are operating on the same records can all cause API errors to occur.
GRAX Point in Time Restore allows a user to retry an execution using just the failed records. This creates a new Point in Time Restore execution with this subset of data as the restore seed.
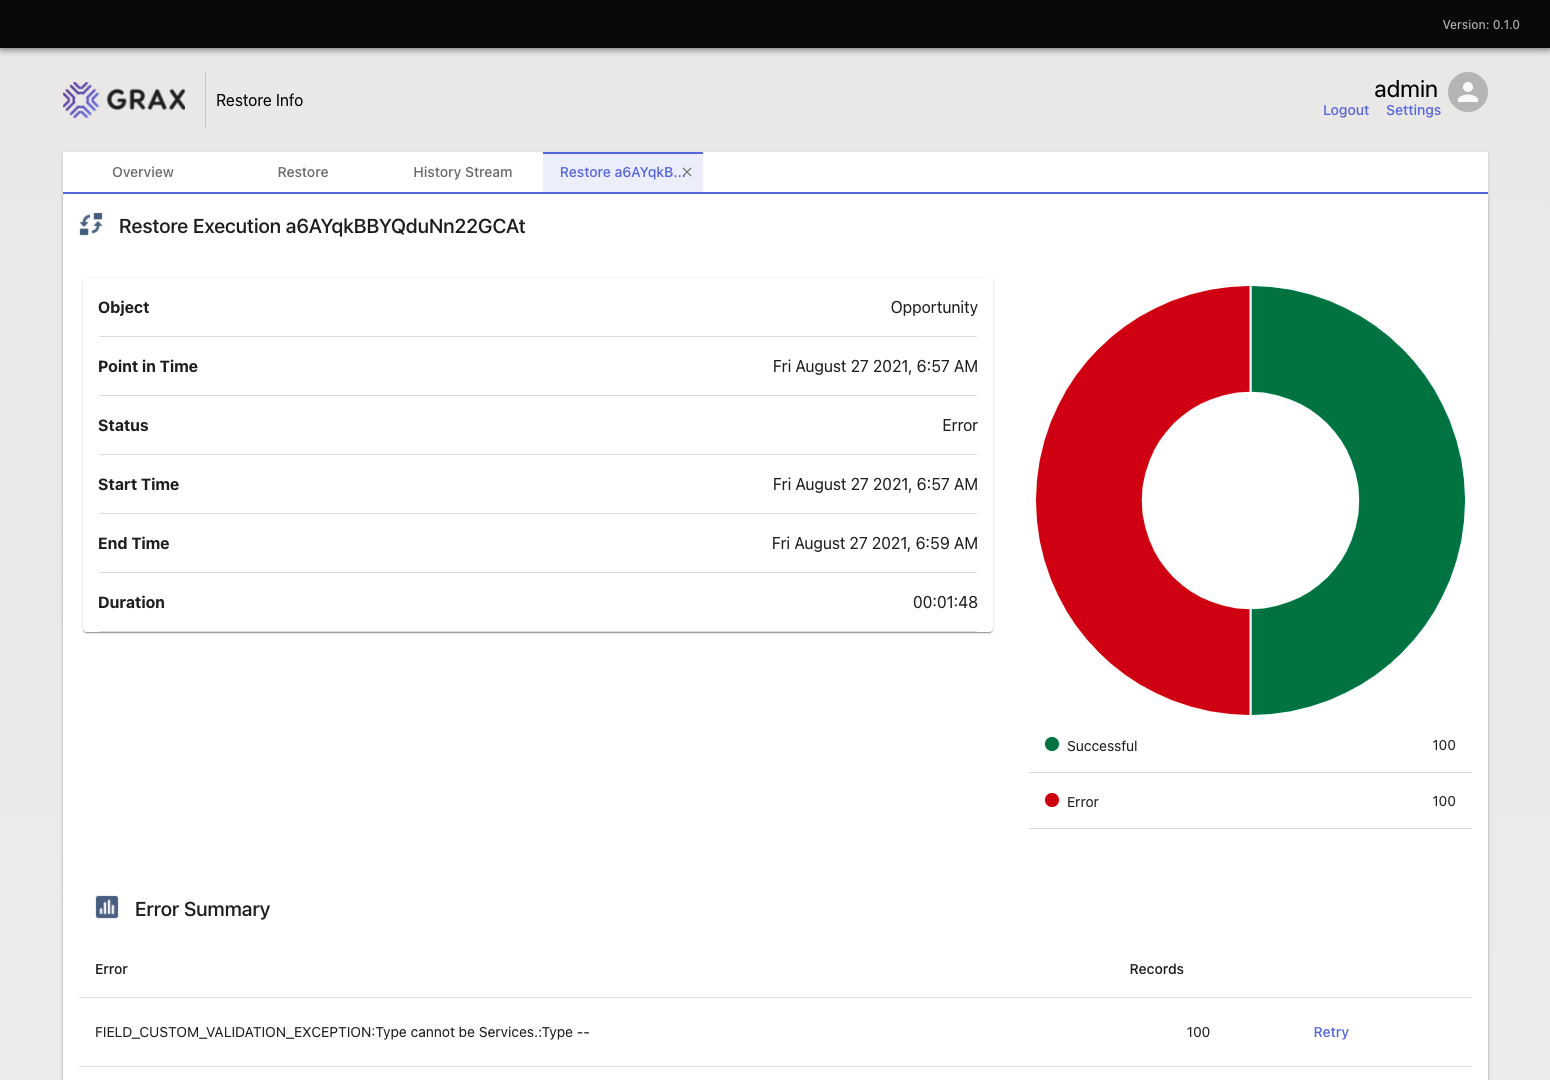
Point in Time Restore with partial errors
Here is a Restore that has failed due to a validation rule firing. The simple fix would be to deactivate the validation rule or to re-run the job without selecting the Type field as part of the Restore Configuration.
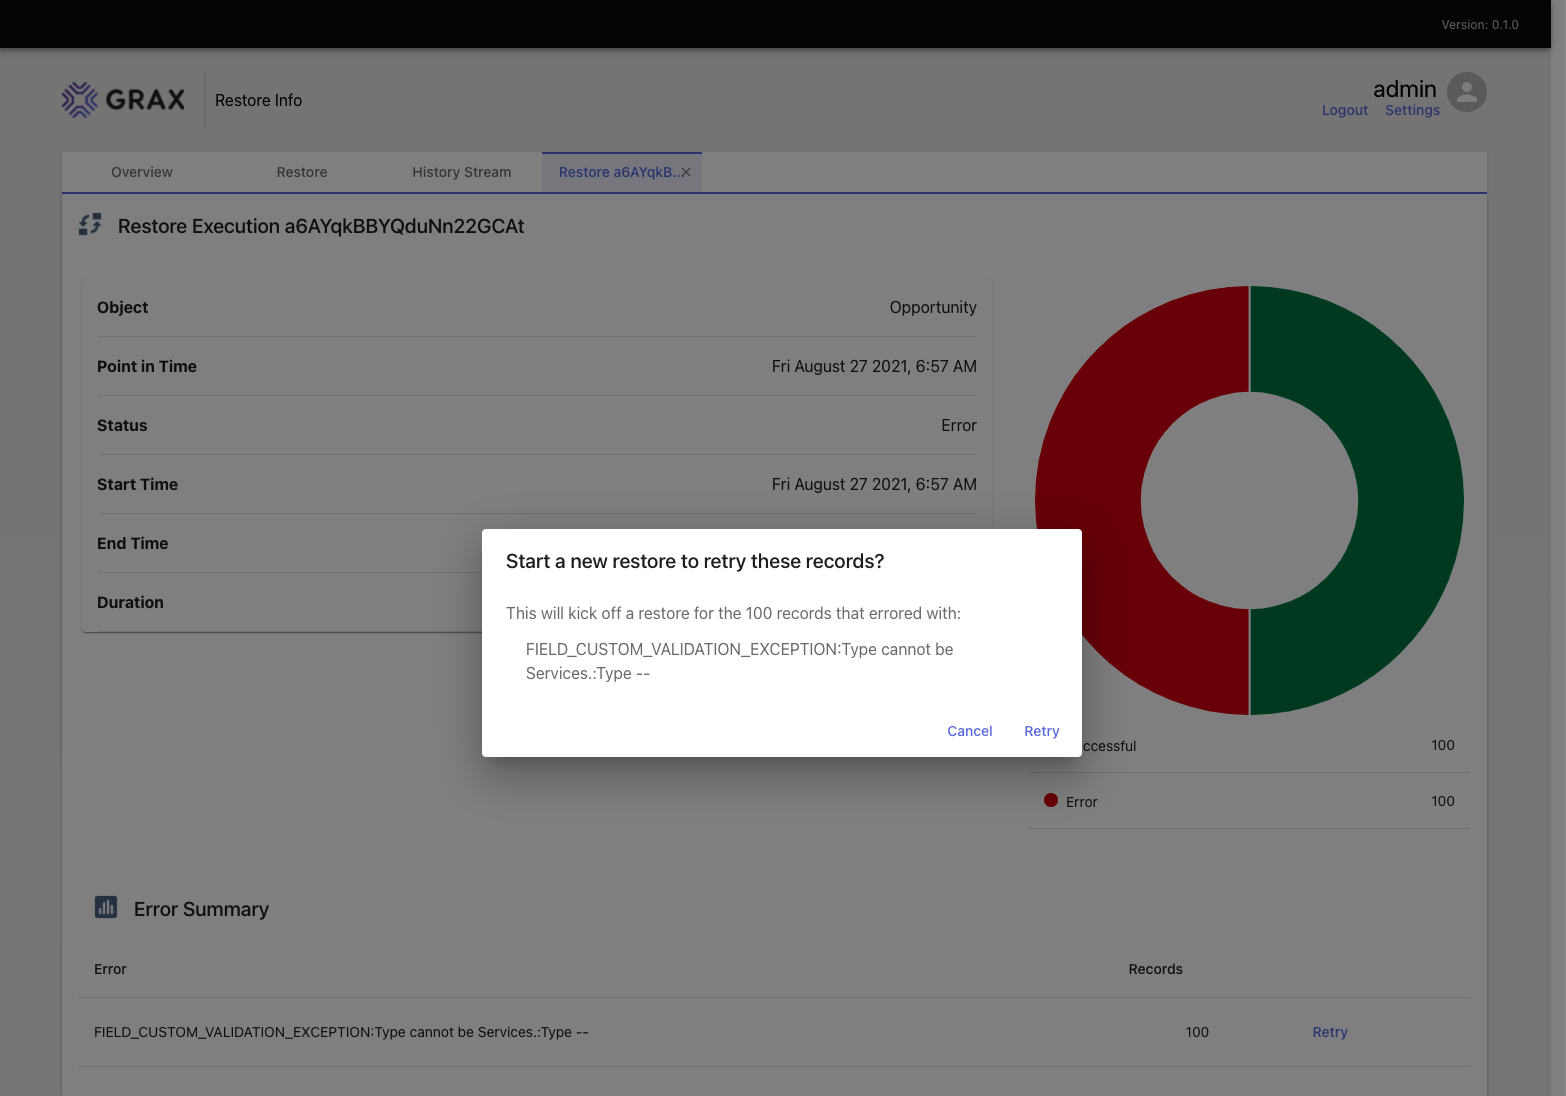
Retrying a Point in Time Restore only uses the records that were in error
The solution for this retry was simply to remove the Type field from the Restore Execution for this next 100 records, then execute the new Point in Time Restore.
Updated 11 days ago